Recently, I started my first experiments with Kubernetes, Google’s open-source orchestration platform for Linux Containers. As containers have become more important to businesses, it has become necessary to create a system that would allow containers to scale out to meet the needs of enterprise-level deployments. That’s where Kubernetes comes into play. Unlike Docker, Kubernetes is a very robust ecosystem for clusters of containers. Instead of deploying a single container, Kubernetes enables to deploy multiple containers to multiple hosts, making it ideal for larger deployments and load balancing. But this very use case makes it very hard to get started with Kubernetes as a hobbyist or a first-time learner. Setting up and configuring Kubernetes on your localhost is bit complex. But I managed to stumble around and get things working.
In this post, I will be covering a brief introduction to Kubernetes, its features and setup. I will also be sharing few issues which I hit while installing Minikube (a tool to try Kubernetes locally) and Kubernetes on Windows and Linux platforms.
Firstly, I want to build and work with Kubernetes on my local machine. As a next step, I want to try it out on an actual cluster of machines (VMs) and see it all work. I will be covering the following:
- What is Kubernetes?
- Kubernetes on Windows Laptop/Desktop with Minikube
- Experimenting Kubernetes on Ubuntu using Minikube
- Running Kubernetes on Google Cloud platform
- Troubleshooting local Minikube installation issues on Windows
What is Kubernetes?
Kubernetes is an open-source system used for automating the deployment, scaling, and management of containerized applications. Kubernetes is enterprise-ready and can be installed on various platforms. It provides the software necessary to successfully build and deploy reliable, scalable distributed system. There are a number of articles explaining what Kubernetes is and its features like Pods, Replication Controllers, Services, Deployments and more. However, the installation of Kubernetes on your localhost can sometimes be a challenge. In the below sections, I will be sharing some of the challenges which I faced during installing a Kubernetes cluster.
Side note:I learnt something interesting about the name ‘Kubernetes’. The name Kubernetes originates from Greek, meaning helmsman or pilot, and is the root of governor and cybernetic. K8s is an abbreviation derived by replacing the 8 letters “ubernete” with “8”.
Kubernetes on Windows Laptop/Desktop with Minikube
My experiment to make Minikube work on Windows was not a smooth task. I faced several issues and thought of listing it here hoping that it will save some time for newbies. Minikube is a Kubernetes distribution that runs in a virtual machine on your local workstation. It provides an easy way to get a local Kuberneters Cluster up and running in a VM on the local desktop or laptop. Minikube has all Kubernetes components in a single VM that runs in the local laptop. Both master and worker functionality is combined in the single VM. There are several cloud-based Kubernetes services that make it easy to create a Kubernetes cluster with a few command-line instructions. Since I am in the experimenting stage, I want to run Kubernetes locally on my laptop and for this, I need setting up Minikube on Windows machine. Minikube is intended for local development, learning and experimentation because it only runs in a VM on a single node and it doesn’t provide the reliability of distributed Kubernetes cluster.
To get started, I followed the instructions given in Minikube Installation Guide. To install minikube on Windows, below are the pre-requisites
- VT-x/AMD-v virtualization must be enabled in BIOS
- Installing Docker Toolbox. This toolbox sets up VirtualBox
My machine is Windows10 Home Edition with virtualization enabled and by default Hyper-V feature is not available on this machine. If you have Windows 10 Home you must use Docker Toolbox. If you have Windows 10 Pro or Enterprise you can and is recommended running Docker for Windows. Docker for Windows will use by default a VM with an external switch called DockerNAT. This switch has no access to the internet, so no way we can get an IP. So when you start Minikube using Docker for Windows on Windows 10 Home it hangs in the message “Waiting for an IP…”. After all the pre-requisites are fulfilled I followed the below steps:
- Downloaded the latest versions of minikube-windows-amd64.exe(Download Minikube) and kubectl.exe(Download kubectl)
- Created a folder called C:\minikube
- Renamed the file name from ‘minikube-windows-amd64.exe’ to ‘minikube.exe’
- Placed these binaries in the C:\minikube folder.
- Added these binaries to environmental variable PATH.
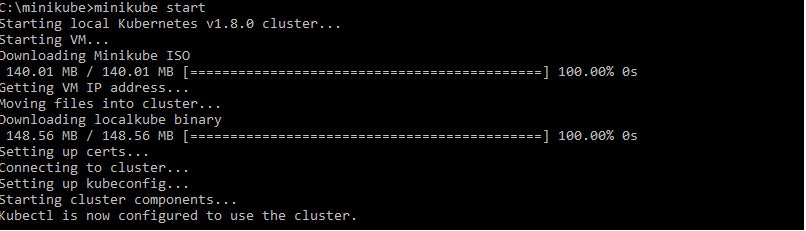
And that’s it! I am all set to start Kubernetes cluster locally now. minikube start is the command to start the minikube.(You can execute the following command from either Powershell or CommandPrompt)
C:\minikube>minikube.exe start --vm-driver=virtualbox |
If you don’t mention the driver when you start the minikube, VirtualBox driver is the default on Windows. The minikube start command creates a “kubectl context” called “minikube”. This context contains the configuration to communicate with the minikube cluster. Let us try to understand what is expected to happen behind the scenes when you issue this command.
- This command will download the Minikube ISO (on the first run only)
- It generates the certificates and a virtual machine (boot2docker) is created using the default VirtualBox VM-driver.
- Creates a Kubernetes context named ‘minikube‘. This context contains the configuration to communicate with your minikube cluster.
- It assigns an IP and does the ssh into the machine
- Finally, it should print out a message that kubectl is configured to talk to local Kubernetes cluster
I expected the above things to happen but in my case, the Minikube VM is created but it is having a problem SSH-ing into the VirtualBox. ‘minikube start’ hangs on “Waiting for SSH to be available…”. This process takes several minutes and it keeps being in the loop of attempting the ssh quite a number of times and finally the system hangs in “Waiting for SSH to be available…” state for some time.
$ minikube start --vm-driver=virtualbox Starting local Kubernetes cluster... Starting VM... Waiting for SSH to be available... E0409 09:36:09.737093 19497 start.go:116] Error starting host: Temporary Error: Error configuring auth on host: Too many retries waiting for SSH to be available. Last error: Maximum number of retries (60) exceeded. Retrying. |
Since it was taking too long to get this SSH, and I pushed Ctrl+C in order to stop. I Googled and found lots of different solutions but none of them helped me. Running minikube delete & minikube start seems to have fixed things for some. I tried minikube stop and minikube delete but nothing worked. I did not get much time to dig deep into this issue. I later decided to use the Linux box (Ubuntu) and install minikube on that system.
PS: I did manage to get things working on my Windows machine finally. To find out how, skip to the Troubleshooting local minikube installation on Windows section.
Experimenting Kubernetes on Ubuntu using Minikube
After making several attempts to use Minikube on Windows, I decided to move on and give it a try on Ubuntu Box. Here are details of my environment.
- From Windows, I have installed Ubuntu virtual machine in Oracle VirtualBox. I followed the steps mentioned here. This allows us to run other operating systems as virtual computers on top of our current operating system, which, in my case, is Windows 10. The virtual Linux operating system will perform the same way as it would when installed to the physical hard drive.
- On that virtual Linux operating system, I have configured Docker.
- Installed Minikube using command
curl -Lo minikube https://storage.googleapis.com/minikube/releases/v0.23.0/minikube-linux-amd64 && chmod +x minikube && sudo mv minikube /usr/local/bin/
When I try to launch minikube it throws a different error message here “This computer doesn’t have VT-X/AMD-v enabled. Enabling it in the BIOS is mandatory“. After so much of reading and research, I could understand that this is related to Nested Virtualization issue. Let me explain what is happening here. Firstly, I have created a VM in Oracle VirtualBox with Ubuntu (I made sure that virtualization is enabled), and on that virtual machine I launched minikube. So, when we launch minikube it starts a vm again, and this leads to nested virtualization(Virtualization inside virtualization) which usually doesn’t work.
After Googling about this I could understand that this process described above will not work for virtualized environments. That’s because minikube does not support nested virtualization. Since I did not get much time to explore further on these tools I later checked out for other ways to install Kubernetes cluster. It is then I decided to use Google Cloud Platform. Kubernetes can run on various platforms: from your laptop, to VMs on a cloud provider, to a rack of bare metal servers. The effort required to set up a cluster varies from running a single command to crafting your own customized cluster. Later I started exploring on running Kubernetes using Google Cloud Platform.
Installing Kubernetes Using Google Cloud Platform
Google Cloud Platform has excellent support for Kubernetes through the Google Container Engine. Just by following below steps I could spin up first Kubernetes Cluster on GKE.
Pre-requisites for Setting up And Configuring Google Cloud Platform
- You should have a Google Cloud account
- Create a Google Cloud Project
- i) Go to Google Cloud Platform console
- ii) Create a project. My project is “kubernetes-project”. Every project has an id that you’re mostly working with. My PROJECT ID is “kubernetes-project-184510”. This is a unique name across all Google Cloud projects
There are two ways to communicate to Google Cloud Platform. You can initialize and configure from a console window on your local window using Google Cloud SDK or you can use Google Cloud Shell a browser-based command line environment. You may refer to my other post on Installing Kubernetes on Google Cloud Platform for detailed steps. Followed below steps to create GKE cluster.
- Enabled the necessary api’s the Container Engine API and Compute Engine API.
- From Google Cloud Platform dashboard, selected the project created(kubernetes-project) and activated Google Cloud Shell by clicking on the console button in the top nav. Once connected, you are already authenticated and and the PROJECT_ID environment variable is already set by default.
- Created a one-zone Kubernetes cluster using below command. In this example, I am creating a Kubernetes cluster in ‘europe-west1-d’ zone with three instances(nodes) per zone using machine type ‘n1-standard-2’
# By default this spins up a 3-node cluster. You can change the default with `--num-nodes VAL`
$ gcloud container clusters create kubernetes-lab1 --zone europe-west1-d --scopes storage-rw --machine-type n1-standard-2
Once the cluster is up and running(This took few minutes to start up), it is fully setup with the Kubernetes platform we can start interacting with it by using the kubectl command as shown below.
$ kubectl cluster-info |

The new cluster will also appear in the Container Engine > Kubernetes cluster section within Google Cloud Platform:

Troubleshooting local minikube installation on Windows
I could successfully setup Kubernetes on Google Cloud Platform and do some experiments with Kubernetes. I was really happy after finally getting something to work. But at the back of my mind, I was always thinking about why I couldn’t install minikube on a Windows machine. Fortunately, I got some time to look back at my Windows set up issue. I decided to completely clear up all the installations like Docker toolbox, Virtual Machine, minikube and kubectl etc. and retry from scratch. I tried below:
- In VirtualBox Manager, shutdown and deleted the VM named “minikube”
- Go to %HOMEPATH%, and deleted the .minikube folder
- Uninstalled Oracle Virtual Box
- Uninstalled Docker Toolbox
- Uninstalled Docker for Windows(Since my machine is Windows 10 Home edition I must use Docker Toolbox Only)
- Downloaded and installed latest release of Docker Tool Box
- Installed Virtual Box using Docker Tool Box
- Installed latest version of minikube, renamed and placed it in the folder c:\minikube
- Installed latest version of kubectl.exe and placed it in the folder c:\minikube
- Added minikube.exe and kubectl.exe binaries to the PATH.
To my surprise it worked! After installing the latest versions of Docker Tool Box and Virtual Box all my issues resolved now. I was really happy after finally getting everything to work.
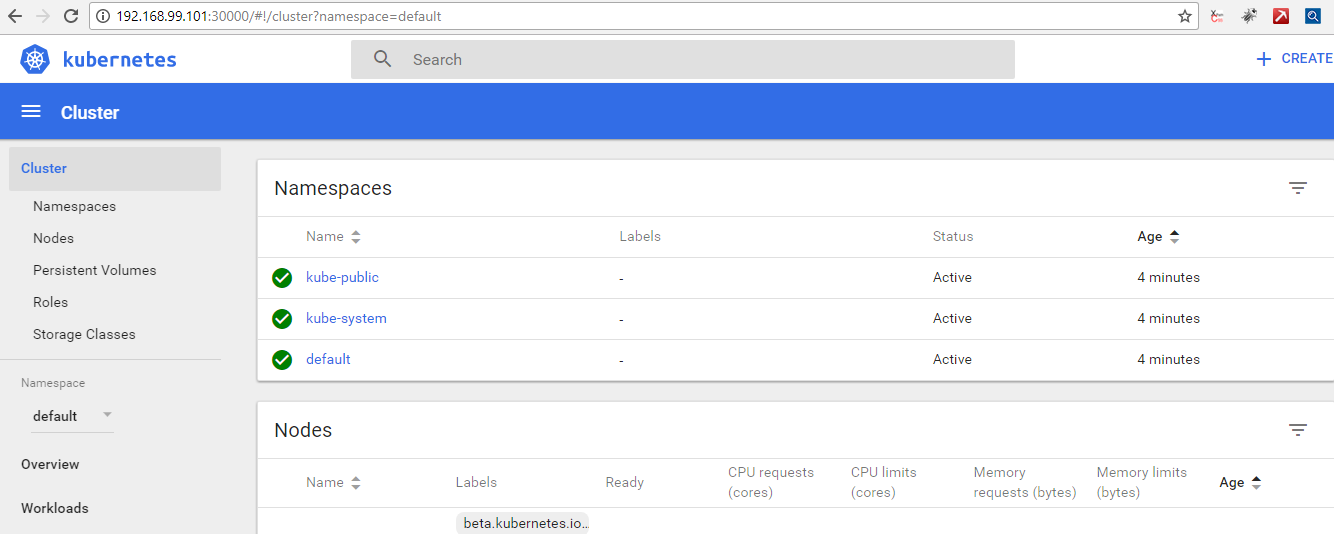
Ran minikube dashboard to ensure the dashboard is running.
Here I want to list out few troubleshooting guidelines to fix minikube start failure issues.
- I encountered below error when installed Docker Tool Box on Windows and started VM
Error creating machine: Error in driver during machine creation: Unable to start the VM: C:\Program Files\Oracle\VirtualBox\VBoxManage.exe startvm minikube --type headless failed:
VBoxManage.exe: error: The virtual machine 'minikube' has terminated unexpectedly during startup with exit code 1 (0x1). VBoxManage.exe: error: Details: code E_FAIL (0x80004005), component MachineWrap, interface IMachine
Looks like something went wrong in step ´Checking if machine default exists´... Press any key to continue...
Unstalling and a reboot after a fresh install of Docker Toolbox did the job for me! - If you want to restart minikube from scratch, not only deleting the corresponding VM, but also removing the contents of the .minikube folder is needed because minikube keeps a track of the machines it creates in the .minikube folder.
- It is highly recommended that you shut down the minikube cluster once you finish your work.
Setting Kubernetes locally using minikube can be really painful but it is definitely worth it! It allows us to manage and scale locally our containers.
Learn more about Qxf2 Services.
References
-
1) Gettings started with Kubernetes, Minikube, and Docker
2) Installing Minikube
3) Tutorial : Getting Started with Kubernetes on your Windows Laptop with Minikube
4) Getting started with Minikube

I am an experienced engineer who has worked with top IT firms in India, gaining valuable expertise in software development and testing. My journey in QA began at Dell, where I focused on the manufacturing domain. This experience provided me with a strong foundation in quality assurance practices and processes.
I joined Qxf2 in 2016, where I continued to refine my skills, enhancing my proficiency in Python. I also expanded my skill set to include JavaScript, gaining hands-on experience and even build frameworks from scratch using TestCafe. Throughout my journey at Qxf2, I have had the opportunity to work on diverse technologies and platforms which includes working on powerful data validation framework like Great Expectations, AI tools like Whisper AI, and developed expertise in various web scraping techniques. I recently started exploring Rust. I enjoy working with variety of tools and sharing my experiences through blogging.
My interests are vegetable gardening using organic methods, listening to music and reading books.


Well Explained…. Thank you so much…