Recently, one of our clients started using Bitbucket Pipelines for Continuous Integration. Thank you Lea Anthony of Secure Code Warrior for introducing and helping us get started with Bitbucket pipelines!
At Qxf2 Services, we like exploring different tools and sharing our knowledge to help other testers. In this post, we will show you how easy it is to enable continuous integration with Bitbucket Pipelines for your Bitbucket account and automatically set up tests. Happy learning!
Steps to setup CI using Bitbucket Pipelines:
In the example below, we will be running some Selenium tests using Python. The test itself is a simple automated check of the Qxf2 Selenium tutorial page. The below steps will guide you set up a Continuous Integration for your Bitbucket Repository using Bitbucket Pipelines:
- Navigate to Bitbucket Pipelines Option
- Select a template
- Configure Bitbucket Pipelines.yml file
Step 1: Navigate to Bitbucket Pipelines Option
Login to your Bitbucket account and select the repository for which want Continuous Integration. Click on Pipelines option available at left hand side menu window as shown in Fig. 1.
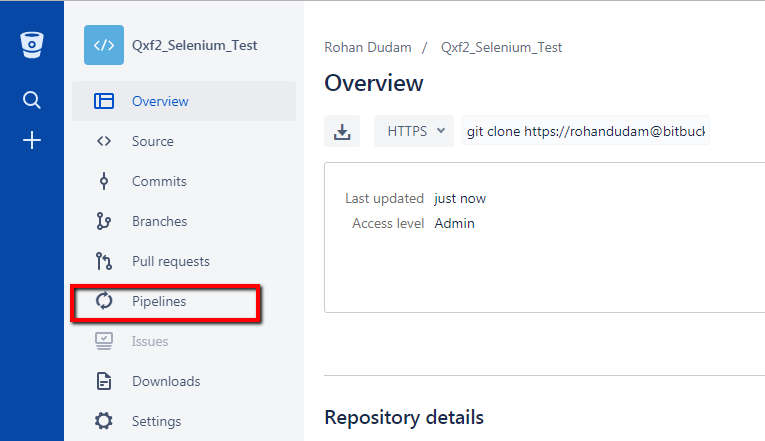
In case, you are not able to see the Pipelines option on your repository page check your access level. To enable pipelines, users must need admin access. Usually, when you try to enable/configure Bitbucket Pipelines without admin access, you will come across the following window as shown in Fig 2.

Step 2: Pick a template
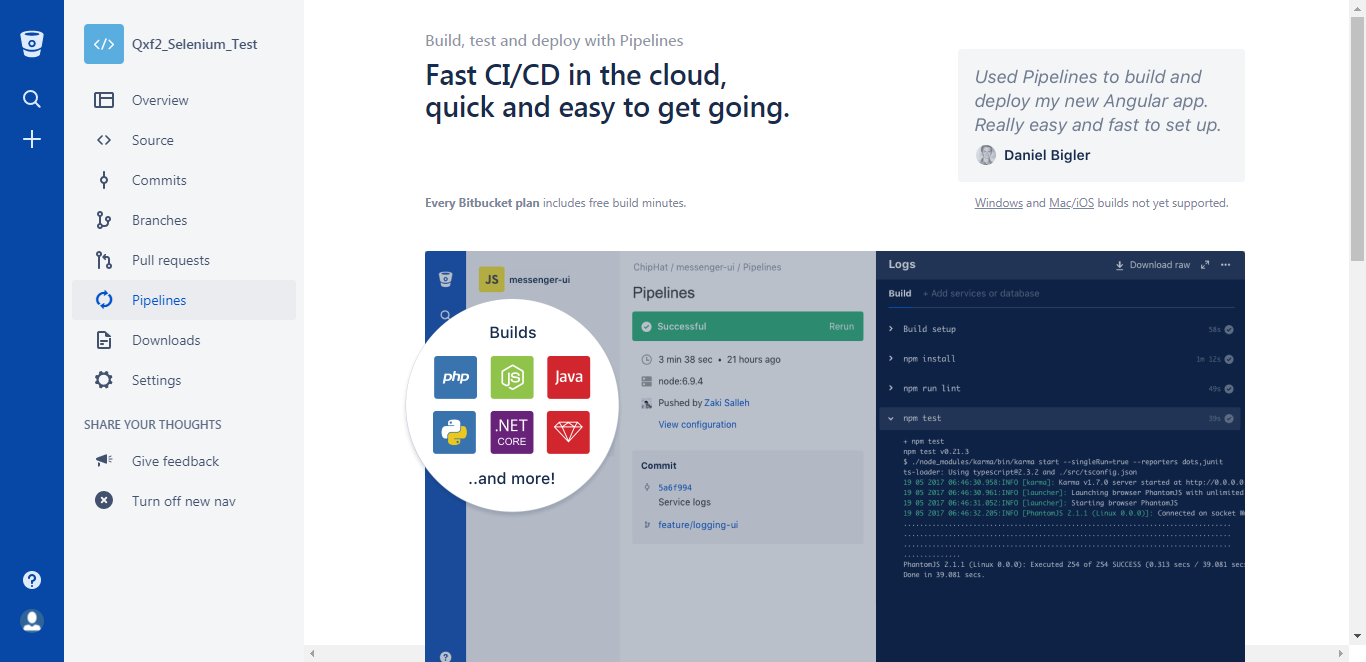
After clicking on Pipelines window, it will load Pipelines add-on and you see the following window as shown in Fig 3.
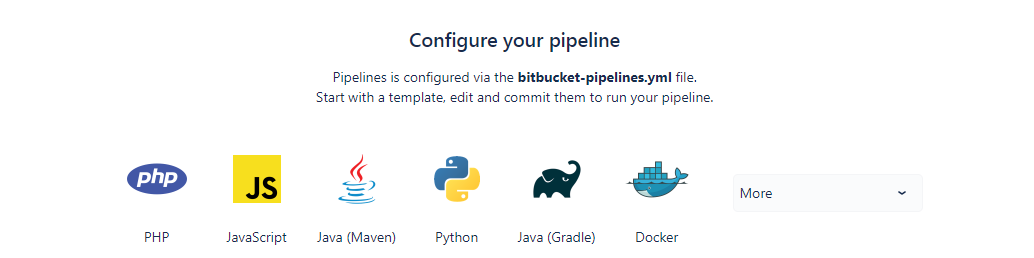
Now just scroll down and select a bitbucket-pipelines.yml template which is suitable for your code. In our case, we selected Python as we use Python for developing Selenium tests.
Step 3: Customize your configuration
After selecting the template, you will get a default Bitbucket template of any selected language. Following Fig. 5 shows you the default template which we got after selecting Python template.
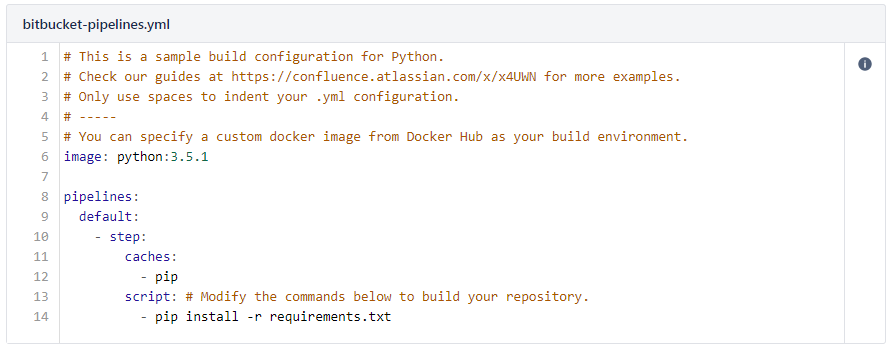
The default Python template uses Python 3.5.1, but we wanted Python 2.7.11 to run our test. We edited the template to use python 2.7.11 image and provided test run command next to pip install -r requirements.txt. But it didn’t work for us. We hit following
So we decided to use one of our own Docker images. We ended up using the Qxf2 POM Essentials docker image which is setup to run Python based Selenium tests. Look at below code for the final version of our bitbucket-pipelines.yml file.
#content of bitbucket-pipelines.yml image: qxf2rohand/qxf2_pom_essentials pipelines: default: - step: caches: - pip script: # Modify the commands below to build your repository. - export DISPLAY=:20 - Xvfb :20 -screen 0 1366x768x16 & - pip install -r requirements.txt - pytest -s -v -B firefox |
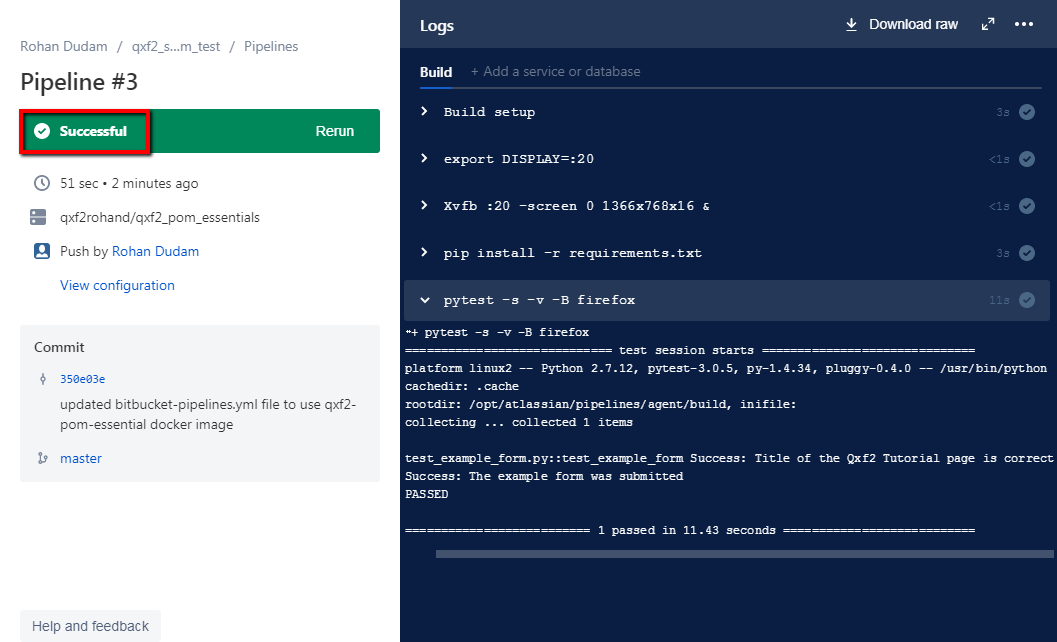
After configuring bitbucket-pipelines.yml, all we needed to do was to commit the changes to the repository and the pipeline automatically starts the build. Look at following Fig. 6 image of our successful build using qxf2-pom-essentials docker image.
We found setting up continuous integration using Bitbucket Pipeline and Docker image very easy and quick. If you don’t have your own Docker image for running the selenium test, you can use our qxf2-pom-essentials Docker image. It’s open to all. To know more about our Docker image, refer to this blog post.
If you are a startup finding it hard to hire technical QA engineers, learn more about Qxf2 Services.

I love technology and learning new things. I explore both hardware and software. I am passionate about robotics and embedded systems which motivate me to develop my software and hardware skills. I have good knowledge of Python, Selenium, Arduino, C and hardware design. I have developed several robots and participated in robotics competitions. I am constantly exploring new test ideas and test tools for software and hardware. At Qxf2, I am working on developing hardware tools for automated tests ala Tapster. Incidentally, I created Qxf2’s first robot. Besides testing, I like playing cricket, badminton and developing embedded gadget for fun.


Using the code of bitbucket-pipelines.yml does not work because there is no existing requirements.txt file. Where does the requirements.txt suddenly come from (it is only mentioned two times in this post)? And what needs to be in it? 🙂