This post helps you understand how to contribute code to open source projects on GitHub. It assumes that you already know about how to use git for version control and that you already have a GitHub account.
Why bother rehashing what is already on the Internet?
Skip this section if you are not wondering why we are writing this post.
I am aware that there are several good tutorials online. But I am choosing to write this post for a couple of reasons:
a) Putting this article on a testing blog increases the chances of a tester trying this out! I have taken extra care to write the article in a format that (our audience) experienced testers would relate to – concrete steps, a real example and screenshots on what to expect.
b) This post fills a hole for Qxf2. We are creating a hands-on training program for testers who do not have too much technical exposure. One of the outcomes of the training program is to make the tester have a public GitHub profile and contribute to one open source project. We had nothing on how to contribute to GitHub projects and decided a post like this would help.
Overview
In this post, I’m going to walk through the GitHub workflow to contribute to an open-sourced repository. Let’s use Qxf2’s Repository for our example. I will be showing how to fork this repository, fix an issue from GitHub issues, make the changes on the forked repository and then pull request the changes back to the original. I will be covering below GitHub workflow.
1) Forking a GitHub repository
2) Clone the forked repository to the local system.
3) Configuring a remote for a fork
4) Create a branch
5) Pick an issue and make the changes
6) Commit the branch
7) Push the branch to GitHub
8) Open a pull request
1. Forking a GitHub repository
If you want to contribute or propose changes to someone else’s open source projects on GitHub, you do not get direct access to push commits or branches to the repository. The first step is to fork the repository with which you would like to work. For example, I want to make a fix to an issue from Qxf2 Issues. For doing this I would first need to fork this repository. By forking a repository basically, we are creating a copy of the entire repository under our GitHub ID. Forking a repository is really straightforward:
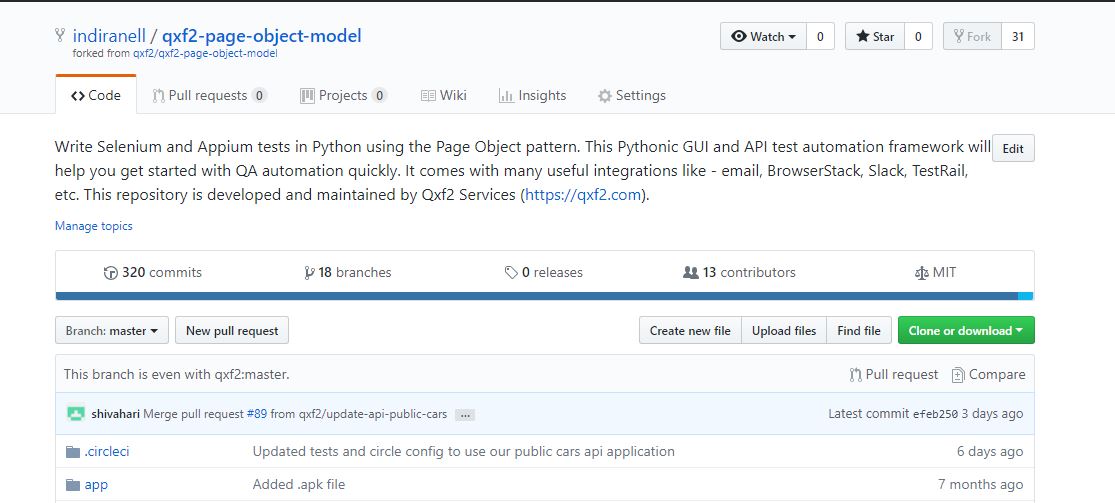
Now, I have a fork of the original qxf2/qxf2-page-object-model repository. The repository ‘indiranell/qxf2-page-object-model’ is forked from ‘qxf2/qxf2-page-object-model’ as shown below and now I have a copy of the original repository in my GitHub account.
2. Clone the forked repository to your local system
Even though I have a copy of the original repository in my GitHub account, I’d rather develop the fix on my local machine, test it and then put it back on GitHub. To do that, I have to clone the repository to my local system using git clone as shown below.
git clone https://github.com/indiranell/qxf2-page-object-model.git |
When this forked repository is cloned, Git will copy down the repository, both contents and commit history, to my local system. By default, git clone command implicitly adds a git remote called ‘origin’ that points back to the forked repository in my GitHub account as shown below: You can view it by running the following command:
git remote -v |

Now I have a remote repository ‘origin’ which is the one I cloned and I can fetch from and push to it.
3. Configuring a remote for a fork
If you have only a single change, then you can make the change, push the code and create a Pull request which is pretty straightforward. But sometime later you may want to make another pull request. In this case, you need to update your fork so that you are working with the latest code. One way of doing is you could delete your fork and go through the process of forking and cloning the repository again, but that’s a repetitive work. In order to make it easy, you must configure a remote that points to the original repository in Git to sync changes you make in a fork with the original repository(This step is not a MUST but is useful to have)
We can use remote add to achieve this. In our example, the original repository’s URL is ‘https://github.com/qxf2/qxf2-page-object-model’. This needs to be added as a new remote. The general term used to name this remote is ‘upstream’. I named the remote as ‘upstream’ and ran below command from the directory where the original repo is cloned.
git remote add upstream https://github.com/qxf2/qxf2-page-object-model.git |
Now, checked git remote -v, I can see that there are two “remotes” the ‘origin’ –> which points to my repository, and upstream –> which points to the original repository.

4. Create a branch
Now let’s spin up a new branch and check it out: I am calling it as “my_first_fork”

5. Make the changes and fix the issue
Once the new branch is created and checked out, make the necessary changes in this branch. In our example, I choose to fix an issue. I made the necessary changes to the branch. The change was simple, need to add .pytest_cache/ to .gitignore file.
6. Commit the changes
After the above change was made, I need to commit those changes. Firstly, build the change set with git add and commit the changes using git commit
7. Push the branch to GitHub
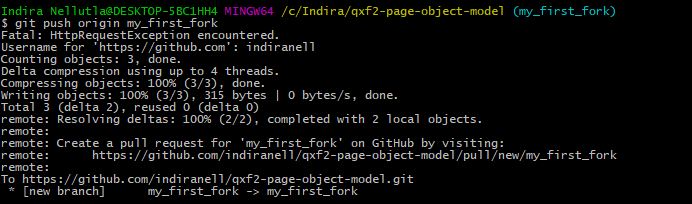
The next step is to push these changes to the forked repository for that branch using below command.
git push origin my_first_fork |
8. Open a pull request from the fork
Since I made changes to the fork, its time to ask the upstream repository to accept the changes. This can be achieved by creating a Pull request in the GitHub user interface. But before creating Pull requests and adding the content, I strongly recommend going through the Pull requests guidelines of the repository. I followed below steps to create a Pull request.
1. Navigated to the original repository where I created my fork from i.e, https://github.com/qxf2/qxf2-page-object-model/
2. Clicked the Pull requests tab, then on this new page clicked the “New pull request” button.
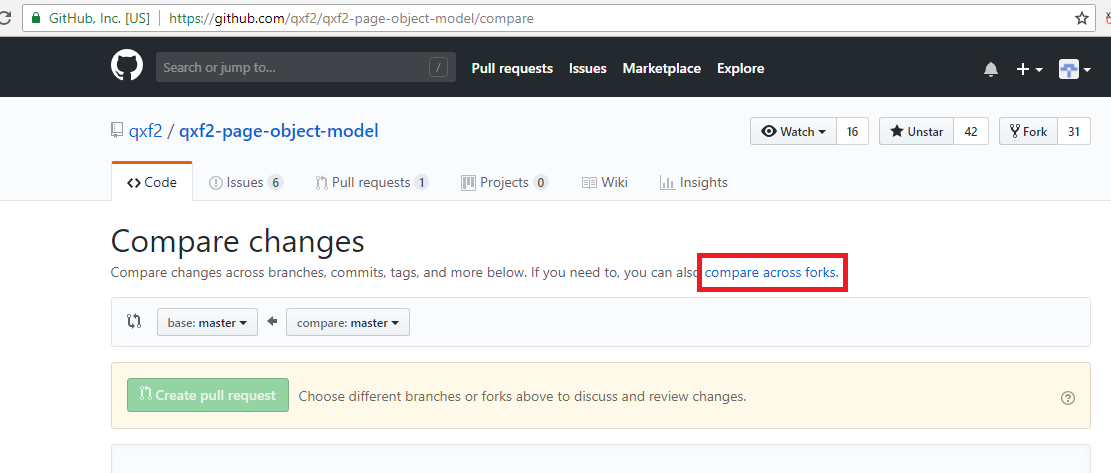
3. On the Compare page, clicked compare across forks.
4. Confirmed that the base fork is the repository I would like to merge changes into(qxf2/qxf2-page-object-model). Selected the base branch as ‘master’ of the upstream repository I would like to merge changes into.
5. From the head fork drop-down menu selected my fork repo(indiranell/qxf2-page-object-model), then used the compare branch drop-down menu to select the branch(my_first_fork) to which i made the changes.
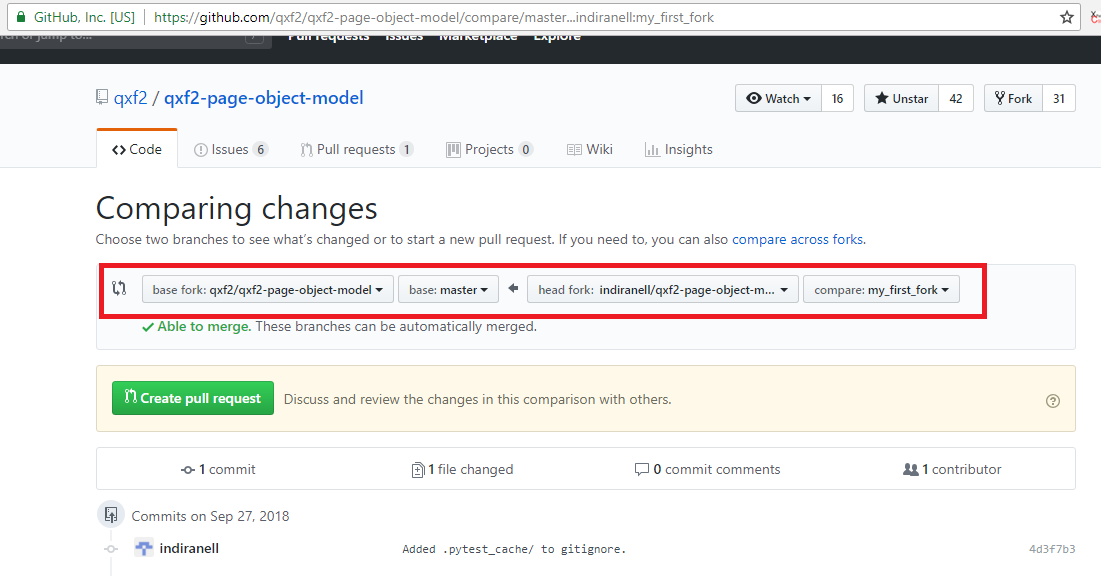
The above pull request configuration tells Git to sync the ‘qxf2/qxf2-page-object-model’ repository with contents from my ‘indiranell/qxf2-page-object-model’ repository. I looked over the changes to make sure everything is correct.
6. Added a title and description for the pull request.
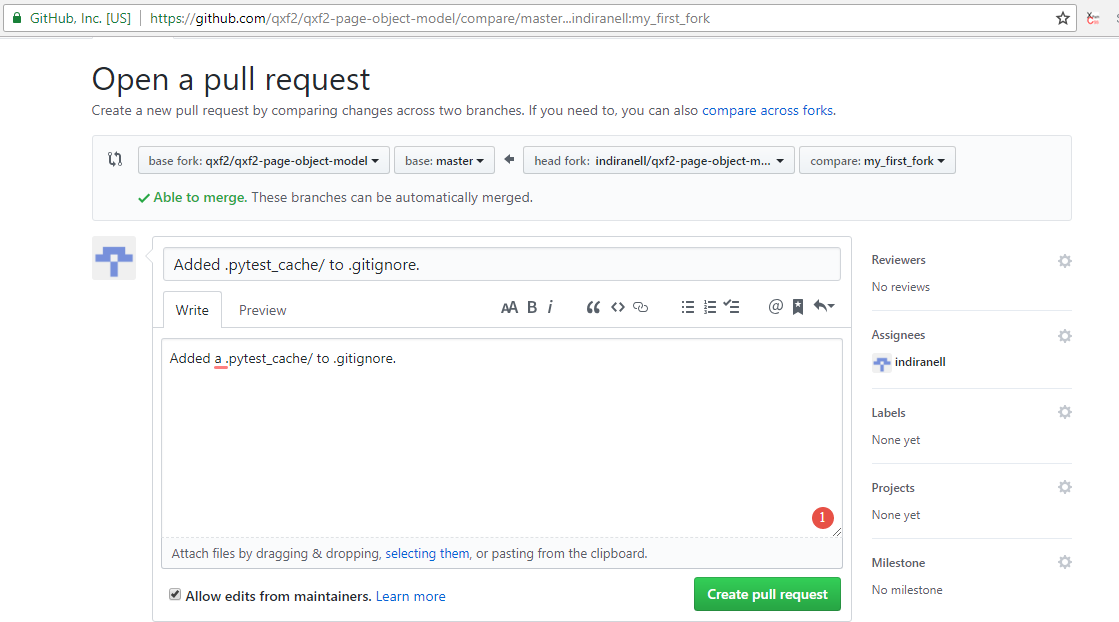
7. Click Create pull request.
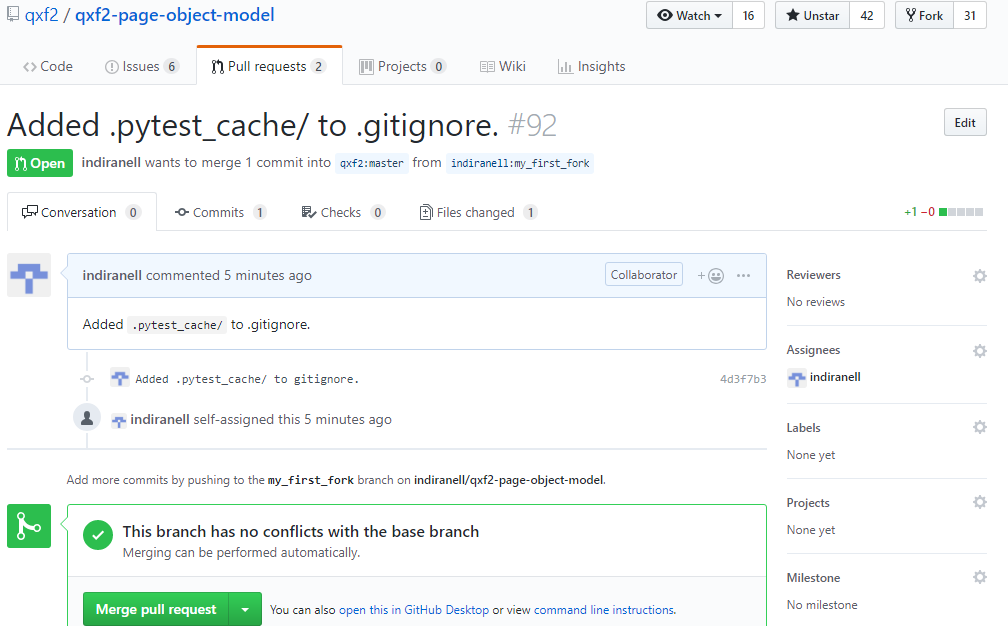
After the Pull request is created, it will show up to the maintainers of the original repository and if they are happy with this proposed change they will merge the changes into the original repository.
In this way, I was able to fork and contribute to an open source repository on GitHub. I hope this helps. Happy forking !!
References
1) How to fork a repository
2) Creating Pull requests from a fork
3) GitHub Pull requests

I am an experienced engineer who has worked with top IT firms in India, gaining valuable expertise in software development and testing. My journey in QA began at Dell, where I focused on the manufacturing domain. This experience provided me with a strong foundation in quality assurance practices and processes.
I joined Qxf2 in 2016, where I continued to refine my skills, enhancing my proficiency in Python. I also expanded my skill set to include JavaScript, gaining hands-on experience and even build frameworks from scratch using TestCafe. Throughout my journey at Qxf2, I have had the opportunity to work on diverse technologies and platforms which includes working on powerful data validation framework like Great Expectations, AI tools like Whisper AI, and developed expertise in various web scraping techniques. I recently started exploring Rust. I enjoy working with variety of tools and sharing my experiences through blogging.
My interests are vegetable gardening using organic methods, listening to music and reading books.


Nice article. Thanks for posting it Indira!!
Easily understandable explanation. Very Useful for the first time users in GitHub.