This post is for those who do a lot of exploratory testing. Exploratory testing is an important part of the agile environment, it helps testers to keep up with rapid development. It’s considered a phase where tester learns, does test design, and executes it simultaneously.
This article helps the tester by highlighting how using a plugin from chrome called “Exploratory Testing Chrome Extension“, we can be more productive and report our findings, ideas more efficiently.
Installation
Go to the chrome web store and search “Exploratory Testing chrome extension“. Add the extension to your browser. A small icon will be displayed on your browser. Now you are ready to start!!
To demonstrate the capabilities of this plugin, I will be testing Qxf2’s in house web app weather-shopper.
A little background on the App – the app homepage on every refresh shows the random value for Current temperature. Based on the temperature, the user is expected to click on Moisturizers or Sunscreens. On navigating to respective item screens, the user can add items to cart and checkout by paying with a card.
Open the application in the new browser and launch the plugin.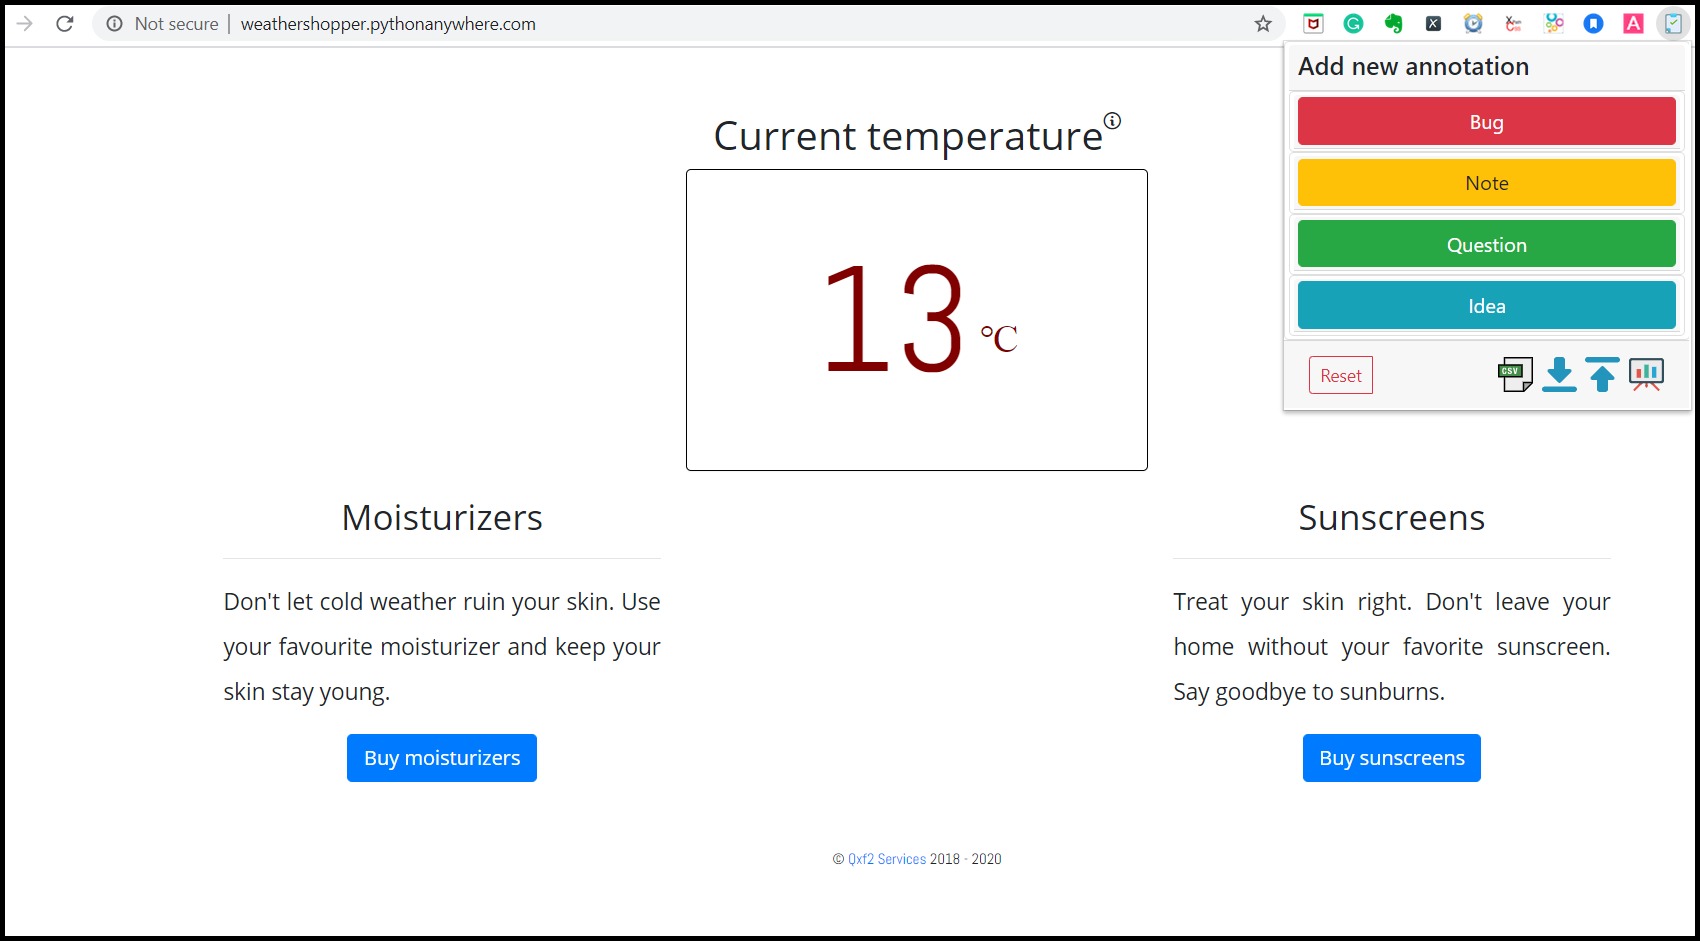
Start exploring the application. Keep the plugin open, the plugin provides us 4 sections – Bugs, Note, Question, and Idea. Here’s how I used this plugin with the weather-shopper app.
Here’s how I used this plugin with the weather-shopper app
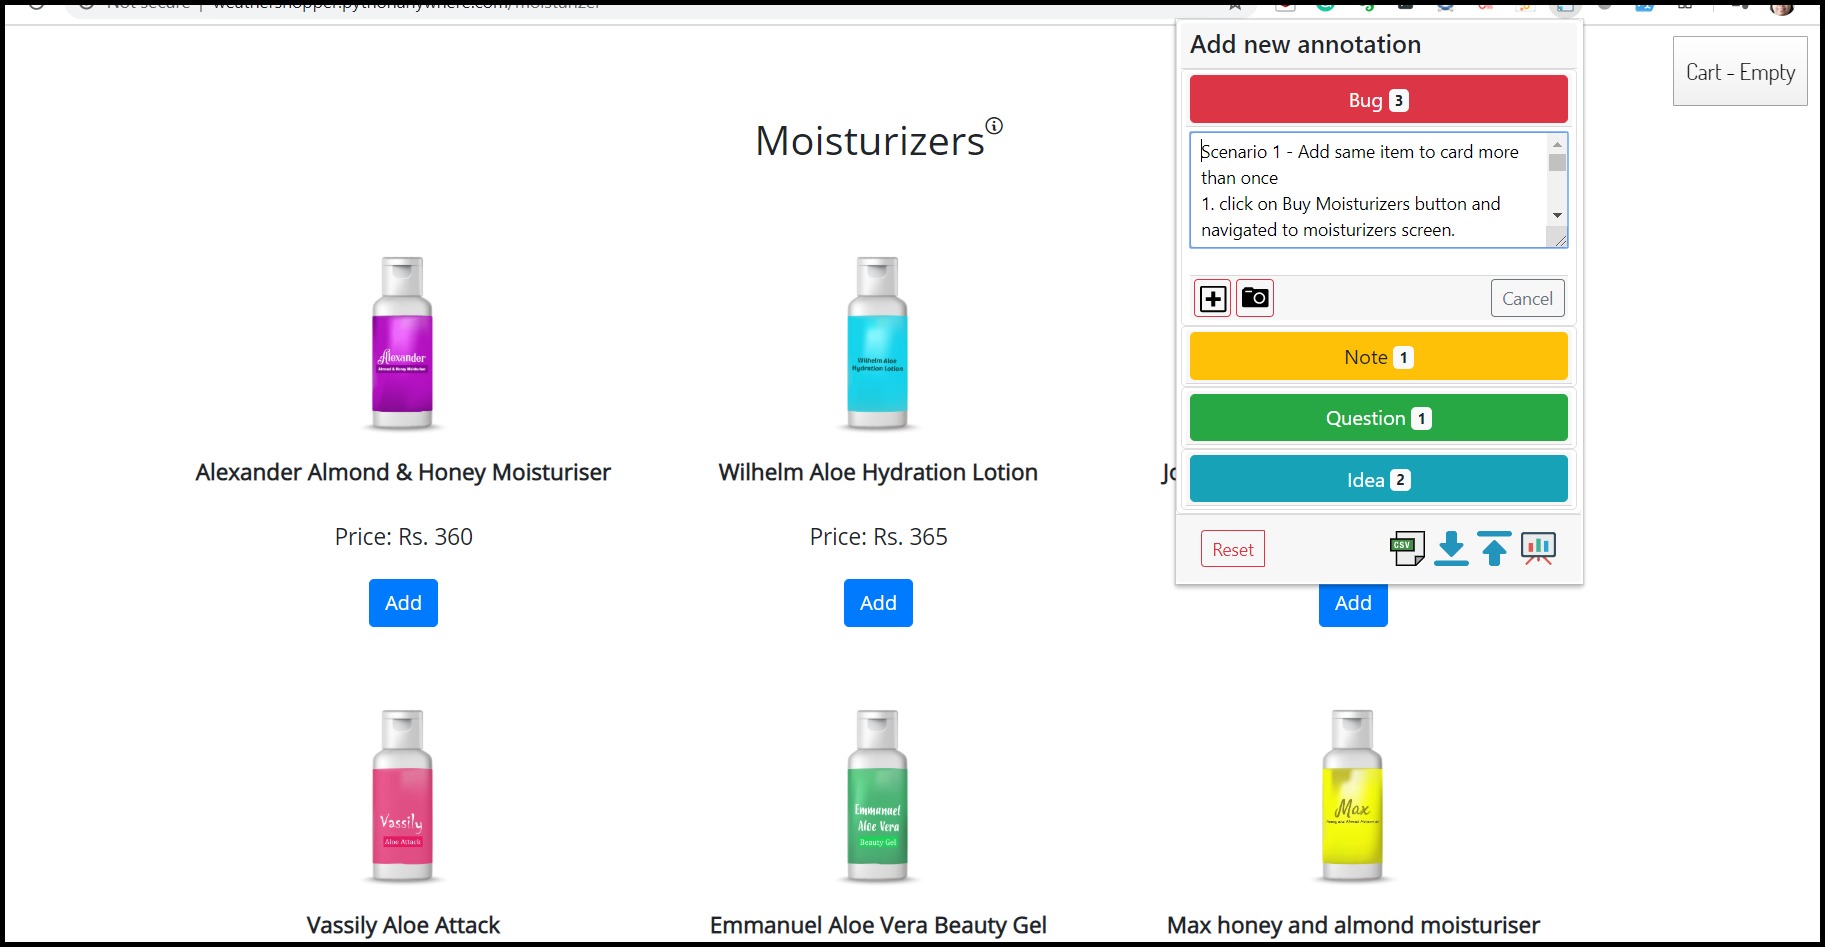
While exploring, I clicked on the Buy Moisturizers button and it navigated me to the moisturizer screen. Based on the UI, I assumed I can add multiple items into the cart and then check them out. So I clicked on the add button for the first item ( you may select any item) 3 times as I intend to buy 3 pieces( Rs 216 per piece) of this item. I see the cart showing 3 items selected. So I went and clicked on the cart button. The expectation is that the cart will show 3 count and amount 3*216 but it shows only 1 count and the Total Amount is Rs 216. Now I went back to the previous screen to check if the items selected were 1 or 3 but when I went back cart shows Empty!!
Normal approach
In the normal case, I will open up a notepad/excel/any other software and note the steps and then add screenshots by going to and from the app page and write down the steps to reproduce, expected, and actual results. Then create a folder in my laptop and take screenshots and name them.
Also while doing this I get ideas like the app is missing on session management and I want to recommend that in the report I submit. So I note it down in someplace.
Later, while filling up the bug I realized I needed to note the OS and browser version – Phew!! I will go back and redo the test and get that info and update my final report by adding all the information I collected and stored in different places. Reporting is bigger activity at the end and it takes most of the time 🙁
So if I use this plugin I can do the above-mentioned work in few steps more neatly.
Here’s how Plug-in can help to solve above problem
- I will note down the steps with expected and actual results under the Bugs section, also I click on the screenshot icon to take a screenshot of the page.

- While finding the bugs, I had few ideas on how the product can be improved under Idea tab (again I can take a screenshot for more clarity) e,g Adding an app back button control
- I have questions around the current design so I can make note of them under Questions tab
- The notes section can be used to pass the information to the client which may not fall under the other 3 tabs.
- I can go on and explore more and keep adding bugs, notes, questions, take screenshots
- Finally, I click on the “View Session report” link on the bottom.
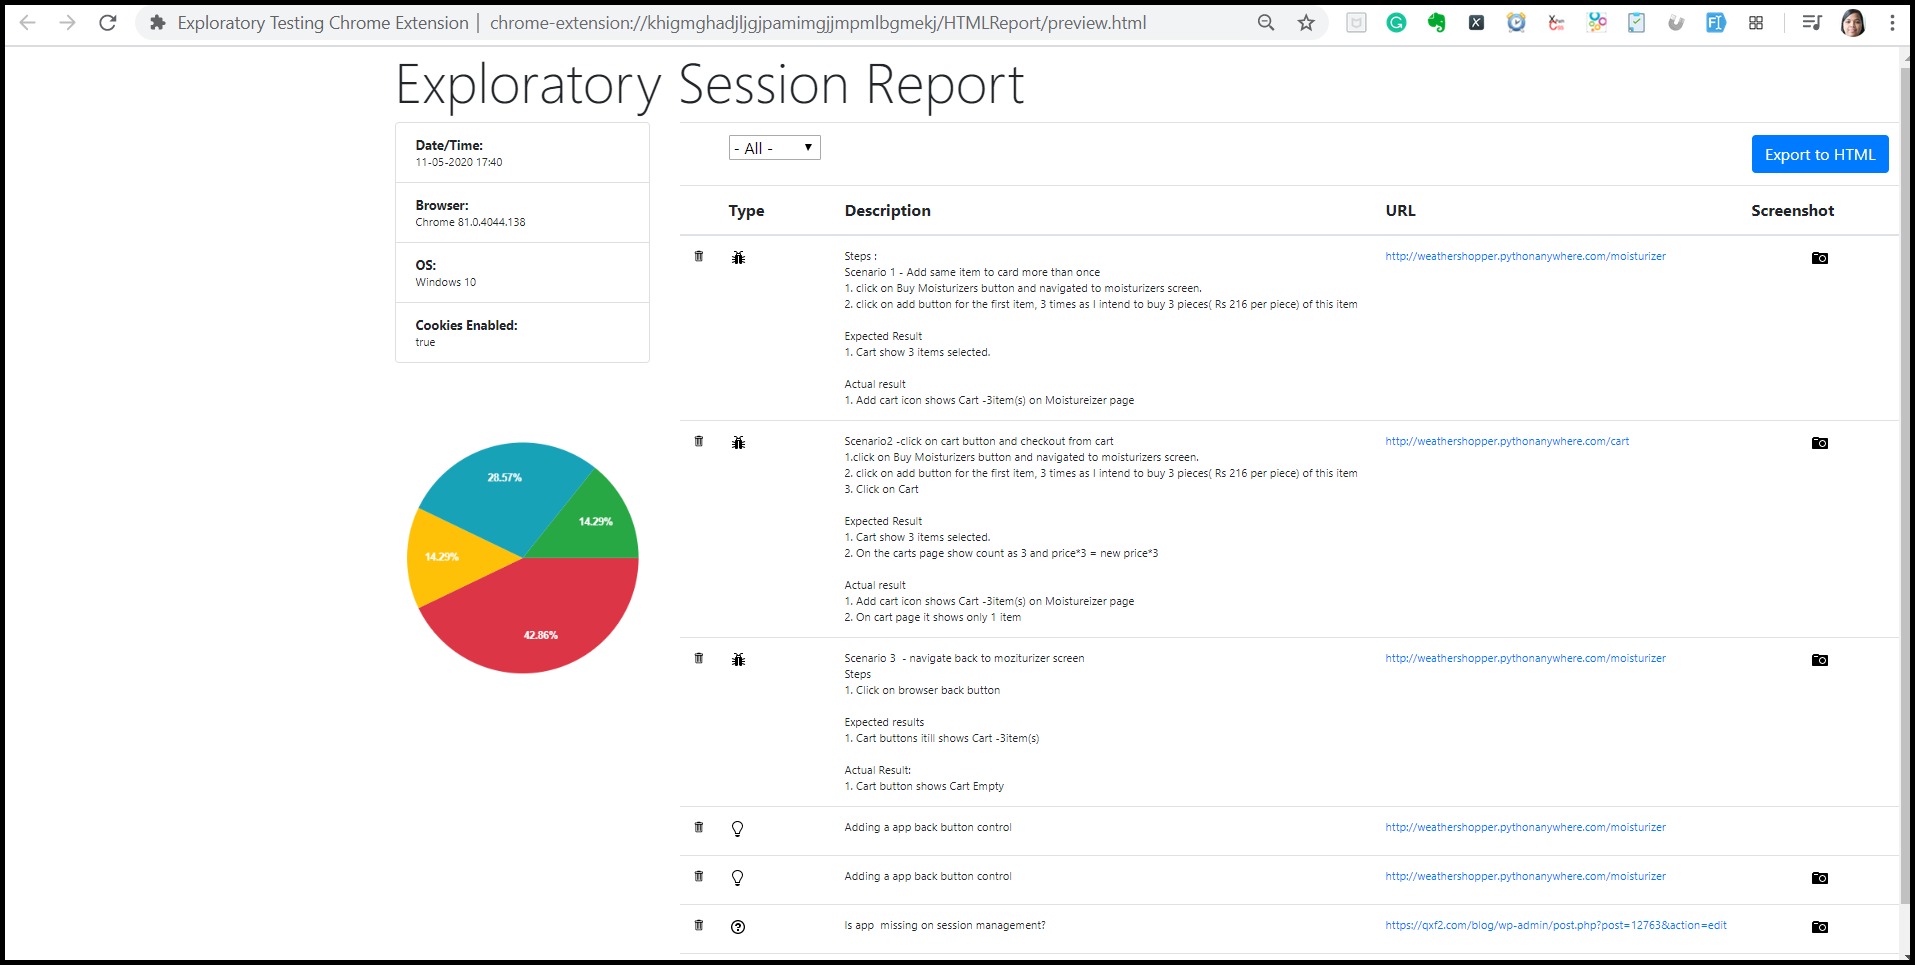
 The report has environment information (which you had missed to note earlier)
- The tabular report showing all that you have noted under 4 tabs earlier. Also, you can use a filter to view specific information.
- There is a pie chart depicting the areas of concern that will definitely catch the eye of the client. If not for this tool, manually we never create such report 🙂
- Finally, you can export the same report into HTML and share it with the client/team.
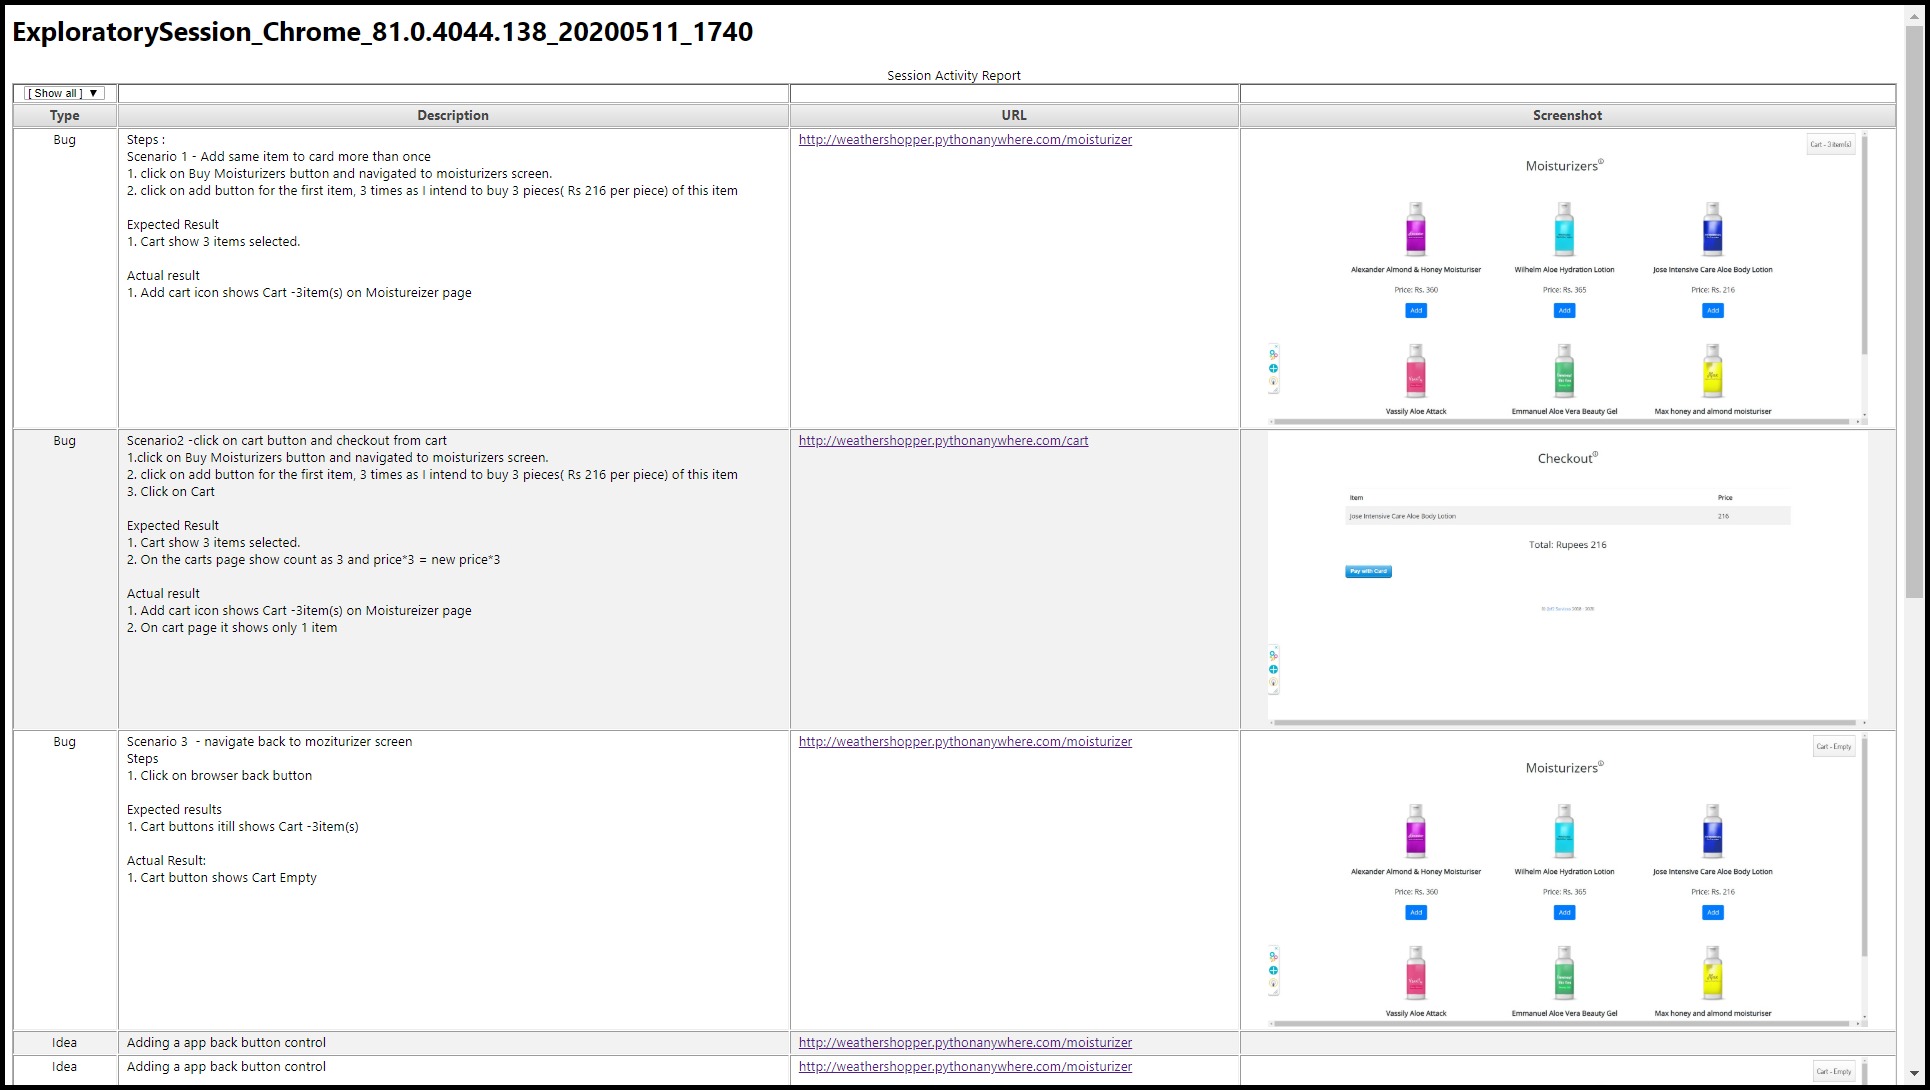

- The report has all the information and screenshots embedded in the report itself.
- You can export the report to CSV and JSON formats. The JSON format can be imported into another session where you can continue to test the app from the point you left earlier and the report will have the new findings too.
The plugin saves a lot of time in generating the final reporting. But if we use it with some other plugins like – “FIll All Inputs with Dummy data ” and “Bug Magnet ” I feel the exploratory testing will be more effective and automated with lots of scopes for you to value-add by finding critical bugs in a small span of time.
Hope this blog helps you report better 🙂

I started my career as a Dotnet Developer. I had the opportunity of writing automation scripts for unit testing in Testcomplete using C#. In a couple of years, I was given the opportunity to set up QA function for our in-house products and that’s when I became full-time Tester. I have an overall 12 years of experience. I have experience in Functional – Integration and Regression Testing, Database, Automation testing and exposure to Application Security and API testing. I have excellent experience in test processes, methodologies and delivery for products in Information security and Pharma domain. On the Personal side, I love playing with kids, watch Football, read novels by Indian Authors and cooking.

