Qxf2 recently explored a tool called Testim, a low code tool for test automation. We found it useful in specific cases and wanted to quickly write about it.
Why bother with a low code tool?
Readers of this blog will know that Qxf2 loves to use code for testing. All our engineers write code. Our GitHub page is extremely popular among the testing community. We have tried low code tools before (maybe 5-10 years ago) and they proved to be more work to maintain than writing good, solid test automation code. So why this post at all?
A common pain point of ours was becoming worse. We work with startups. When we start, we want to show some value by writing some minimal test automation for the most important portions of the application under test. Many times this involves discovering what tests are important. After writing some minimal test automation, we work with developers and help them write more tests to expand test coverage. But working with developers takes time. This means the product has less tests initially. It also means we lose the opportunity to learn what tests are suitable for automation and what ones do not provide much value. Wouldn’t it be nice to bang out a dozen of quick and dirty UI tests within a day? Recent advances in the no-code/low-code movement made us wonder if the tooling had evolved to fulfill our need.
Things we liked about Testim
Testim made it really easy for us to write some quick and dirty test automation within a day. We were also able to integrate the tests with our CI (GitHub Actions) within minutes. It gave us just enough “programatic control” like being able to add some code customize our inputs or make validations more robust or improve the default locators.
Testim can do a lot more. But I think those capabilities are better suited for QA teams that want a full low/no-code solution. That was not what we wanted. We are technical engineers capable of writing code. Our need was for a stop gap solution until we got the entire team (developers and testers) to write more robust test automation code.
If you run a technical QA team, here are some places you will find a tool like Testim useful:
a) stop gap measure
b) when you are new and want *something* quick
c) having good test automation does not justify the ROI
d) a cheap substitute for documentation/knowledge transfer
e) discovering what tests are worth automating well
f) temporary solutions (like hotfixes)
How have we implemented Testim with Newsletter Generator
I will talk a bit about our experience trying Testim on an internal project. We, at Qxf2, generate a weekly newsletter for a larger technical community. The newsletter is an application consisting of loosely-coupled microservices. We use this application to practice our testing too. For example, we virtualized MailChimp to help our test automation. If you are interested to know how to set up and use Virtualized MailChimp, check out our separate blog post on it here.
Although we have an entire framework for newsletter automation, the scope of this work was to look out for quick automation without worrying much about other details. We looked for tools that would help us do that. Testim helped us achieve this.
Recording with Testim
Testim allows us to record a test. Then we have options to edit/customize the test by adding/editing code.
For the purpose of this post, we selected an end-to-end scenario of adding an article, editing an article, creating a newsletter with the article, and finally creating a campaign. For folks that do not use our app, this translates to setting some input, clicking on buttons and links, validating text, navigating pages and dealing with alerts. In other words, standard functionality you would expect from a test automation tool.
To start using Testim for your tests, you need to create a new test from the dashboard and add the Base URL. Clicking on the record button allows you to record the user steps.
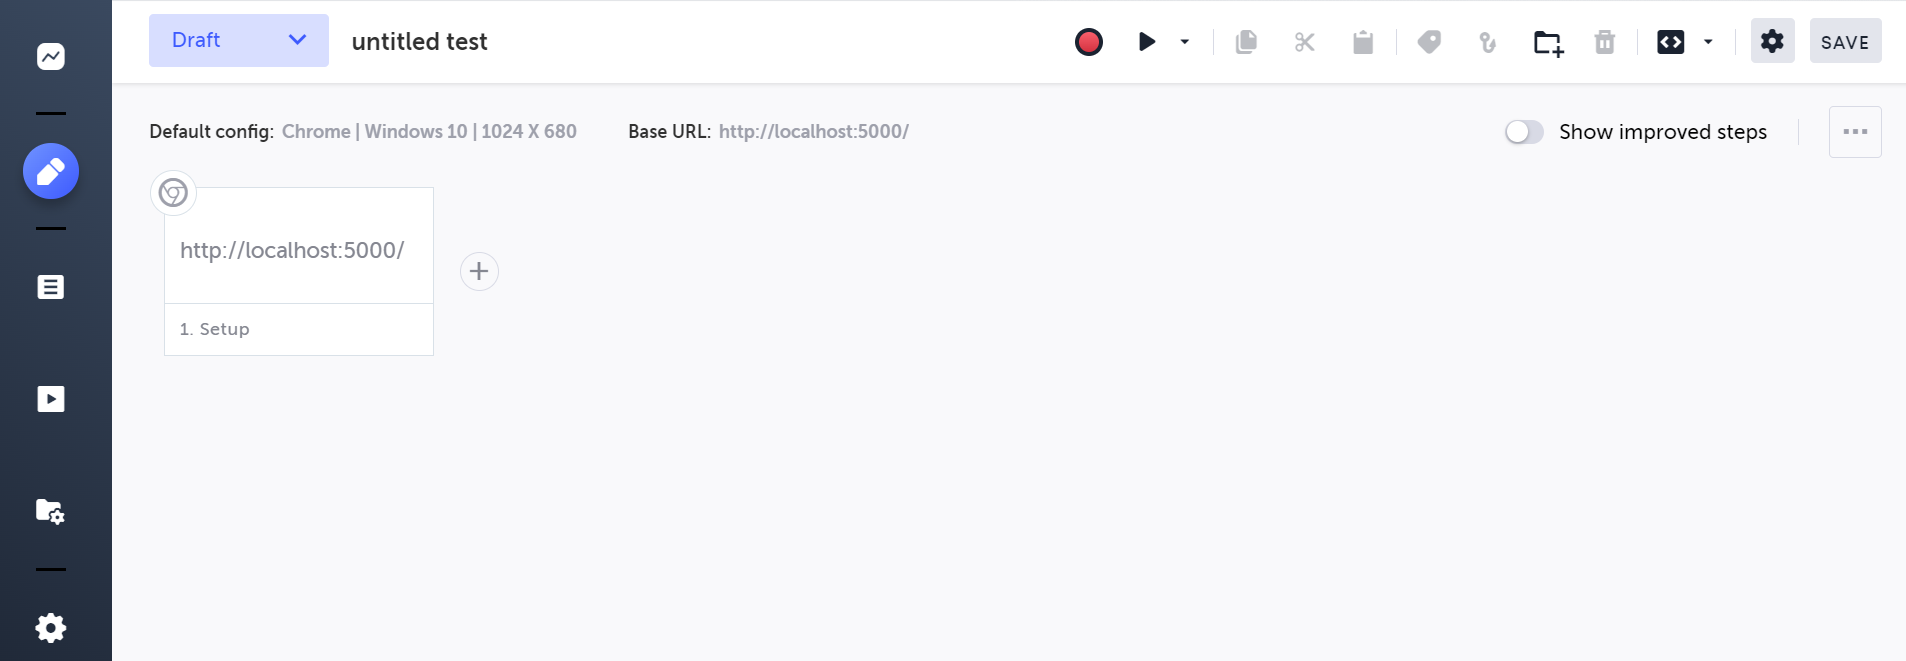
Once you click the record button, the user’s base URL opens up, and you can perform the required action.
Customizing the test with a little code
In this post, we will include a few customizations that all testers can use namely: generating random input text, customizing a validation, creating a shared step and modifying locators to be more robust.
Generating random input text
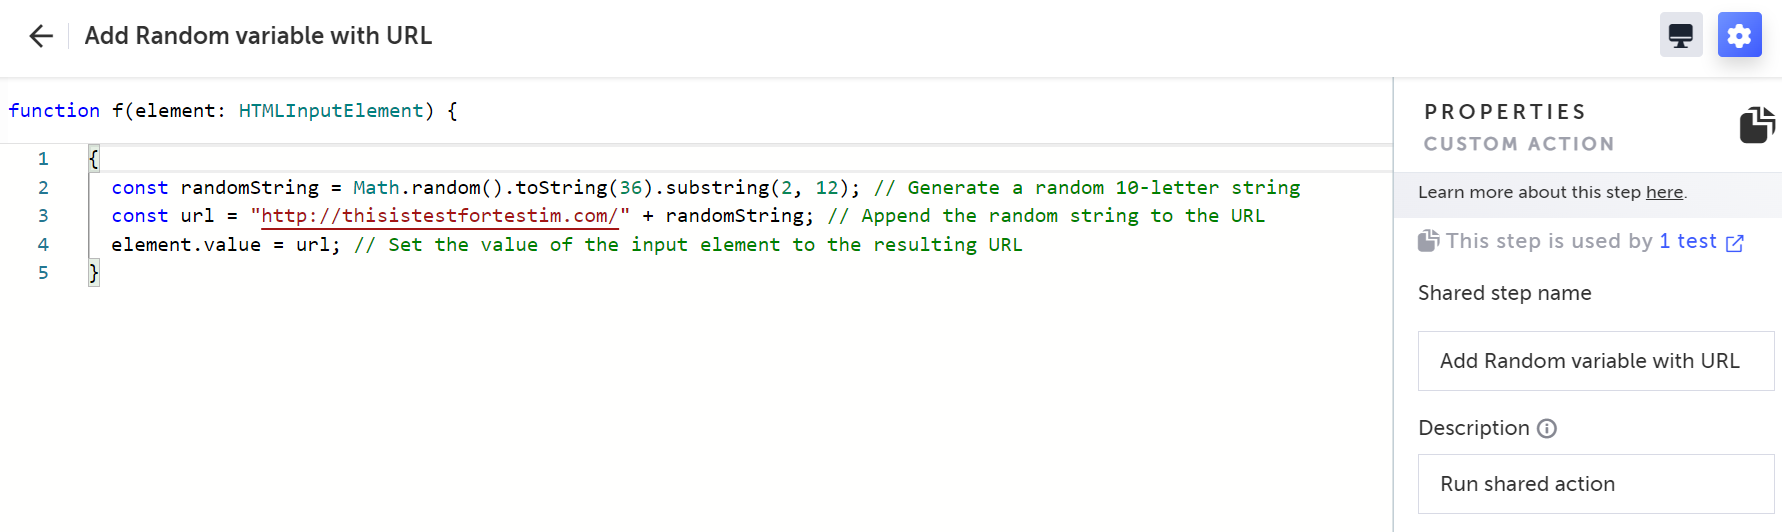
We appended a random string at the end of the URL so the user is able to generate a unique URL everytime they run the tests. To do that, the user clicks on the forward triangle icon between the steps or the ‘+’ icon in the dashboard. Click ‘M’ icon to open the Testim predefined steps. Under predefined steps, we can find the Add custom validation where we can write the following code to generate random input text.
These steps can be made as shared steps that can be reused across other steps.
This is what the custom validation for “Add Random variable with URL” looks like.
Add Random variable with URL
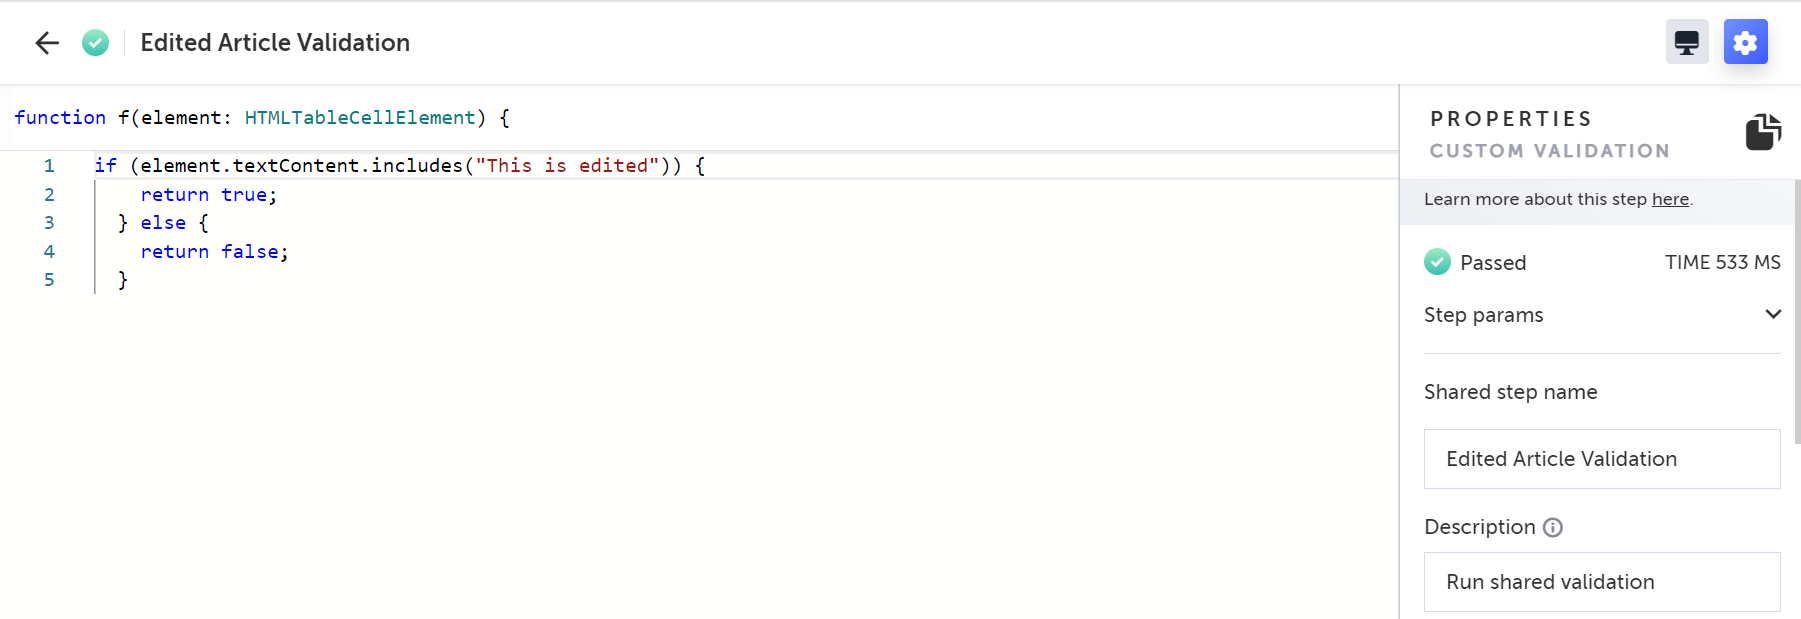
Customizing a validation
We will show you one more validation, where we custom validated the edited articles. The steps to create a custom validation is same as “Add Random variable with URL” shown above.
This is what the custom validation for “Edited Article Validation” looks like.
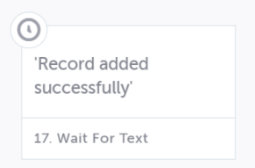
We also validate the added article during our test by validating the message “Record added successfully”. This is done with Testim’s inbuilt validation “wait for element text”. The inbuilt validation are present under predefined steps.
Modify Locators within Testim and Test
You can export tests into code in a JavaScript or Testcript format by clicking the “Export to code” icon in the dashboard. Once, the code is exported then you can use your editor to edit the tests and change the locators.
![]()
![]()
The next step involves integrating the tests with continuous integration.
Integrate Test with CI using GitHub Actions
In Testim, you have various options like Azure pipelines, Bamboo, Circle CI, Jenkins, Gitlab, etc. to integrate tests with CI. We chose GitHub Actions to integrate our tests with CI.
To integrate the tests with CI, you need to obtain the Token ID and the Project ID. To do this, you can navigate to the left bar in Testim, click on Settings, and then click on CLI. The token and the project ID can be found in the CLI interface.
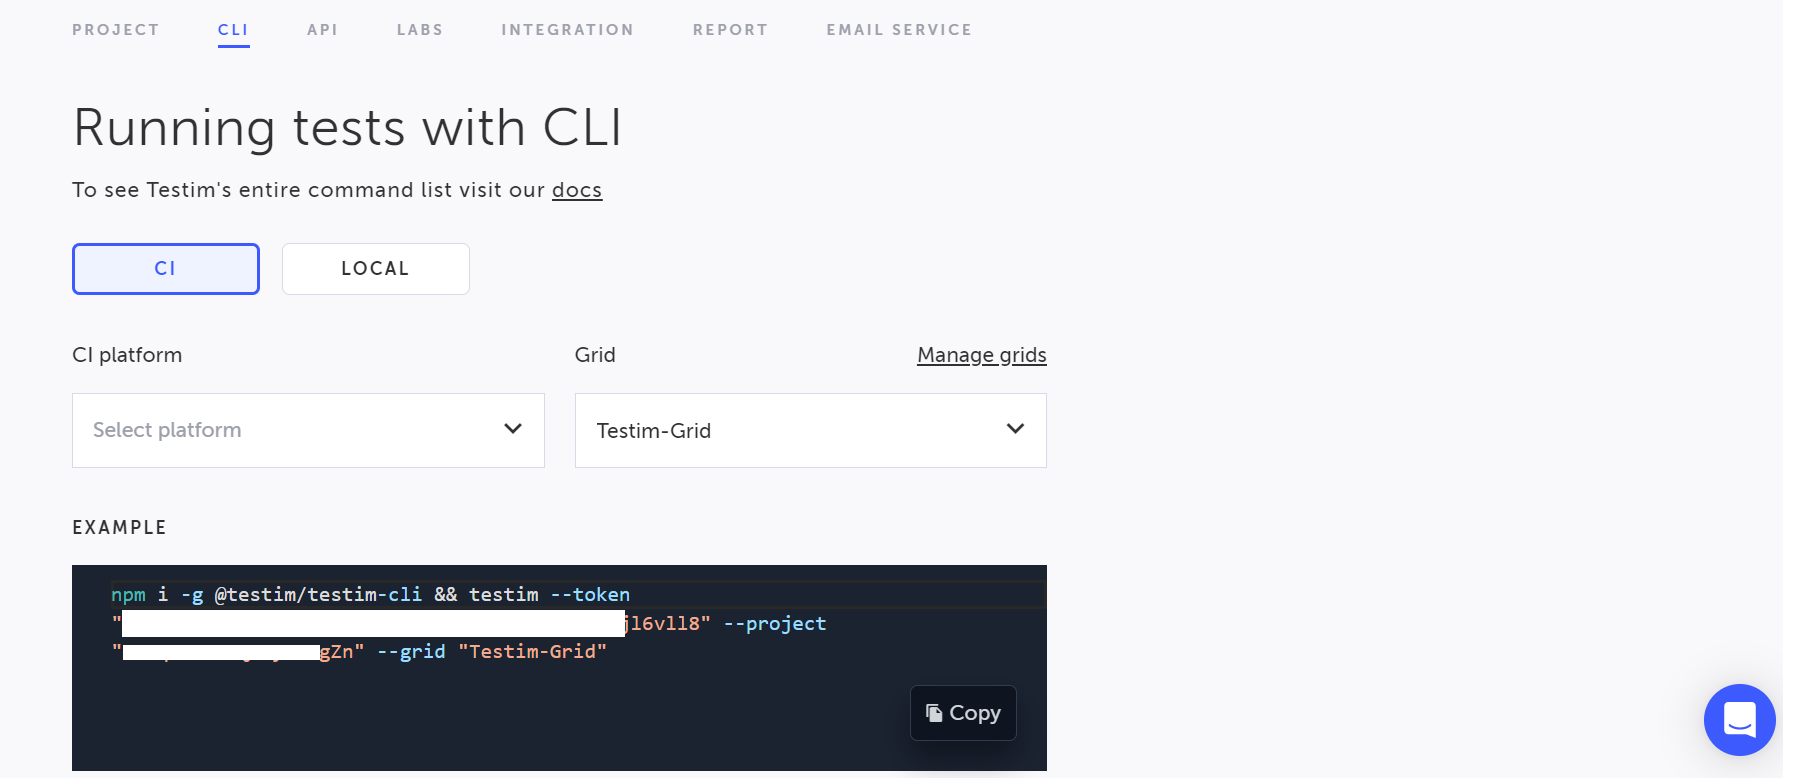
With the Token ID and the Project ID, you can create GitHub actions to integrate the tests with CI.
GitHub Actions for End-to-End Test
This is the snippet for the GitHub Actions to integrate and run the tests.
- run: npm install -g @testim/testim-cli
- run: testim --token "${{ secrets.TOKEN }}" --project "${{ secrets.PROJECT_ID }}" --grid "Testim-Grid" --suite "End to End Test" |
For this post, I have added the GitHub Actions, which can be found at the following link: End-to-End Test GitHub Actions
Hire Qxf2 for testing
Looking for technical testers to help with your project? Reach out to Qxf2 here. We are an engineer-lead software testing firm. We like working on early stage software products and gel well with small engineering teams.
My journey in software testing began with Calabash and Cucumber, where I delved into Mobile Automation using Ruby. As my career progressed, I gained experience working with a diverse range of technical tools. These include e-Discovery, Selenium, Python, Docker, 4G/5G testing, M-CORD, CI/CD implementation, Page Object Model framework, API testing, Testim, WATIR, MockLab, Postman, and Great Expectation. Recently, I’ve also ventured into learning Rust, expanding my skillset further. Additionally, I am a certified Scrum Master, bringing valuable agile expertise to projects.
On the personal front, I am a very curious person on any topic. According to Myers-Briggs Type Indicator, I am described as INFP-T. I like playing soccer, running and reading books.

