As part of the pairing project activity at Qxf2 – I had to demonstrate a simple working example that included Celery and it’s monitoring tool called Flower. I knew a little bit of background as I have tested a product that includes Celery.
I read the Celery guide, a few related articles, and simple examples. I also came across the asynchronous behavior of Celery. I wanted to come up with a working example that connects the tech involved i.e. Celery, Redis, RabbitMQ, and Flower, and hence this post.
This post will introduce you to Celery, the other basic tech required to set up a working example. The example shows the asynchronous behavior of Celery.
This post has these sections:
1. What is Celery?
2. What is Flower?
3. A brief about the example
4. A step by step guide
What is Celery?
- Celery is an asynchronous task queue based on distributed message passing.
- Celery system can consist of a single worker, multiple workers, and brokers, giving way to high availability and horizontal scaling.
- Celery communicates via messages, usually using a broker to mediate between clients and workers.
- Celery is written in Python, but the protocol can be implemented in any language.
- Tasks can execute asynchronously (in the background) or synchronously (wait until ready).
- The recommended message brokers are RabbitMQ or Redis. Additionally, MongoDB, Beanstalk, Amazon SQS, CouchDB, IronMQ, and databases (using SQLAlchemy or the Django ORM) are supported in status experimental
For more information, click here.
What is Flower?
- Flower is a web-based tool for monitoring and administrating Celery clusters.
- You can also monitor the progress of the Celery tasks, view graphs and statistics.
For more information, click here.
A brief about the example:
In this example, I am demonstrating asynchronous processing functionality using Celery i.e. how we can execute tasks in the background without waiting for the task to finish. We can also view these tasks in the Flower dashboard.
Please note that it’s preferable to use a Linux machine for this example.
A step by step guide:
STEP 1. Installation
Here we’ll ssh into the Linux machine and install Celery, RabbitMQ and Flower.
a. Install Celery using
pip install celery |
b. Get set up with RabbitMQ by following the section “Setting up RabbitMQ” from this link
c. Install Flower using
pip install flower |
STEP 2. Project setup
This section tells you about the structure of the directory and also explains the content of the files within the directory which are needed for the example. Create the following structure:
test_celery
    __init__.py
    celeryconfig.py
    run_tasks.py
    tasks.py
a. test_celery is the parent directory which consists of all the listed files above.
b. celeryconfig.py will have the broker(RabbitMQ) and backend(Redis) result details.
BROKER_URL = 'amqp://username:password@localhost:5672/myvhost' broker_url = 'redis://username@localhost:6379/0' CELERY_IMPORTS = ('tasks', ) |
c. tasks.py Here let’s initialize the ‘app’ using Celery with the broker and backend details. Create 2 methods, one for add and the other for minus. Add appropriate print statements so that we know which method is being called.
from celery import Celery import time app = Celery('tasks', broker='pyamqp://username:password@localhost:5672/vhost', backend='redis://localhost') @app.task def add(x, y): print("task 1 working here") return x + y @app.task def minus(x, y): print("task 2 working here") return x - y |
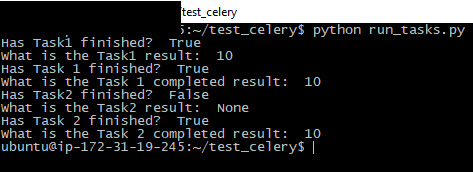
d. run_tasks.py has 2 blocks, one for each task/worker where the ‘add’ and ‘minus’ methods/tasks are called. delay method is used for asynchronous processing. Once the ‘run_tasks.py’ is executed, you would see some useful information about the status of each task and the result as well. Initially, when the task has not been finished, it returns a None. Once the task is complete, it returns the result. Task1 ends and Task2 starts immediately. Task2 works in a similar way Task1 functioned.
from tasks import add from tasks import minus import time if __name__ == '__main__': result = add.delay(5,5) # at this time, our task is not finished, so it will return False print('Has Task1 finished?'), result.ready() print('What is the Task1 result: '), result.result # sleep 10 seconds to ensure the task has been finished time.sleep(10) # now the task should be finished and ready method will return True print('Has Task 1 finished?'), result.ready() print('What is the Task 1 completed result:'), result.result result = minus.delay(20,10) # at this time, our task is not finished, so it will return False print('Has Task2 finished?'), result.ready() print('What is the Task2 result:'), result.result # sleep 10 seconds to ensure the task has been finished time.sleep(10) # now the task should be finished and ready method will return True print('Has Task 2 finished? '), result.ready() print('What is the Task 2 completed result: '), result.result |
STEP 3. Start Celery, RabbitMQ, Flower
Now that the project has been set up, let’s start Celery, RabbitMQ, and Flower:
a. Start RabbitMQ server using the command
rabbitmq-server |
b. Start Celery workers: On two separate consoles, start Celery worker using the command below (run in the parent folder of our project folder test_celery):
On one console:
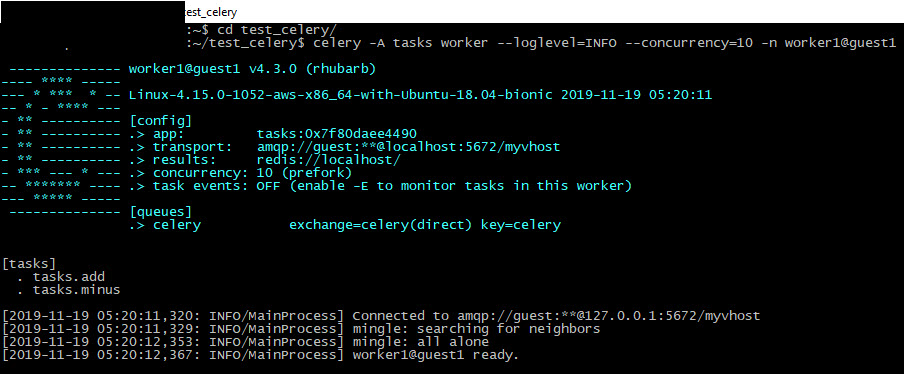
celery -A tasks worker --loglevel=INFO --concurrency=10 -n worker1@guest1 |
On another console:
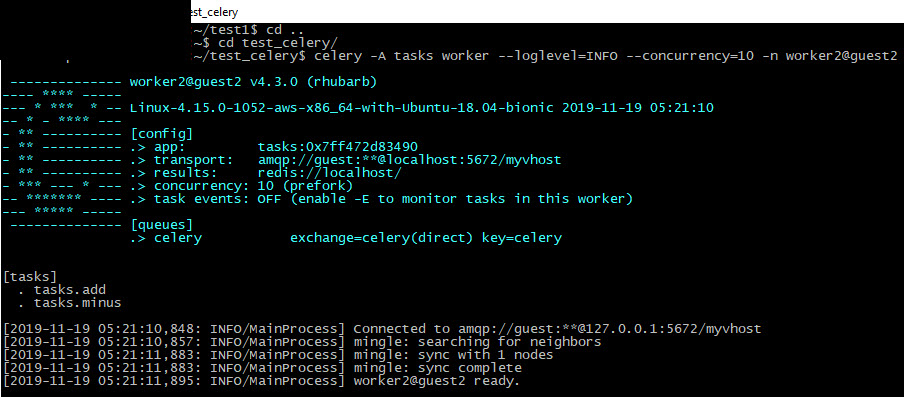
celery -A tasks worker --loglevel=INFO --concurrency=10 -n worker2@guest2 |
Celery successfully connects to RabbitMQ:
This is the image of Worker1
This is the image of Worker2
c. Now on another console, start Flower:
celery -A tasks flower |
Successful connection to Flower is seen as given below:

STEP 4. Run the python file
Now, run the python task “run_tasks.py” like this:
python run_tasks |
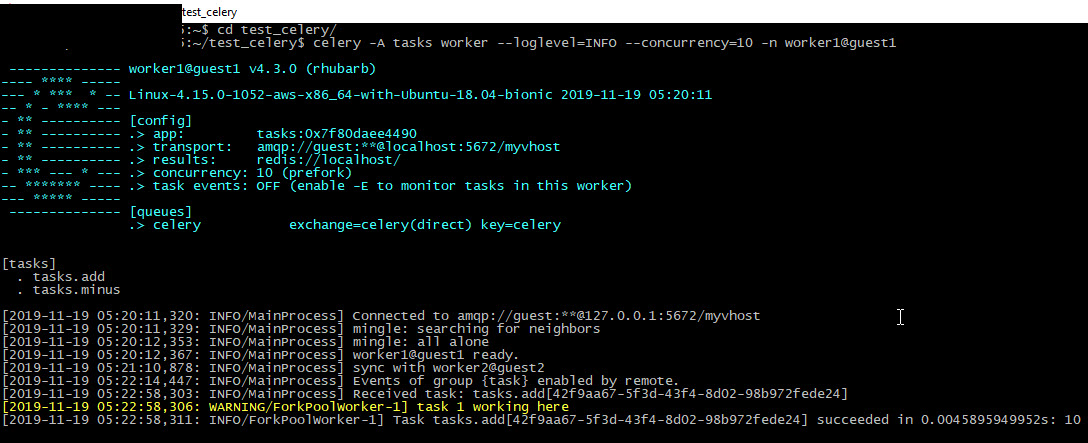
Look at the guest1 celery console now, you’ll see worker1 received the task and the result 10 is displayed immediately. It prints the task name with task id in brackets. This shows the asynchronous functionality of Celery.
Refer to the below images for Worker1 and Worker2 results.
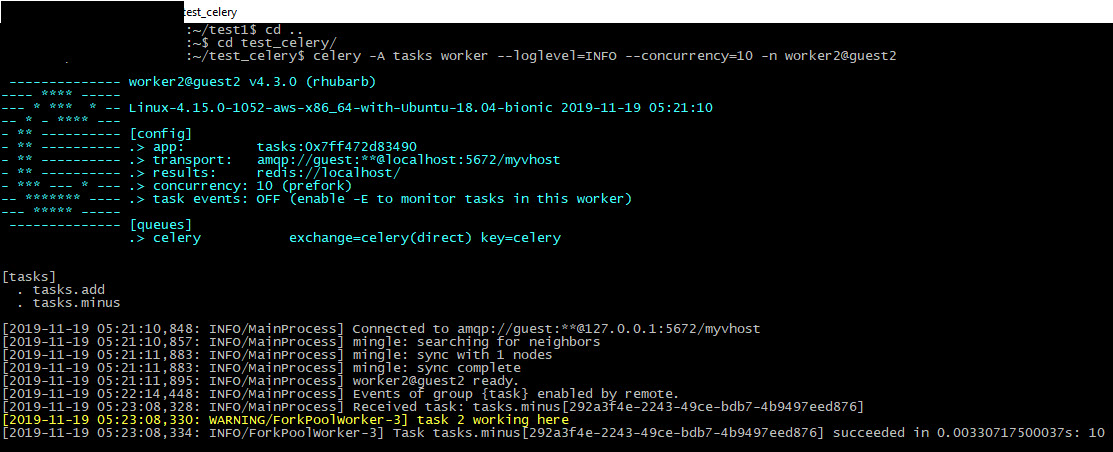
In the current console where we ran the run_tasks.py, you’ll see the print statement initially, and then after 10 seconds, you’ll see the Task1 completed. Similarly, Task2 starts and completes by displaying the print statements.
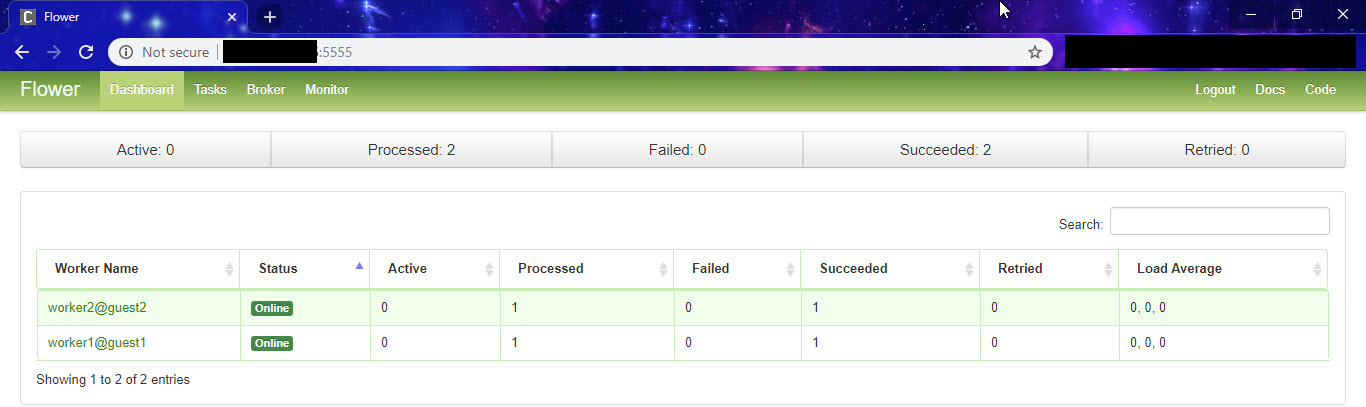
STEP 5. Access Flower
Now, access the web console at http://localhost:5555, you would see these tasks in worker1 and worker2.
I hope this blog has helped you get set up quickly with Celery and Flower.
References:
1. Celery
I’m a software tester with more than 10 years of software testing. My experience has been with functional testing, regression testing, test management and defect management. I have had a great journey in the testing world with products inclined towards Banking and Insurance domain. I have excelled in test processes, methodologies, offshore delivery for application/product testing. I enjoy testing in terms of test execution and finding defects. My other interests include watching movies, painting and sketching.

