This post is about sending automated Emails with Amazon Simple Email Service(SES). We wanted to explore Amazon SES and hence implemented a sample Flask app to send an automated email.
What is Amazon SES?
Email is the heartline of any business these days. So sending an automated email,is an important part of business, whether it is the response to a particular query or email triggered with some event. Amazon Simple Email Service (Amazon SES) is a cost-effective cloud-based email sending service.
What is Flask App?
Flask is a lightweight Web Application Framework. This Web Application can be used for creating web pages, online forms etc.
How to build simple Flask App?
Here, we are going to see step by step procedure to build a Flask app. In this Flask app, we are going to build one Web Form where users can enter name and email and click on the submit button which will take you to a “Thank You” Web Page.
from flask import Flask, render_template, flash, request from wtforms import Form, TextField, validators from flask_bootstrap import Bootstrap DEBUG = True app = Flask(__name__) app.config.from_object(__name__) app.config['SECRET_KEY'] = conf.SECRET_KEY Bootstrap(app) #Reusbale Form to enter name and email class ReusableForm(Form): name = TextField('Name:', validators=[validators.required()]) email = TextField('Email:', validators=[validators.required()]) #Form Main Page @app.route("/", methods=['GET', 'POST']) def hello(): form = ReusableForm(request.form) #After entering valid name and email,returns you to "Thank you" page. if request.method == 'POST': name=request.form['name'] email=request.form['email'] if form.validate(): flash('Hello: {} {}'.format(name, email)) return render_template('thank_you.html',respondent1=name,respondent2= email) else: flash('Error: All Fields are Required') return render_template('index.html', form=form) if __name__ == "__main__": app.run(debug=True) |
Amazon SES Account,how to register?
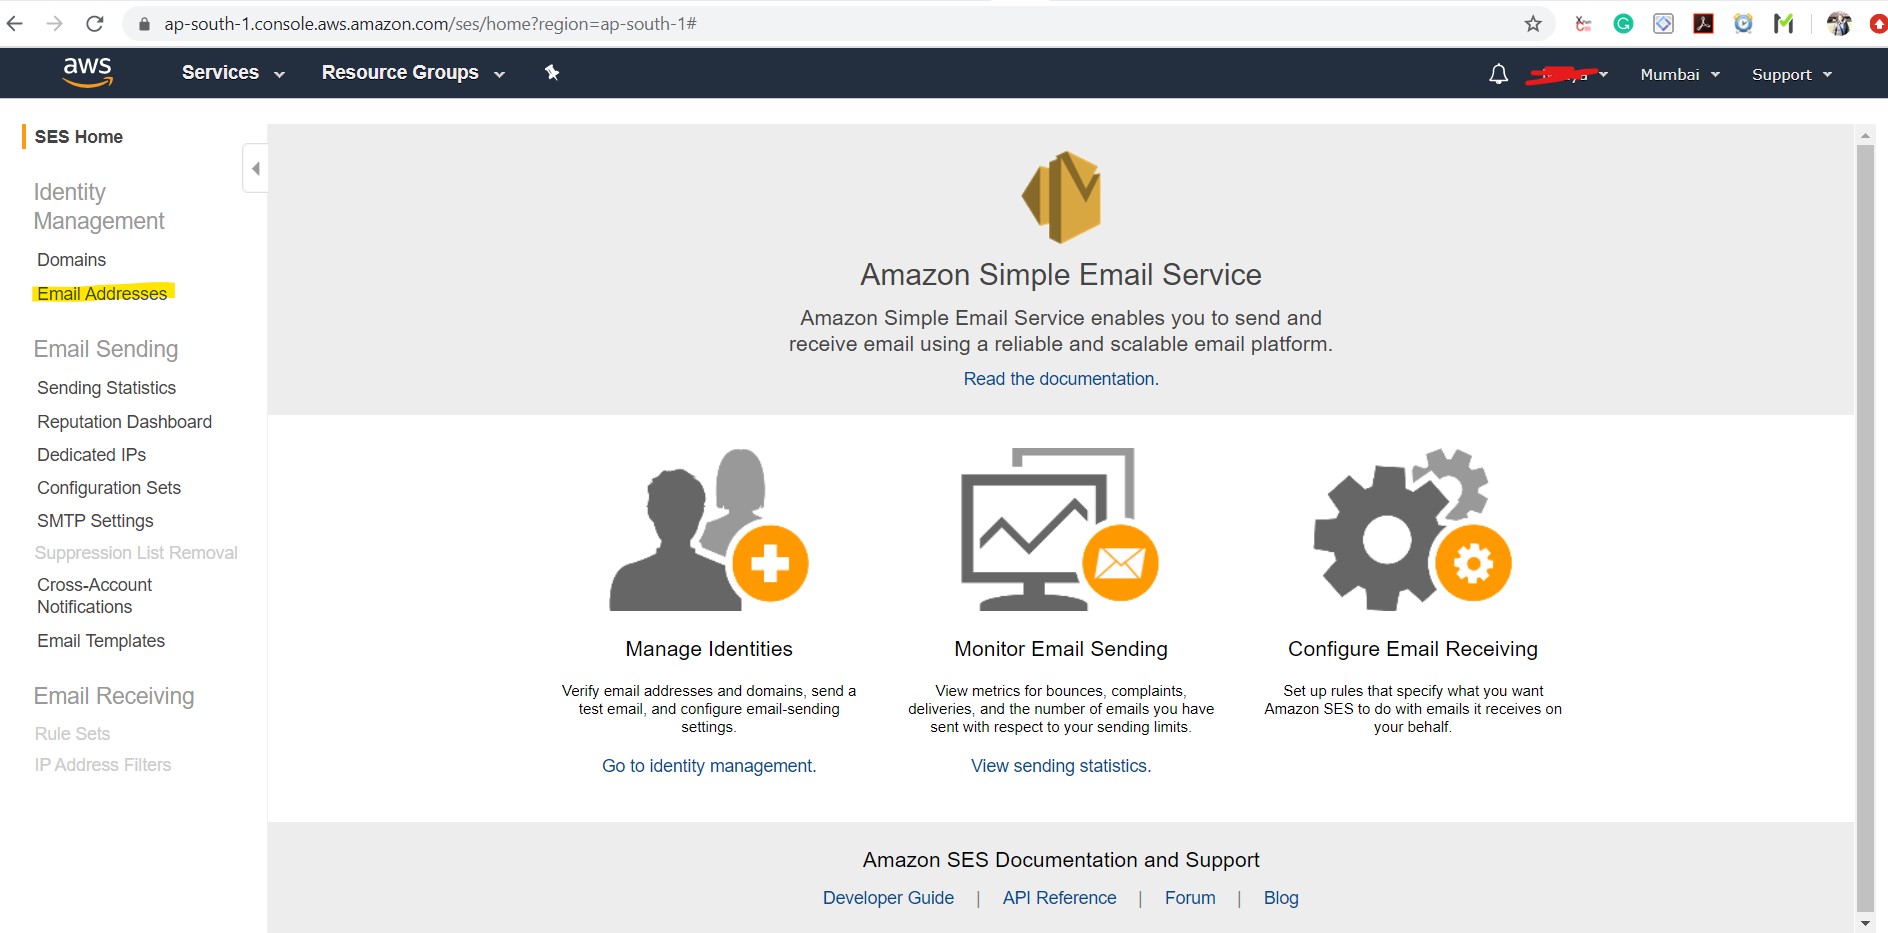
If you have an AWS account, click on the Email Addresses link as shown in the image below. Verify a new email address. You will be getting a link to verify the email address. Clicking on that link will verify your email address. Now you will be able to send emails to this verified email account. If you want to send an email without having to verify the email id you would need to upgrade to a premium account.
Set up
Next comes activating Setup with Virtual Enviornment. Steps can be as below:
1. Create Virtual Enviornment.
python3 -m venv sandbox |
2. Activate Virtual Environment.
cd sandbox
source sandbox/Scripts/activate |
3. Configure AWS credentials on Sandbox.
You can get these AWS credentials from AWS account details.
$ aws.cmd configure AWS Access Key ID [None]: AWS Secret Access Key [None]: xxxxxxxxxxxx Default region name [None]: xxxxxxxxxx Default output format [None]: (sandbox) Services@DESKTOP-J57BCFG MINGW64 ~/Flask_SES (master) $ |
Linking SES with Flask Application
Now next comes sending email to the email id which we enter on flask form. This email is sent through Amazon SES. Let’s have a look at how to integrate SES with Flask. Here we use Python library Boto3. Boto3 makes it easy to integrate your Python application with AWS services such as SES. Boto3 provides an easy to use, object-oriented API, as well as low-level access to AWS services. So we have used this library in our application as below:
In order to use session in flask you need to set the secret key in your application settings. Secret key is a random key used to encrypt your cookies and send them to the browser. Here have configured “secret key” in conf file.
from flask import Flask, render_template, flash, request from wtforms import Form, TextField, validators from flask_bootstrap import Bootstrap import boto3 from conf import aws_conf as conf DEBUG = True app = Flask(__name__) app.config.from_object(__name__) app.config['SECRET_KEY'] = conf.SECRET_KEY Bootstrap(app) #Reusbale Form to enter name and email class ReusableForm(Form): name = TextField('Name:', validators=[validators.DataRequired()]) email = TextField('Email:', validators=[validators.DataRequired()]) #Form Main Page @app.route("/", methods=['GET', 'POST']) def hello(): form = ReusableForm(request.form) #Send email using SES resource ses_client = boto3.client('ses') if request.method == 'POST': name=request.form['name'] email=request.form['email'] user_json = {} user_json['customer_email'] = request.form.get('email') user_json['comments'] = request.form.get('Thank you for your email') SUBJECT = 'You have a new mail' BODY_HTML = render_template( 'pretty_json.html', user_json = user_json ) # sending email with all details with amzon ses response = ses_client.send_email( Destination = { 'ToAddresses': [ email, ], }, Message={ 'Body': { 'Html': { 'Charset': conf.CHARSET, 'Data': BODY_HTML, }, 'Text': { 'Charset': conf.CHARSET, 'Data':conf.BODY_TEXT, }, }, 'Subject': { 'Charset': conf.CHARSET, 'Data': SUBJECT, },}, Source=conf.SENDER, ) if form.validate(): flash('Hello: {} {}'.format(name, email)) return render_template('thank_you.html',respondent1=name,respondent2= email) else: flash('Error: All Fields are Required') return render_template('index.html', form=form) if __name__ == "__main__": app.run(debug=True) |
How to run the app
Step 1: Run the script app.py as below:
python app.py |
Step 2: From Browser, run the app on localhost:5000. Add the name and email address. After entering valid details you will be getting mail on maid id entered and get the “Thank you” page.

And yes..with the flask form, when we enter the email address, we are able to successfully send the email. Please find this Github link for all the details.I hope you enjoyed this blog!!!
Happy testing!!!
I have started my career with Networking Domain.Have 8 years of relevant IT experience in network protocol testing.Experienced in functional testing of various networking protocols and Device-specific features.I was involved mainly in Manual Testing, Writing Test Plans, Updating Release Notes, Documentation for the same.Mainly worked on L4-L7 Load Balancers, Application Accelerators, Application Delivery Controllers.After that, I was looking for Automation Testing and Remote Work Opportunities.I found Qxf2 is the right place.Learning Python,Automation Framework, Exploring New Tools for Automation.My hobbies are listening classical,non-classical music .

