At Qxf2, our AWS environment hosts a multitude of applications, so monitoring the AWS services in real time is crucial for maintaining system reliability and performance. We’ve been using CloudWatch alarms to help us watch over our resources, these alarms used to send us emails whenever something went wrong. The problem was, it is often easy to miss these alerts because, let’s face it, who checks their email all the time? So, we decided to change things up. We integrated CloudWatch alarms with our official Skype channel to make sure we never miss an alert again. This integration requires multiple AWS services to work together. So, we decided to write this post as we thought it would be useful to anyone in the same boat as us.
Architecture of the alerting system:
Let’s first take a look at the architecture of our alerting system.

1. The CloudWatch alarm is setup to send the alert message to an SNS topic whenever an anomaly arises.
2. An SQS is subscribed to this SNS topic, to receive the messages from the SNS.
3. This SQS triggers a lambda function that sends the alert message to our Skype channel.
4. The lambda function processes the messages, filtering useful information and uses the API endpoint exposed by a Skype sender application that we developed previously to send the notification message to the desired Skype channel. For more information on how the Skype sender service is implemented, you can visit the following post.
Overview:
In this blog, we’ll guide you through the process of integrating AWS CloudWatch alarms with Skype. You’ll learn how to set up a notification system that ensures you never miss a critical alert. Here’s what we’ll cover:
- Setting up Lambda function to process the alert messages
- Setting up an SQS to trigger the lambda function:
- Setting up the Amazon SNS Topic to receive the alert messages from CloudWatch
- Setting Up the CloudWatch Alert to Monitor the Lambda errors
- Testing the integration
Setting up Lambda function to process the alert messages
Let’s first create a Lambda function that can process the alert messages and send the message to our desired Skype channel. I will be using Python to write the lambda code.
1. So, let’s start off by importing the required libraries.
import json import os import requests |
2. Next, let’s define our lambda handler function and fetch the alert message from the event
def post_message(event, context=None): "Post a message" print(f'The trigger event is: {event}') for record in event['Records']: full_msg = record['body'] |
3. Now, let’s process this message by calling a new function ‘get_alert_message’
alert_message = get_alert_message(full_msg) |
4. Let’s define our ‘get_alert_message’ function
def get_alert_message(full_msg): "Form alert message to send" alarm_message = json.loads(json.loads(full_msg).get("Message", {})) alarm_name = alarm_message.get("AlarmName", "Unknown Alarm Name") alarm_region = alarm_message.get("Region", "Unknown Region") alarm_state_reason = alarm_message.get("NewStateReason", "Unknown State Reason") alarm_state_change_time = alarm_message.get("StateChangeTime", "Unknown State Change Time") alarm_description = alarm_message.get("AlarmDescription", "Unknown Alarm Description") # Form meaningful alert message alert_message = ( f"<b>ALERT:</b> {alarm_name} in {alarm_region}\n" f"<b>Description:</b> {alarm_description}\n" f"<b>State Change Time:</b> {alarm_state_change_time}\n" f"<b>Reason:</b> {alarm_state_reason}\n" ) return alert_message |
As you can see in the above code, we will be extracting useful information from the alert message and form a new message that is ready to be sent to our Skype channel.
5. We can now go back to our lambda handler function and get the ID of the Skype channel that we intend to send this message to.
First let’s call a new function to fetch the Skype channel ID
channel_id = get_channel_id() |
Our Skype channel IDs are stored in an environment variable 'SKYPE_CHANNELS', in a dictionary-like structure. It maps user-friendly names to corresponding Skype channel IDs. So, lets define the get_channel_id() function, which would help us fetch the channel ID from the environment variables.
def get_channel_id(channel_name='test'): "Set the channel to send the message to" channels = json.loads(os.environ.get('SKYPE_CHANNELS').replace("'", "\"")) channel_id = channels.get(channel_name, 'provide default channel ID here') return channel_id |
6. We now have the message to be sent and the Skype channel ID. So, we are now ready to send our message to Skype. We will be using the API endpoint exposed by the Skype Sender application that we previously developed to send our alert message to the desired Skype channel.
url = os.environ['SKYPE_SENDER_ENDPOINT'] data = { 'API_KEY': os.environ['API_TOKEN'], 'msg': alert_message, 'channel': channel_id } response = requests.post(url, json=data, timeout=10) print(f'Received {response.json()} for {alert_message}') |
7. Here’s what our complete code would look like:
""" This script will send the Cloudwatch Alarm notification messages to Skype """ import json import os import requests def get_channel_id(channel_name='test'): "Set the channel to send the message to" channels = json.loads(os.environ.get('SKYPE_CHANNELS').replace("'", "\"")) channel_id = channels.get(channel_name, 'provide default channel id here') return channel_id def get_alert_message(full_msg): "Form alert message to send" alarm_message = json.loads(json.loads(full_msg).get("Message", {})) alarm_name = alarm_message.get("AlarmName", "Unknown Alarm Name") alarm_region = alarm_message.get("Region", "Unknown Region") alarm_state_reason = alarm_message.get("NewStateReason", "Unknown State Reason") alarm_state_change_time = alarm_message.get("StateChangeTime", "Unknown State Change Time") alarm_description = alarm_message.get("AlarmDescription", "Unknown Alarm Description") # Form meaningful alert message alert_message = ( f"<b>ALERT:</b> {alarm_name} in {alarm_region}\n" f"<b>Description:</b> {alarm_description}\n" f"<b>State Change Time:</b> {alarm_state_change_time}\n" f"<b>Reason:</b> {alarm_state_reason}\n" ) return alert_message def post_message(event, context=None): "Post a message" print(f'The trigger event is: {event}') for record in event['Records']: full_msg = record['body'] alert_message = get_alert_message(full_msg) # Print the alert message print(alert_message) channel_id = get_channel_id() url = os.environ['SKYPE_SENDER_ENDPOINT'] data = { 'API_KEY': os.environ['API_TOKEN'], 'msg': alert_message, 'channel': channel_id } response = requests.post(url, json=data, timeout=10) print(f'Received {response.json()} for {alert_message}') |
We are done with our lambda code. You can go ahead and deploy this lambda in your AWS account.
Setting up an SQS to trigger the lambda function:
Now, lets lets have a look at how we can set up an SQS that would trigger the lambda function that we just created.
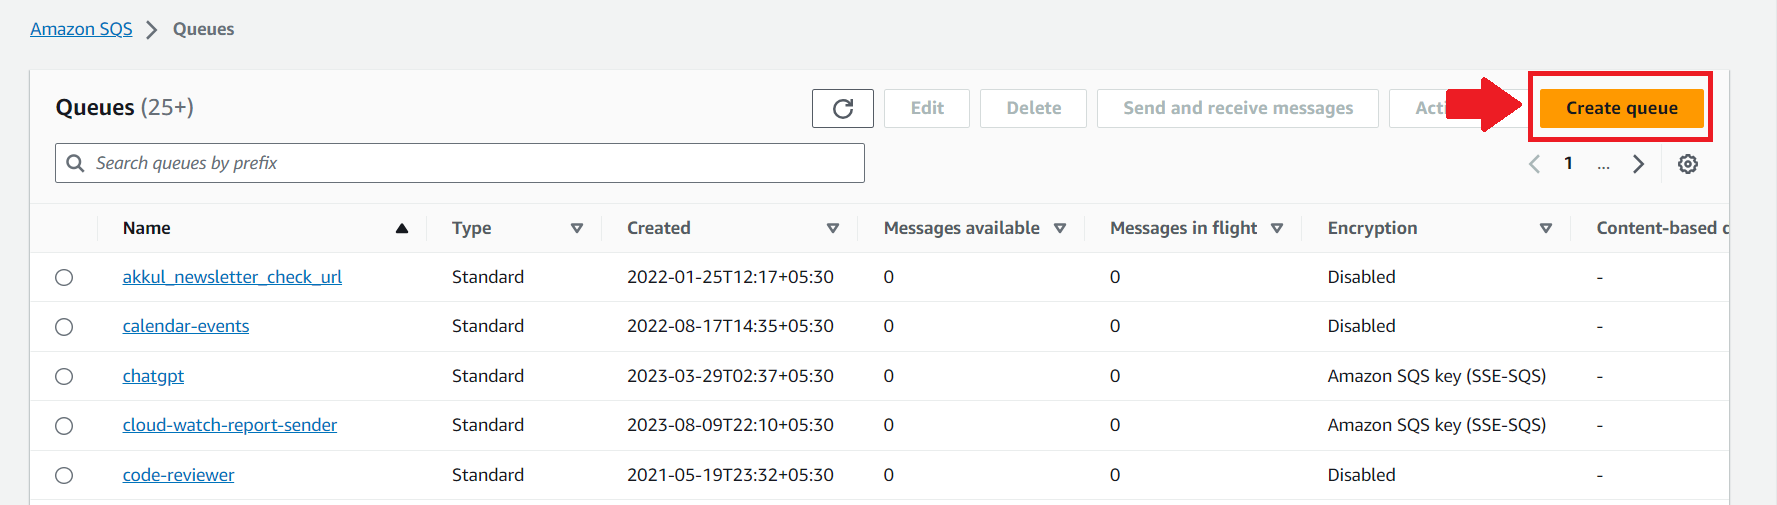
1. Sign in to your AWS Management Console and navigate to the AWS SQS service.
2. Create a new queue by clicking on the “Create Queue” button.
3. Provide a name for your queue and choose the type of queue you want to create (Standard or FIFO).In this case we will be using the standard queue
4. Configure the queue settings, such as the name, visibility timeout, and message retention period.
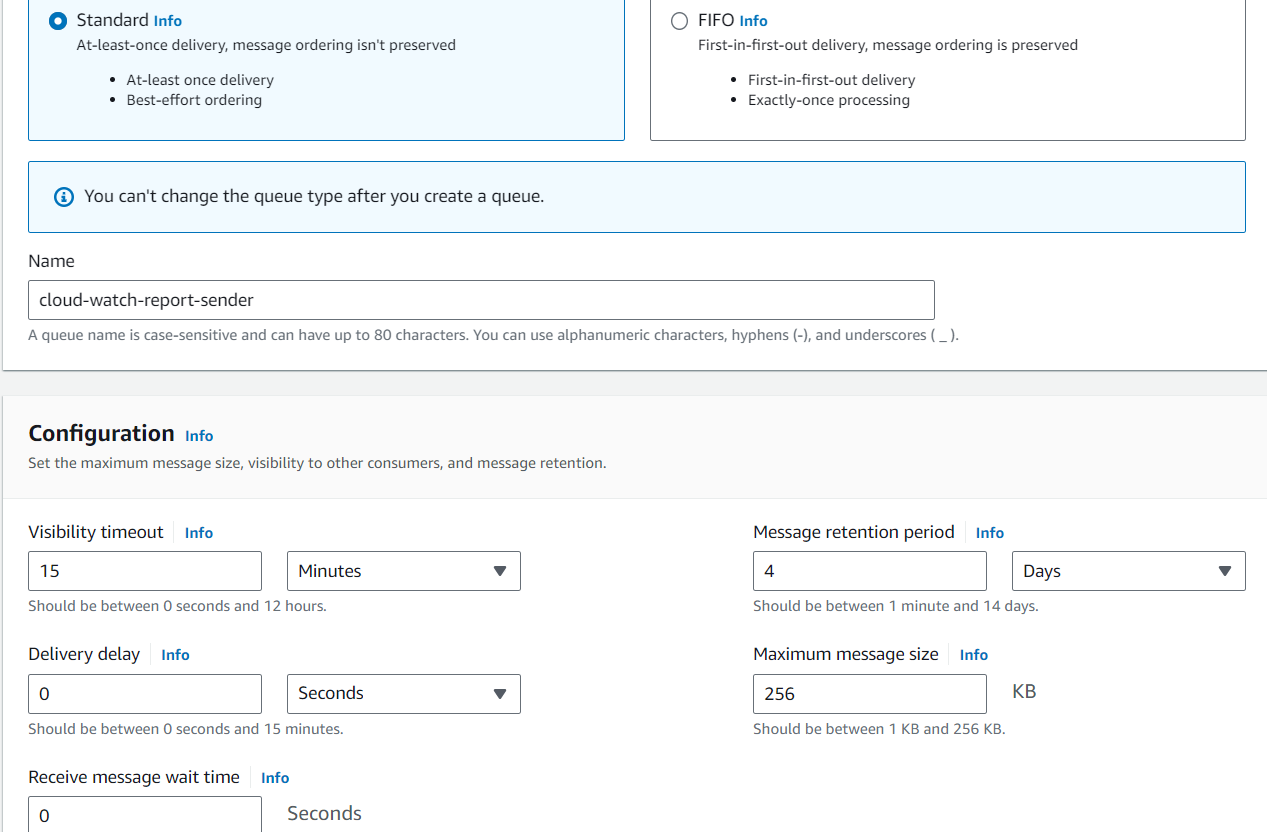
5. Click on “Create Queue” to create the SQS queue.
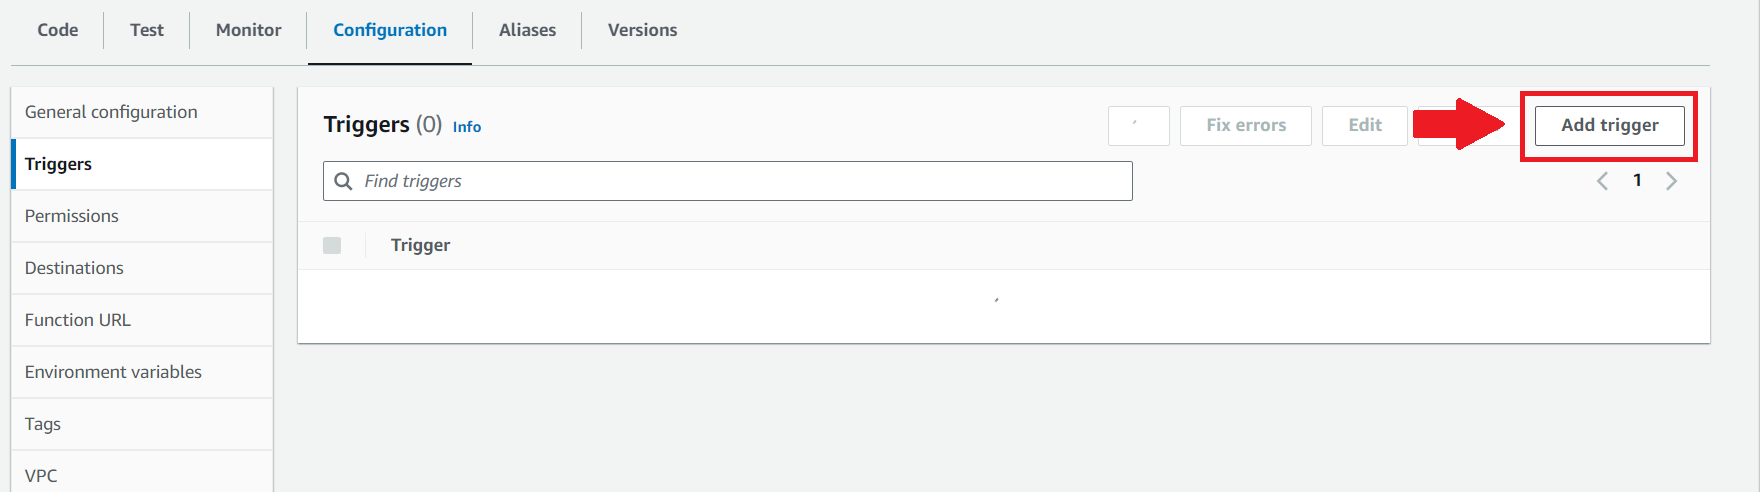
6. Next, navigate to the lambda function we deployed
7. In the Lambda function configuration, scroll down to the “Triggers” section.
8. Click on “Add trigger.”
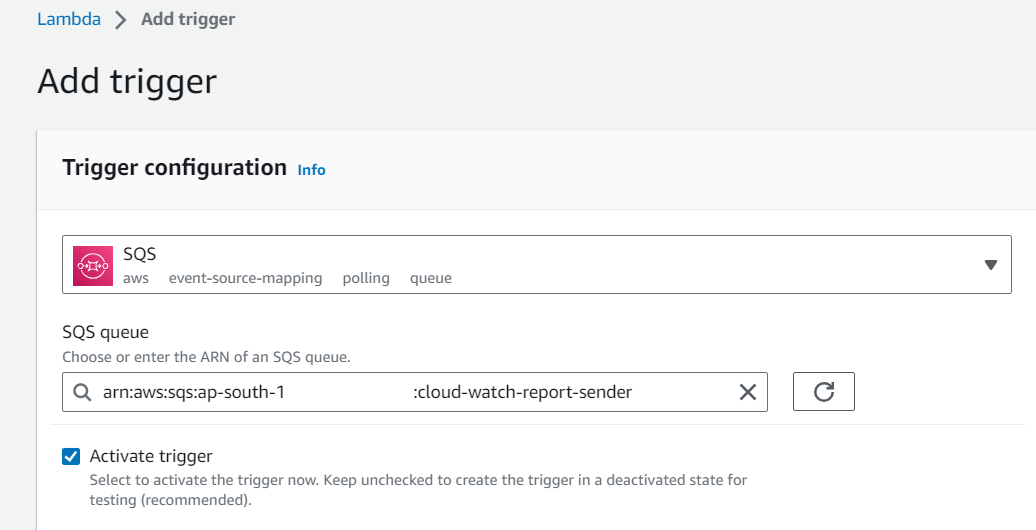
9. In the trigger configuration, select “SQS” as the trigger type.
10. Choose the SQS queue that you just created
Ensure that your Lambda function has the necessary permissions to access the SQS queue.
You can create an execution role for your Lambda function with permissions to read from the SQS queue if needed.
Setting up the Amazon SNS Topic to receive the alert messages from CloudWatch:
1. Sign in to AWS Console and navigate to the AWS SNS service section.
2. Create a New SNS Topic by clicking on the “Create topic” button.
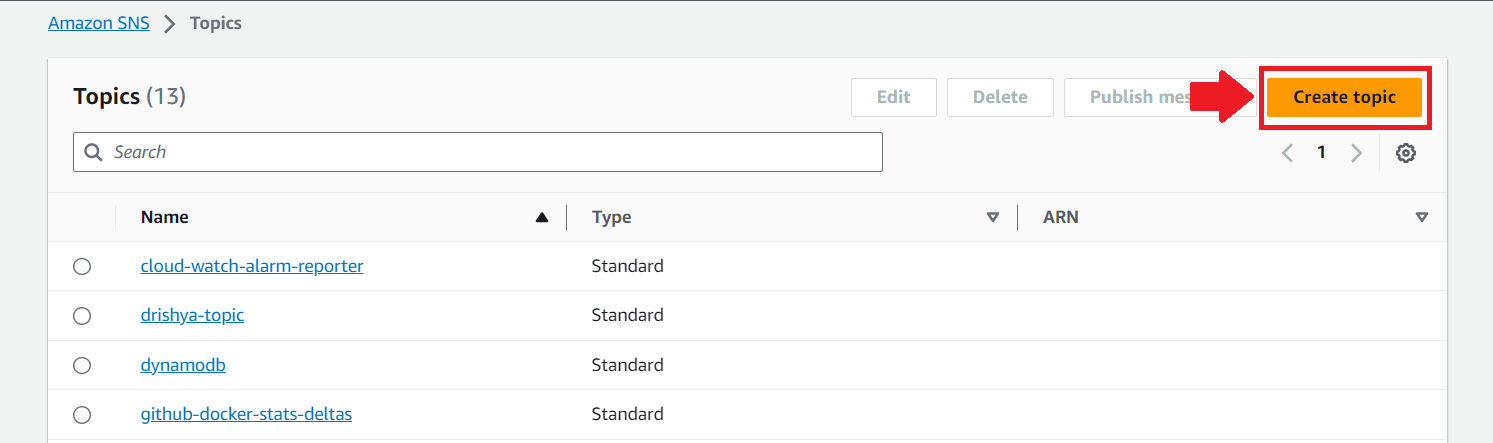
3. Provide a name and optionally a display name for your SNS topic.
4. Optionally, set a policy for access control to set the users who can publish message to the queue.
5. Click “Create topic” to create the SNS topic.
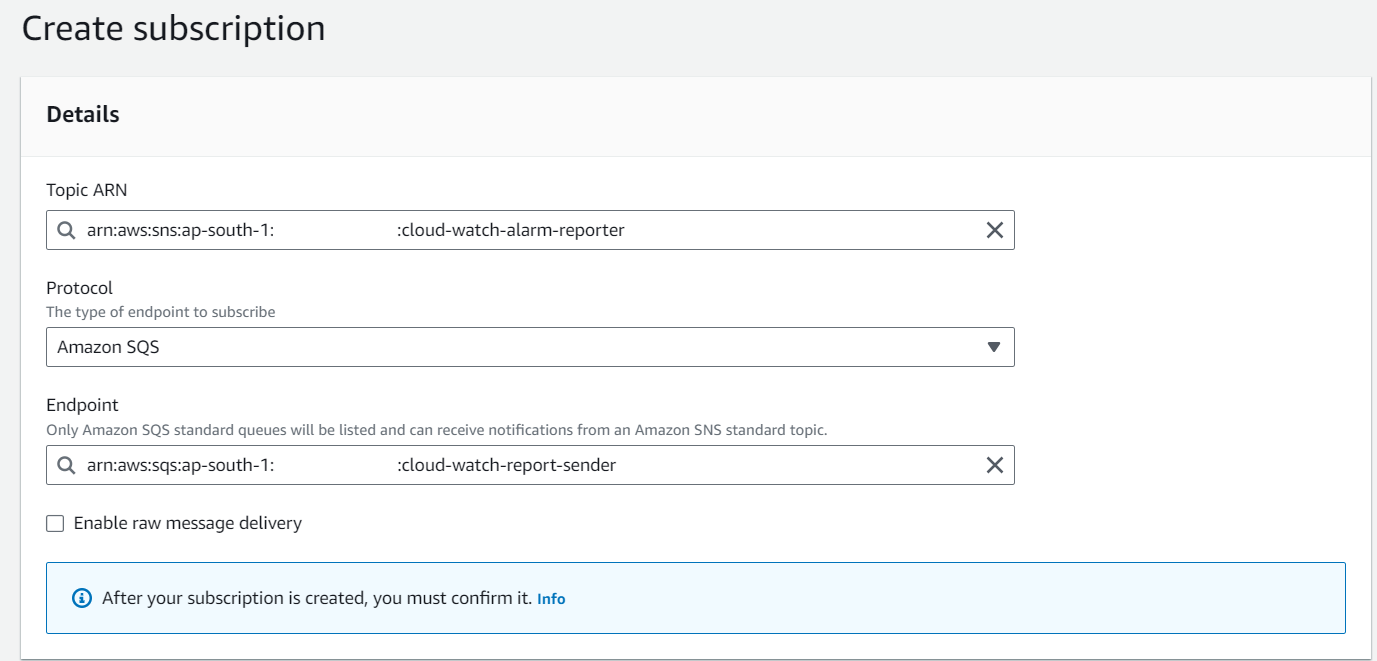
6. After creating the SNS topic, in the SNS topic details page, click on the “Create subscription” button.
7. Select the SQS queue as the protocol for the subscription.
8. Choose the SQS queue that we created previously, to subscribe to the SNS topic from the dropdown menu.
9. Confirm Subscription: An email or confirmation request might be sent to the SQS queue’s owner or the specified email address, depending on your setup. Follow the instructions in the confirmation request to confirm the subscription.
Now that we have our SNS topic ready as well, we can finally go ahead and setup our CloudWatch alarm.
Setting Up the CloudWatch Alert to Monitor the Lambda errors
1. Sign in to the AWS Management Console.
2. Open the CloudWatch Console.
3. Click “Create Alarm” in the CloudWatch dashboard.

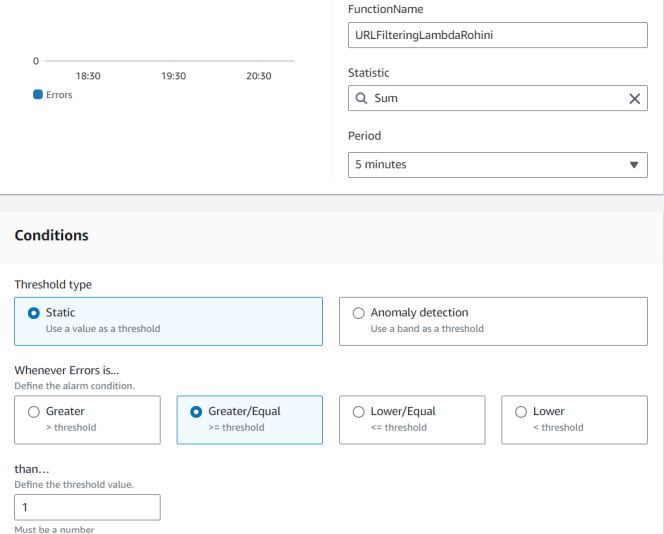
4. Under the “Browse” tab, select “Lambda” to filter Lambda-specific metrics.
5. Choose the Lambda function you want to monitor for errors.
6. Select the “Errors” metric, representing Lambda function errors.
7. Set threshold conditions. In my case I will set the condition as “Errors” greater than or equal to 1 for 5 minutes .
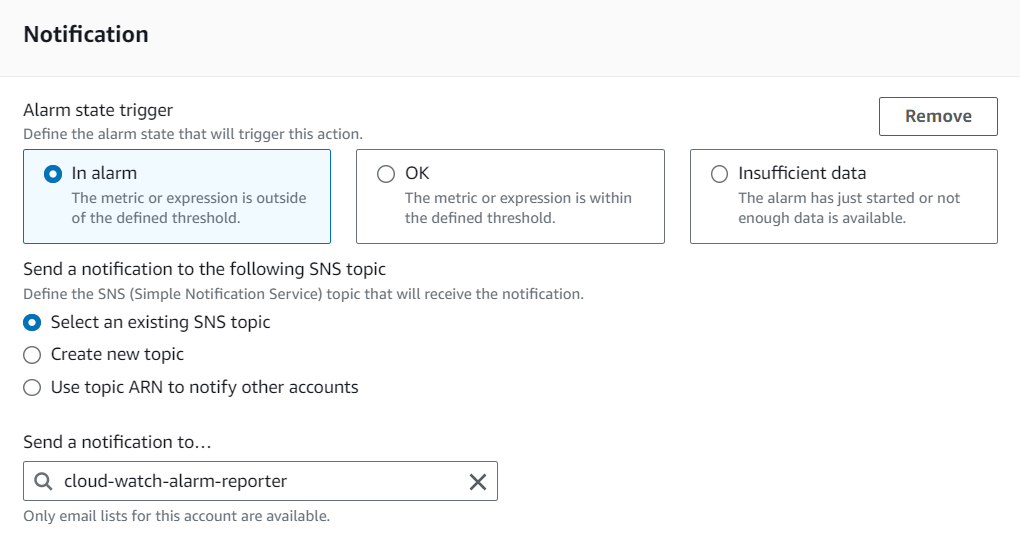
8. Next, configure actions by selecting the SNS topic we created previously, to send the notification message to.
9. Then, provide a name and description for your alarm.
10. Click “Create alarm” to create the CloudWatch alarm.
And there you have it, we are done setting up our alerting system. We can now go ahead and test if all the integrations are working fine.
Testing the integration:
1. To test if the integration is working as expected we can simulate an error condition that triggers your CloudWatch alarm. To do this, initiate an error in the monitored Lambda function. This can be done by creating a test event for the Lambda function that triggers the error condition.
2. Keep an eye on the CloudWatch alarm that you’ve configured to trigger when errors occur in your Lambda function. Check the CloudWatch console for the status of the alarm. It should transition to the “ALARM” state when an error is simulated.

3. Check the execution of your alert notification Lambda function. In the AWS Lambda console, you should see new executions triggered by messages arriving in the SQS queue. Verify that the function successfully processes these messages.
4. Verify your Skype chat or channel to ensure that the alert message is successfully received.

And there you have it!! We have successfully integrated our CloudWatch alarms with Skype. If you have any questions or need further assistance, feel free to reach out to us. Happy monitoring!
Hire technical testers from Qxf2
Qxf2 has smart, technical testers that have a wide range of technical skills. Our technical skills allow us to identify and implement high value tests that normal SDETs cannot. If you are struggling to find solid testers with deep technical expertise, reach out to us today!

I am a QA Engineer. I completed my engineering in computer science and joined Qxf2 as an intern QA. During my internship, I got a thorough insight into software testing methodologies and practices. I later joined Qxf2 as a full-time employee after my internship period. I love automation testing and seek to learn more with new experiences and challenges. My hobbies are reading books, listening to music, playing chess and soccer.

