Recently when I was searching for the screen capture tool to report my issues to QA team, I discovered that windows already have an inbuilt hidden tool in Windows 7, 8 and 10 versions called Problem Steps Recorder(PSR). Do you know about Problem Steps Recorder already? If you feel no, scroll down to learn more.
Problem Steps Recorder is a troubleshooting tool used for documenting issues. It’s intended for users to capture step by step actions and screenshots to illustrate a problem. Suppose if a QA wants to report an issue, he can quickly record each and every step actions using Problem Steps Recorder(PSR) which would make QA job simple and saves a lot of time in documenting the issues. This post helps you to capture screenshots without downloading any external tools in your Windows machine.
How to launch PSR on Windows machine:
If you are searching to launch PSR application from the Start menu or Control Panel, bad luck;)
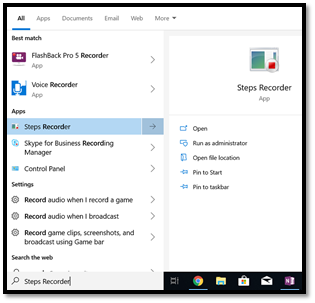
Check out the two ways to launch the Problem Steps Recorder(PSR)tool:
1) Launch the executable file by typing psr.exe from a command prompt or the search bar.
2) Type the keyword “record” or “steps recorder” in the search bar:
How to record the issues in Problem Steps Recorder(PSR):
When you click the “Start Record” button, PSR automatically captures and records the active window(regardless of whichever application you’re in) to show a step-by-step progression.

When you click the “Stop Record” button, a new window will open up, which shows a stepwise list of activities performed along with screenshots. For Example: Suppose you encounter an error during a software setup and you want to show this error and the steps you performed, you can simply hit “Start Record” button and then start the installation process. When you encounter an error message, you can hit the “Stop Record” button. Problem Steps Recorder(PSR) captures all the user activities from the start to stop recording period and gives a detailed step by the step information. You can save this file and share this information with the IT team to debug the issue.
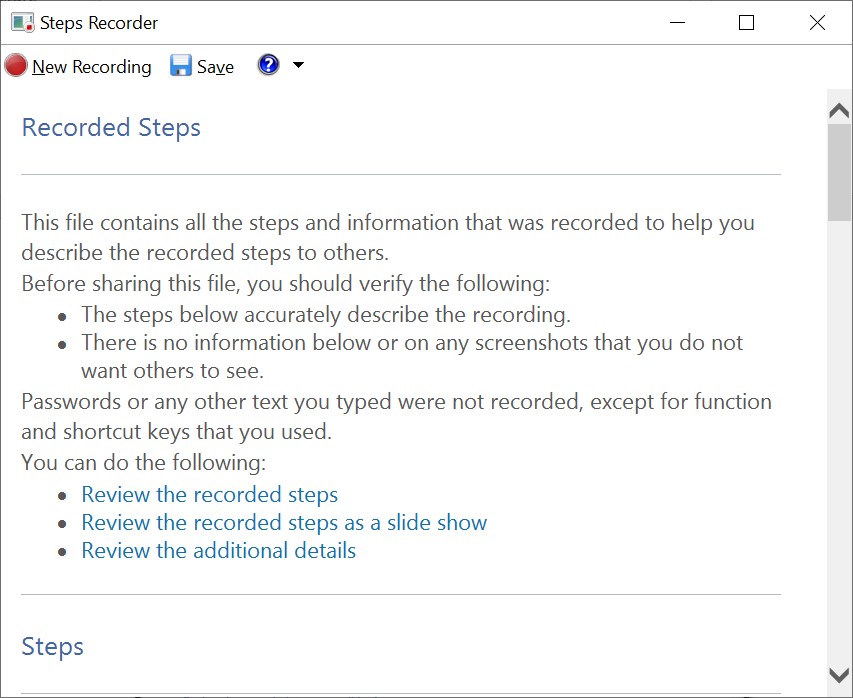
How to save the recorded steps
To save, click on the Save Button. The above-recorded steps can be saved to a.ZIP file, in a .mht format, which can be used to report the issue. You can attach the zip file in a mail or in a bug report depending on your requirement.
Tip: You can even pause or resume the recording process as per the requirement.
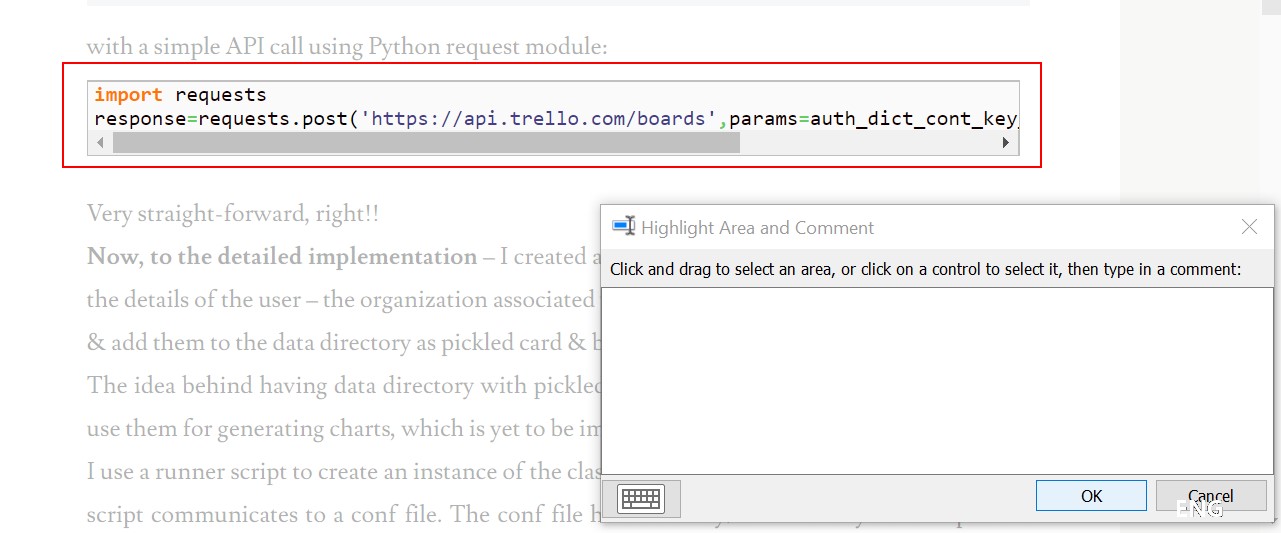
By clicking the “Add Comment” button, you have an option to highlight the text area which shows an error and add comments to it for better clarity. Just like the picture is shown below.
Tip: By default, PSR only saves the last 25 screenshots which help in reducing the size of the capture file. You can increase the number of screenshots to be stored in the Steps Recover “Settings”.
I hope you like this post! By using PSR tool, am sure you would spend your valuable time in other aspects rather than taking screenshots and documenting and writing the description for issue report.
References :
1. Record steps to reproduce a problem
2. How to Use the Problem Steps Recorder Tool in Windows?
[social_share style=”bar” align=”horizontal” heading_align=”inline” text=”” heading=”” facebook=”1″ twitter=”1″ linkedin=”1″ link=”” /]

I have 6 years of experience as a software tester working in cognizant in Healthcare, Insurance and Life science domains. After my testing venture as a Test Lead, I gained experience in Marketing, Sales and Digital technologies. I started working in startups and tech companies as a Business development executive and Marketing Analyst. One of my venture is Qxf2 and I feel fortunate to be part of this wonderful team. On the Personal verge, I love travelling, listening to music and playing acoustic guitar.

Excellent information. Thanks for this.
You are welcome Raghava
Good information, thank you for detailed steps..
Am glad that this post helped you. Welcome 🙂
Good information, thank for detailed steps..