This Appium tutorial will show you how to run automated tests on a real physical device. We estimate skimming through this post will take you 10 minutes. We estimate working through this post, step by step, will take you about 90 minutes. In this post we will cover getting setup with Appium, interfacing with real devices, writing and running Appium tests. We also briefly introduce you to multiple ways to locate UI elements.
NOTE: If you have an Android phone handy, you can follow along easily. If not, you may be interested in a previous post showing you how to get started with Appium on an emulator.
Why this post?
There are two compelling reasons for this post.
1. Mobile devices are taking over the world
In recent times there is a lot of interest in mobile testing. And rightly so. The mobile space is growing. The apps are the new cool thing. The mobile space is ideal for software testers looking to learn new things and keep current.
2. Lack of high quality tutorials on mobile automation
One big challenge in the mobile automation space is the the limited amount of information about the technologies. Quality sources of information on mobile automation is very limited.
So here is a high quality and informative tutorial for the hands-on tester who wants to get started with Appium and mobile automation on a physical mobile device.
Why Appium?
There are quite a few number of tools out there in the mobile automation market like MonkeyTalk, Calabash, Robotium, etc. Each has its own advantages and limitations. Some of these tools require an agent to be installed, the application has to be recompiled so that the tool can interact with the mobile app, etc. However Appium is built on the idea that testing native apps shouldn’t require including an SDK or recompiling the app. Appium is also an open source project – so if you are not happy with it, you can contribute and enhance it. Appium tests run against both on iOS and Android. For me, Appium (while still being extremely immature), looks to be the standout technology that will own the mobile UI automation space. Appium reminds me of the early Selenium versions I used. Based on history, I think Appium will be the front-runner in the mobile UI automation space.
Step by step Appium tutorial
We have already shown you how to run an Appium test using an emulator in one of our previous posts. In this post, I will show you how to test an app using a real device. Being a tennis fan, I decided to test a tennis app. On my Android phone, I downloaded the ATP/WTA app and decided to automate some of the functionality of this app. I will also show you how to navigate through different pages in the app using different locator strategies, get data from a table using Appium and Python and how to use the uiautomator to find UI components of the page.
Overview
1. Appium setup
2. Connect to an Android device
3. Select an app to test, get its package and activity name
4. Use uiautomatorviewer to find UI components of the application
5. Write the test
6. Start and launch Appium server console
7. Run the test
8. View the test result
STEP 1: Appium setup
Download and install Android SDK and Appium along with Appium’s client libraries for Python. Installations are fairly straight forward. However if you need help, please refer to the setup section in our previous blog for a more detailed process on how to set up Appium on your machine.
STEP 2: Connect to an Android device
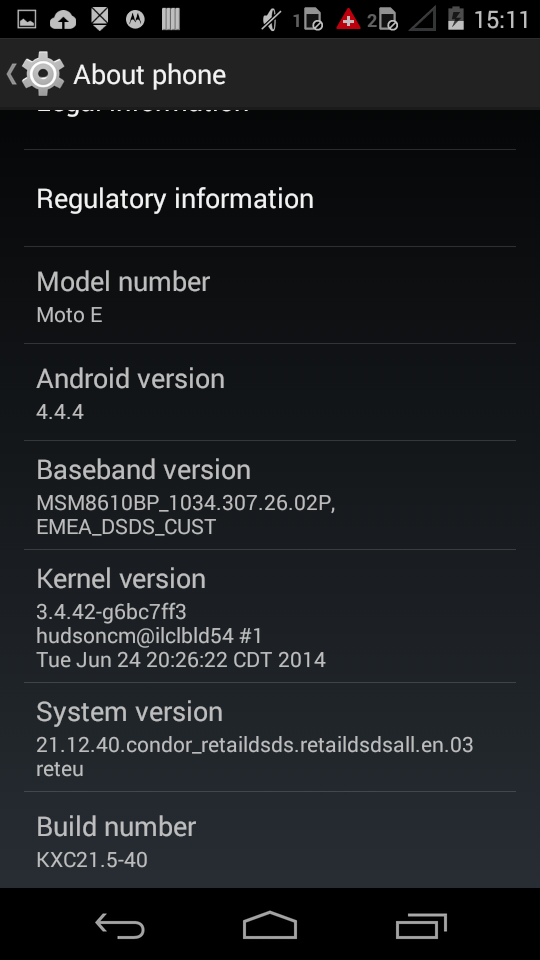
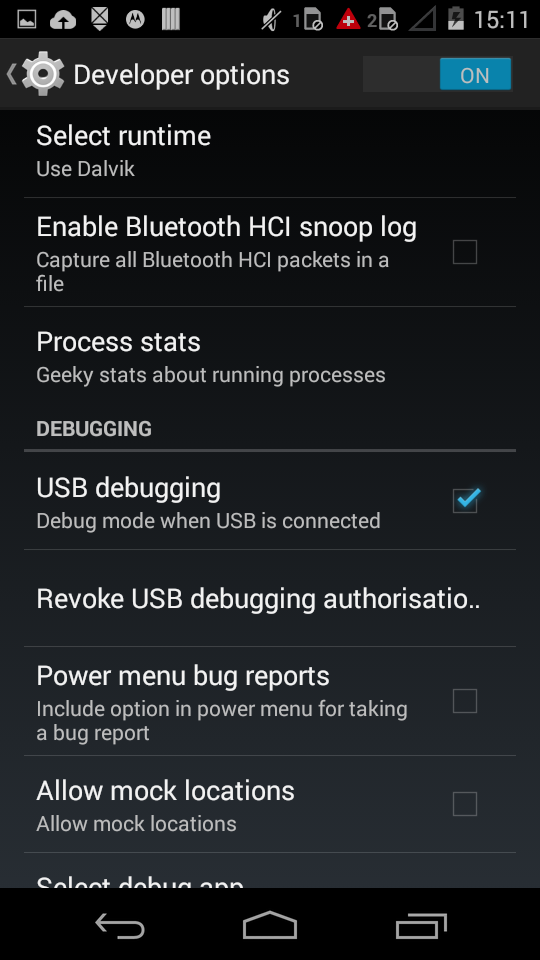
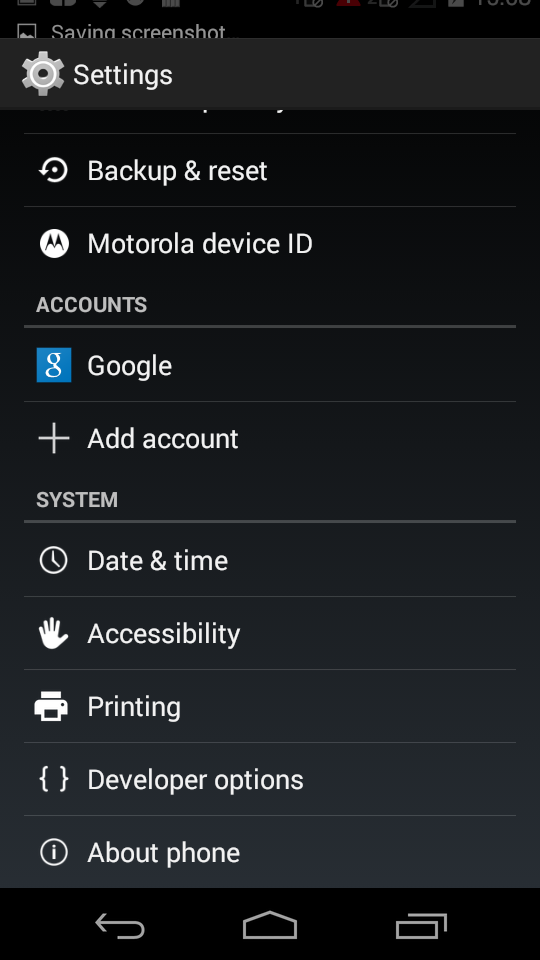
You have to enable USB debugging in your phone to be able to run your test scripts. For this, first, you need to enable “Developer options” by navigating to Settings/About Phone and tapping build number seven times. You will get a notification saying that you’re now a developer. Ignore it – you are still a tester ;). Once you are a developer you need to navigate to “Developer options” and enable the USB debugging option. You can refer to this link for more details
Note: On some devices, you may have to download some device drivers to connect your phone to the PC
STEP 3: Select an app to test, get its package and activity name
You can go to Google Play Store and download the ATP/WTA app. We will automate some of the functionality like navigating to the ATP Singles Rankings view to assert that Novak Djokovic is the first player listed and also get his personal details from the table in players view.
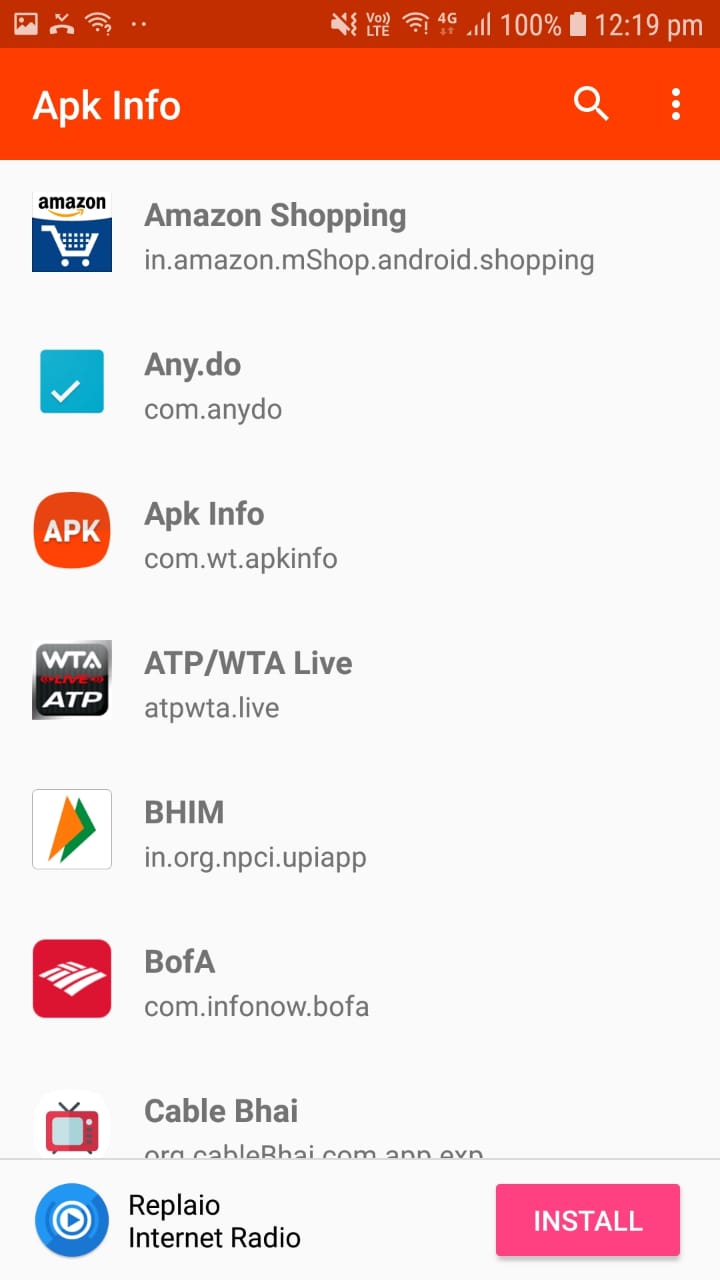
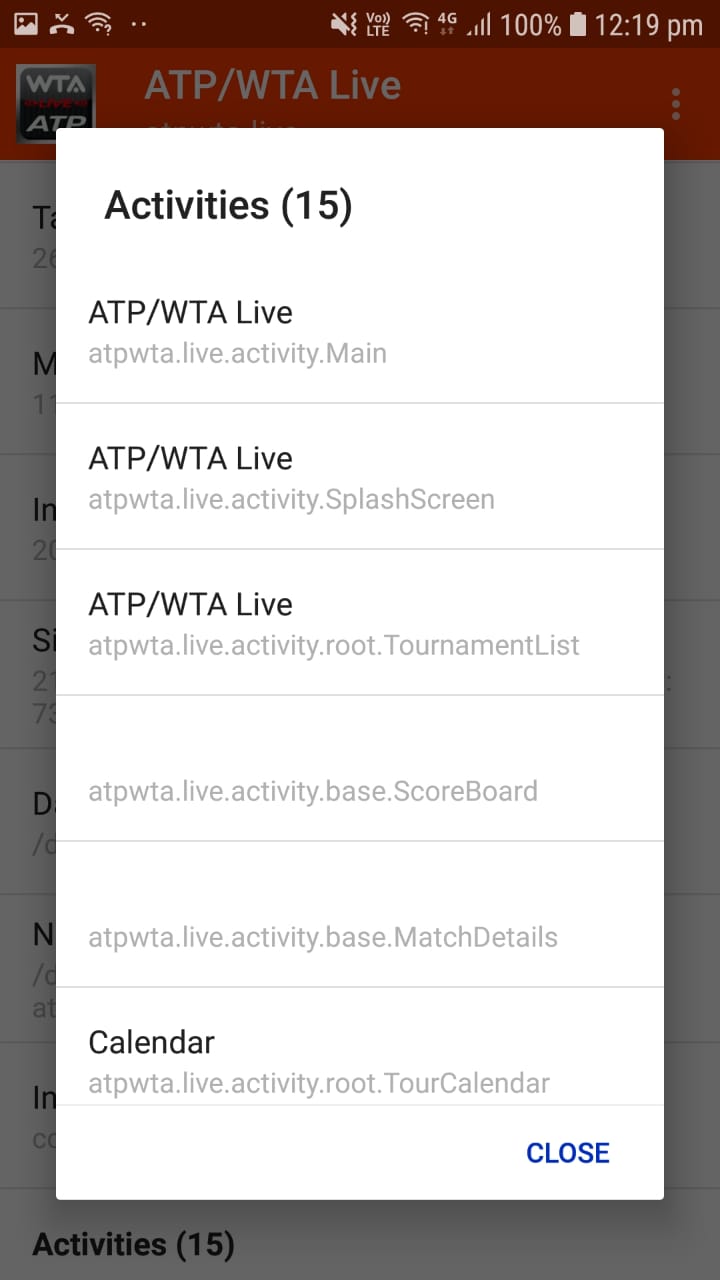
In order to start the app we would need the app Package and Activity name. We can get these details from the apk file of the app. Instead of downloading the apk file and looking into app manifest file for this detail, we can also download some really cool apps which can get you these details. Apk Info is one such app which you can download from Play Store and get the app Package and Activity details. Just download the app and click on Apk Info Icon which will list all the apps on your device. Click on your app to get the details required as shown below
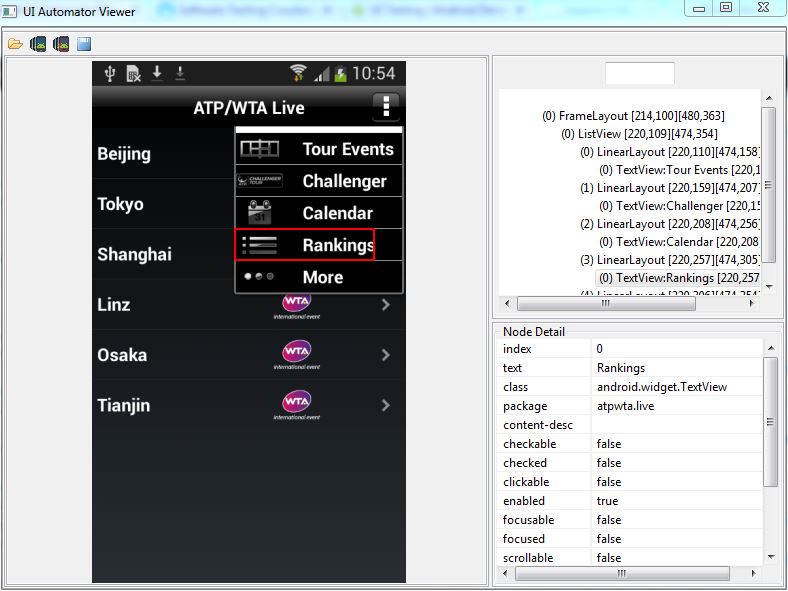
STEP 4: Use uiautomatorviewer to find UI components of the application uiautomatorviewer is a GUI tool to scan and analyze the UI components of an Android application. To click or to navigate to any components in your app you need to identify the UI components of your application. Using uiautomatorviewer you can take the snapshot of the UI screen on any Android device that is connected to your machine. You can then inspect the layout hierarchy and view the properties of the individual UI components that are displayed on the device.
Connect your Android device to your machine and open the app you are testing. In your machine open a terminal window and navigate to the path $android-sdk /tools and run the command to open Uiautomatorviewer
$ uiautomatorviewer |
To capture a screen, click the “Device Screenshot button” in the uiautomatorviewer tool. The screenshot of the page in your device is captured. You can move over the snapshot in the left-hand panel to see the UI components identified by the uiautomatorviewer. You can view the component’s properties listed in the lower right-hand panel, and the layout hierarchy in the upper right-hand panel.
STEP 5: Write the test
We will launch the ATP WTA app using the package and activity name we found out and then navigate through various pages using different locator strategies. While we do not recommend using multiple locator strategies, we are doing so in this tutorial only to make you aware of your options. Then we will confirm that Novak Djokovic is the top player listed in ATP Singles Rankings list view and get his personal details from a table in Players view.
""" Qxf2: Example script to run one test against ATP_WTA app using Appium The test will navigate to ATP Singles Rankings list and confirm that Novak Djokovic is the top player listed and get his personal details from a table. """ import unittest, time, os from appium import webdriver from time import sleep class Android_ATP_WTA(unittest.TestCase): "Class to run tests against the ATP WTA app" def setUp(self): "Setup for the test" desired_caps = {} desired_caps['platformName'] = 'Android' desired_caps['platformVersion'] = '4.4' desired_caps['deviceName'] = '$ Your device name' # Since the app is already installed launching it using package and activity name desired_caps['appPackage'] = 'atpwta.live' desired_caps['appActivity'] = '.activity.Main' # Adding appWait Activity since the activity name changes as the focus shifts to the ATP WTA app's first page desired_caps['appWaitActivity'] = '.activity.root.TournamentList' self.driver = webdriver.Remote('http://localhost:4723/wd/hub', desired_caps) def tearDown(self): "Tear down the test" self.driver.quit() def test_atp_wta(self): "Testing the ATP WTA app " self.driver.implicitly_wait(30) time.sleep(5) # click on Navigation Bar MainMenu by finding element by xpath menubar = self.driver.find_element_by_xpath("//android.widget.Spinner[@resource-id='atpwta.live:id/NavBarMainMenuSpinner']") menubar.click() # From list of options available click on Rankings by finding element using uiautomator rankings = self.driver.find_element_by_android_uiautomator('new UiSelector().text("Rankings")') rankings.click() # click on ATP Singles by finding element using id singles = self.driver.find_element_by_id('atpwta.live:id/RankingsListItem') singles.click() # Assert that Novak Djokovic is the top listed player elmnt = self.driver.find_element_by_id('atpwta.live:id/Player1TV') self.assertEqual('Novak Djokovic', elmnt.get_attribute('text')) print elmnt.get_attribute('text') elmnt = self.driver.find_element_by_xpath("//android.widget.LinearLayout[@index=0]") elmnt.click() # Print the contents of Table listed for the top ranked player table = self.driver.find_element_by_android_uiautomator("new UiSelector().className(android.widget.TableLayout)") rows = table.find_elements_by_class_name('android.widget.TableRow') for i in range(0, len(rows)): cols = rows[i].find_elements_by_class_name('android.widget.TextView') for j in range(0, len(cols)): print(cols[j].get_attribute('text')+" -- "), print("") #---START OF SCRIPT if __name__ == '__main__': suite = unittest.TestLoader().loadTestsFromTestCase(Android_ATP_WTA) unittest.TextTestRunner(verbosity=2).run(suite) |
STEP 6: Start and launch Appium server
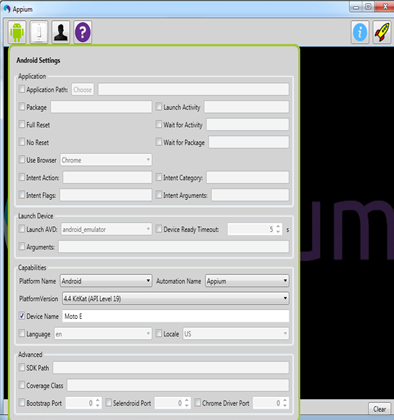
Start Appium server console by double-clicking on the Appium file. Click on the ‘rocket’ icon to launch the Appium node server.
Please refer to the 6th and 7th step of our previous blog if you need more details on starting appium server.
STEP 7: Run the test
You can run the test any way you like. We will run it using the command prompt. The app gets launched in your device and navigates to a different screen.


STEP 8: View the test result
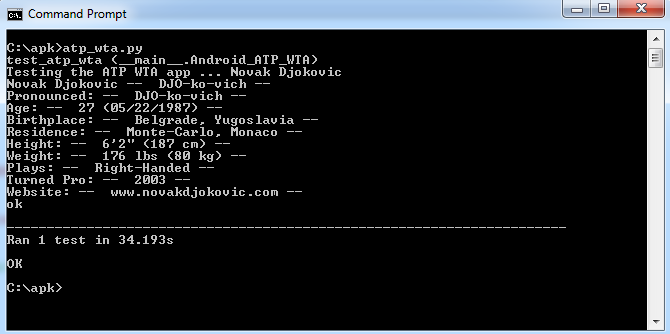
Game. Set. Match. You learnt how to do mobile automation using Appium on a real device! If you are still hungry for more, take a tour of our open-sourced web and mobile automation framework.

I am a dedicated quality assurance professional with a true passion for ensuring product quality and driving efficient testing processes. Throughout my career, I have gained extensive expertise in various testing domains, showcasing my versatility in testing diverse applications such as CRM, Web, Mobile, Database, and Machine Learning-based applications. What sets me apart is my ability to develop robust test scripts, ensure comprehensive test coverage, and efficiently report defects. With experience in managing teams and leading testing-related activities, I foster collaboration and drive efficiency within projects. Proficient in tools like Selenium, Appium, Mechanize, Requests, Postman, Runscope, Gatling, Locust, Jenkins, CircleCI, Docker, and Grafana, I stay up-to-date with the latest advancements in the field to deliver exceptional software products. Outside of work, I find joy and inspiration in sports, maintaining a balanced lifestyle.


Hi Avinash,
Have you written a similar blog for automating an iOS app using a real device?
If yes, please provide its link.
If no, could you please advise me a tool which can be used to find the UI component of an iOS application?
Any help would be highly appreciated.
Hi Mohit,
We haven’t written any blog on automation on a iOS app. You can probably refer to below link which would help you in finding UI component for iOS apps:
https://developer.apple.com/library/ios/documentation/DeveloperTools/Conceptual/InstrumentsUserGuide/UsingtheAutomationInstrument/UsingtheAutomationInstrument.html
Hi Avinash,,
Is there any issue in appium when we use the While loop.
I am trying to use while loop to install a data from a data sets. the while loop seems to not break after it completed data sets install. Is there anything i am doing wrong here.
basically the text “AVAILABLE DATASETS” will be disappear once all data set got install.
here is my part of the code.
while self.driver.find_element_by_android_uiautomator(‘new UiSelector().text(“AVAILABLE DATASETS”)’):
Single_Datasets=self.driver.find_element_by_xpath(“//android.widget.ImageButton[@resource-id=’com.bsgwireless.fac:id/download_button’]”)
Single_Datasets.click()
any suggestion how i can use the while loop with appium for android. any other example also fine. i can get idea.
Thanks
selva
Hi Selva,
You can probably use an if condition inside the loop and break. But i am not completely sure of this and may need to see what exactly the app does.
Thanks
Avinash Shetty
Hi Ainash,
Thanks for your information. you are correct i did use that but it fails. I mean it did not break.
Appium close the app.
Thanks
Selva
Hi Avinash,
Do you know any python or Xcode command via which I can change the language of my iPhone and iPad to Chinese or some other language after which , I will run my script on that particular device?
Also, on working with iOS devices, if I want to automate the app in many languages, then I can’t find the element by name because that is different in every locale. So, do we only have the option of xpath to do this or is there any other option?
Mohit, we have not take a serious shot at iOS automation yet. Researching your problem, here are interesting links we found:
a) Using UI Automation to automatically generate all screenshots of your iOS app, on different device types, in different locales by running a single command: https://github.com/jonathanpenn/ui-screen-shooter
b) Using UIAutomation for Multilanguage iOS Applications
https://www.innoq.com/blog/phaus/2011/01/using_uiautomation_for_multila.html
c) These link gives you a peek into how Internationalization is done:
http://www.raywenderlich.com/64401/internationalization-tutorial-for-ios-2014
http://createdineden.com/blog/2014/december/12/language-changer-in-app-language-selection-in-ios/
http://stackoverflow.com/questions/9416923/ios-how-to-change-app-language-programmatically-without-restarting-the-app?rq=1
Re your question about finding elements in this kind of Multilanguage tests, it depends. If you are interested in simply checking of the element performs its job, then locate the element by something other than name. If you care about the correctness of the label/name of the element, then keep an expected mapping of language:word and programatically pull in the name.
Hi
I would like to compare screenshot taken by appium with manaul screenshot. Could you let me know how i can do this in python.
Thanks
selva
Hi Selva,
Arun had earlier replied for a similar comment. Please find his comments below
“I have used image comparison in the non-mobile space. In various projects I used EggPlant, AutoIT and Screenster. I have also written my own Python scripts using a combination of ImageMagick and Python Image Library. How you end up doing image recognition depends on your specific use case. Sometimes its just a matter of scaling the image to a known size, comparing it with a reference and then working out the co-ordinates that you want to click. Other times, it may be a matter of super-imposing two images and taking a pixel by pixel difference (with an error margin) to determine an exact match.
Having said all that, I would strongly discourage you from using image comparisons unless that is literally your last unexplored alternative. To date, I have not found a single tool that is based on image recognition that is even moderately robust enough for professional use.”
You can also probably try automated-screenshot-diff.
Hi,
Thanks for this information. I will look at this. sorry to get back to you so late.
Regards
selva
Can you help me with the code to compare screenshot taken from real android device .
Hi Sonal,
Can you refer the below link for comparing your images?
https://qxf2.com/blog/compare-pdfs-python/
Thanks
Hi Avinash,
I am trying to automate an android app using appium- keyword driven framework which includes methods (keywords) as actions . So if i use UNITTEST for these kind of frameworks will it be feasible? or any suggestion on this?
Hi Vaishali,
May be UnitTest would work. Can you let me know what language you are using here?
Hi,
I am very new to automation …. Moving from manual to automation now.
Trying to install Appium but there is no proper documentation to install Appium on Ubuntu.
Looking forward for the same.
Thankyou in Advance.
good articles……………..
Hi Deepa,
I found this stack overflow answer useful while trying to install appium in Ubuntu
http://stackoverflow.com/questions/22374416/how-to-setup-appium-in-ubuntu-for-android/23263166#23263166
The steps which i tried are following
Download latest nodejs linux binaries from http://nodejs.org/download/
Extract into a folder that doesn’t need sudo rights to access, for example your home folder.
tar -xvf
Add the following line to your ~/.bashrc file.
export PATH=$PATH:/bin
Open a now terminal and do
npm install -g appium
Ran into permission issue while running appium
So i set the path of appium bin in .bashrc file as
export PATH=:$PATH
After this I could run appium successfully.
Regards
Avinash Shetty
Hi Avinash,
This atricle is very good.i am very new to appium.i am trying to automate one android app.for that i need to login by using my company credentials.before doing complete login i am trying to validate the login functionality.that means if i didnt enter the username, i am getting ptompt like field shouldnt be empty message.i am not able to capture that prompt in uiautomator and not able to print that message.unable to attache the image here to give you the clear explanation.
please give some suggestions.its very useful for me.
Hi Giri,
Thanks for your comments. Probably you can check with the Development team. They should have details on the prompt so that you can capture it.
Regards
Avinash Shetty
Hi Avinash,
I am using the same method self.driver.get_screenshot_as_file(filename) for taking a screenshot and it was working fine for me till now.
But now, I have to take a screenshot of a tooltip which appears after you click an element. That tooltip appears on the screen for one second.
Since there is inherent delay of 1 sec in executing every command on a real device., I miss taking that particular screenshot.
Any ideas which you can think of taking this screenshot?
Thanks in advance.
Hi Mohit,
I am not aware of any 1 sec delay. As per appium documentation (http://appium.io/slate/en/master/?javascript#server-flags) IOS has a weird built-in unavoidable delay. We patch this in appium. If you do not want it patched, pass in this flag.
I am not sure how you can capture the tooltip if it goes off immediately before you capture the screenshot.
Regards
Avinash
Hi friends am using python language to automate mobile apps with appium,
Can any one suggest me how to do datadriven/keyword driven testing in appium using python script.
your help will be well appriciated.
Thx
vinod
hello,
Can you provide me the exact link to download the python library for this project, also we dont require to import selenium jar files in the projet as we do in case of TestNG frameworks?
Hi Jennifer,
You can download python 2.7.10 from link here. After this install selenium using pip (pip install -U selenium). This installs selenium in python site packages. Once you have this you don’t need to add selenium jar’s to the project separately as you do in Java.