Problem: How do I connect to BrowserStack from CircleCI’s build containers?
Why this post?
A recent Qxf2 client was using CircleCI for their continuous integration and deployment needs. Partnering with our client, we had identified that it would be useful to run a minimal set of automated GUI tests as part of their continuous integration and deployment process. The GUI tests needed WebGL enabled browsers. So we figured we would use BrowserStack to run the tests against the local CircleCI build container. You can find bits and pieces of the solution in different places on the Internet. We thought we would document the complete solution in one place.
For this tutorial, we will pretend that we are testing a static web application with exactly one html page. This is sufficient to illustrate how you would go about connecting to BrowserStack from the CircleCI container. We will create a repository for the static web application and write a Selenium test to test the page. Our deploy process is simply getting setup with an NGINX server and copying over the html file to the appropriate directory. For the test, we will create a BrowserStack tunnel and access our html page on BrowserStack.
Detailed Steps
1. Check in your application to GitHub
2. Create a Selenium test to run on BrowserStack
3. Sign up with CircleCI and integrate with your GitHub Project
4. Configure CircleCI
5. Check-in the circle.yml file
STEP 1. Check in your application to GitHub
To keep things simple I will add a single html page which we can host later in CircleCI. I will add an html page which we had created earlier as part of Selenium training that we conduct. You can get the source from this link.
STEP 2. Create a Selenium test to run on BrowserStack
BrowserStack is a cross-browser testing tool, to test public websites and protected servers, on a cloud infrastructure of desktop and mobile browsers. If you are not familiar how to create a selenium test with BrowserStack, you can refer to our earlier post on BrowserStack . We have created a “tests/” directory within our GitHub repository and placed our test in it.
""" Selenium Test to run on BrowserStack: Visit the Qxf2 Tutorial Page and assert the title """ import unittest from selenium import webdriver from selenium.webdriver.common.desired_capabilities import DesiredCapabilities class Qxf2_Tutorial_BrowserStack_Test(unittest.TestCase): "Example class written to run Selenium tests on BrowserStack" def setUp(self): desired_cap = {'os': 'Windows', 'os_version' : '7', 'browser': 'Firefox', 'browser_version':'36', 'browserstack.debug': 'true', 'browserstack.local':'true' } self.driver = webdriver.Remote(command_executor='http://USERNAME:[email protected]:80/wd/hub',desired_capabilities=desired_cap) def test_qxf2_selenium_tutorial(self): "An example test: Visit Qxf2 Tutorial Page and assert the title " # The driver.get method will navigate to a page given by the URL self.driver.get("http://localhost/selenium-tutorial-main.html") # Assert the Page Title self.assertIn ("Qxf2 Services: Selenium training main", self.driver.title) # Close the browser window self.driver.close() def tearDown(self): self.driver.quit() if __name__ == '__main__': unittest.main() |
Note 1: Remember to set the “browserstack.local” capability to “true”
Note 2: Replace USERNAME:ACCESS_KEY with your BrowserStack username and access key
STEP 3. Sign up with CircleCI and integrate with your GitHub Project
You can sign up with CircleCI using your GitHub account and give CircleCI permission to access your repository on your behalf. CircleCI supports open source projects with 3 free containers for high build throughput.
When you add a GitHub repository to CircleCI, CircleCI automatically adds a deploy key that references this repository. Whenever there is a new commit to your repository CircleCI detects and pulls the latest code and runs the test.
STEP 4: Configure CircleCI
## Customize dependencies
dependencies:
  pre:
    - sudo pip install -U selenium
    - sudo apt-get install nginx
    # Copy the html page to nginx default public www location
    - sudo cp ./selenium-tutorial-main.html /var/www/html/selenium-tutorial-main.html

## Running Tests
test:
  pre:
    # MAGIC HAPPENS HERE
    # Download the browserstack binary file to create a tunnel
    - wget "https://www.browserstack.com/browserstack-local/BrowserStackLocal-linux-x64.zip"
    # Unzip the browserstack binary file
    - unzip BrowserStackLocal-linux-x64.zip
    # Run the file with your access key
    - ./BrowserStackLocal $BROWSERSTACK KEY:
        background: true

  override: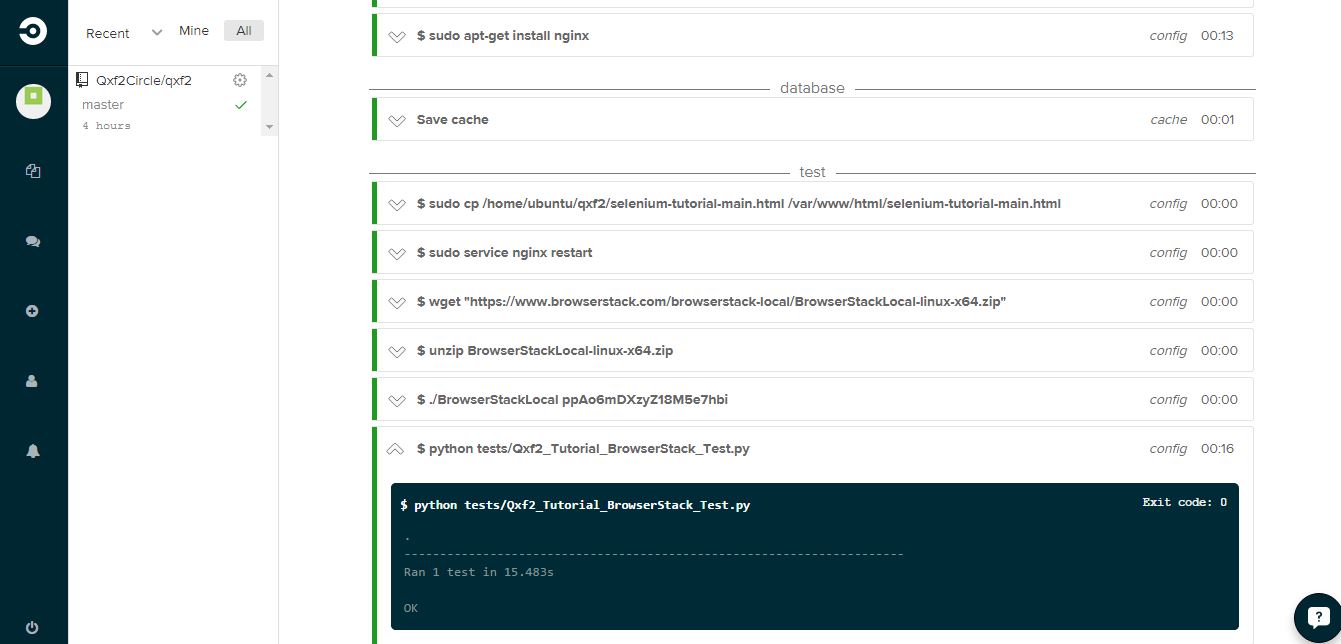
- python tests/Qxf2_Tutorial_BrowserStack_Test.py |
Let us closely examine our YAML file.
a. The CircleCI environment provides the libraries, languages, and databases needed for most development work. However, if you need to install a particular version of software CircleCI makes it easy to set up your environment to meet your testing needs. In our example we will install NGINX to host our page and Selenium to run our test. We will also deploy our static web application by copying over the file to NGINX’s default public www location.
dependencies:
  pre:
    - sudo pip install -U selenium
    - sudo apt-get install nginx
    # Copy the html page to nginx default public www location
- sudo cp ./selenium-tutorial-main.html /var/www/html/selenium-tutorial-main.html |
b. Running the test:
We need to perform some actions before we run our tests. CircleCI “pre:” command can be used to run commands before CircleCI’s inferred commands. And this section is where the magic happens. We simply translated the setup outlined here into a format CircleCI understands.
We download the BrowserStack binary file
wget "https://www.browserstack.com/browserstack-local/BrowserStackLocal-linux-x64.zip"</em> |
Then we unzip the downloaded file to obtain the BrowserStackLocal executable
- unzip BrowserStackLocal-linux-x64.zip |
Finally we run the file with our BrowserStack access key. You can look up your BrowserStack access key by simply logging in to your BrowserStack and accessing your account information.
- ./BrowserStackLocal $BROWSERSTACK KEY:
background: true |
By default CircleCI runs nosetests when it finds a unittest.py file. However we can override and run custom test commands from your circle.yml file on bash prompt.
python tests/Qxf2_Tutorial_BrowserStack_Test.py |
STEP 5: Check-in the circle.yml file
Now once you check-in your circle.yml file, CircleCI will find the new commit to your test and run the test. Make sure the circle.yml file is added to your root directory.

And that’s how you can connect to BrowserStack and run your GUI automation against a CircleCI build container.

I am a dedicated quality assurance professional with a true passion for ensuring product quality and driving efficient testing processes. Throughout my career, I have gained extensive expertise in various testing domains, showcasing my versatility in testing diverse applications such as CRM, Web, Mobile, Database, and Machine Learning-based applications. What sets me apart is my ability to develop robust test scripts, ensure comprehensive test coverage, and efficiently report defects. With experience in managing teams and leading testing-related activities, I foster collaboration and drive efficiency within projects. Proficient in tools like Selenium, Appium, Mechanize, Requests, Postman, Runscope, Gatling, Locust, Jenkins, CircleCI, Docker, and Grafana, I stay up-to-date with the latest advancements in the field to deliver exceptional software products. Outside of work, I find joy and inspiration in sports, maintaining a balanced lifestyle.

