Problem: Many Start up companies don’t have their test cases organized
TestRail is comprehensive web-based test case management software to efficiently manage, track and organize your software testing efforts.
Why this post?
Many start ups use google docs or excel to document their test cases. Though the process may be easier and cheaper to maintain, they are not visual in nature and the problem arises as your testing team starts growing. Tracking, organizing and managing the test cases becomes challenging. That’s where a good test management tool would come in very handy. In this blog we will explore about “TestRail” a popular test management tool which can solve most of your problems related to test case management with ease.

Overview
In this post we will cover the following:
1. TestRail Installation
2. Adding Projects
3. Test Cases and Test Suite
4. Milestone
5. Todos and Assign Test Cases
6. Test Run
7. Reports
8. Integration with Defect Tracking tool
9. TestRail API
1. TestRail Installation:
TestRail offers a 30 day free trial period using which you can checkout its rich features. You can either Download TestRail and install it on your own Server or Try the cloud/online edition of TestRail. Getting set up using the cloud edition is much easier and more popular.
Once you get the available web address along with credentials you are ready to go…
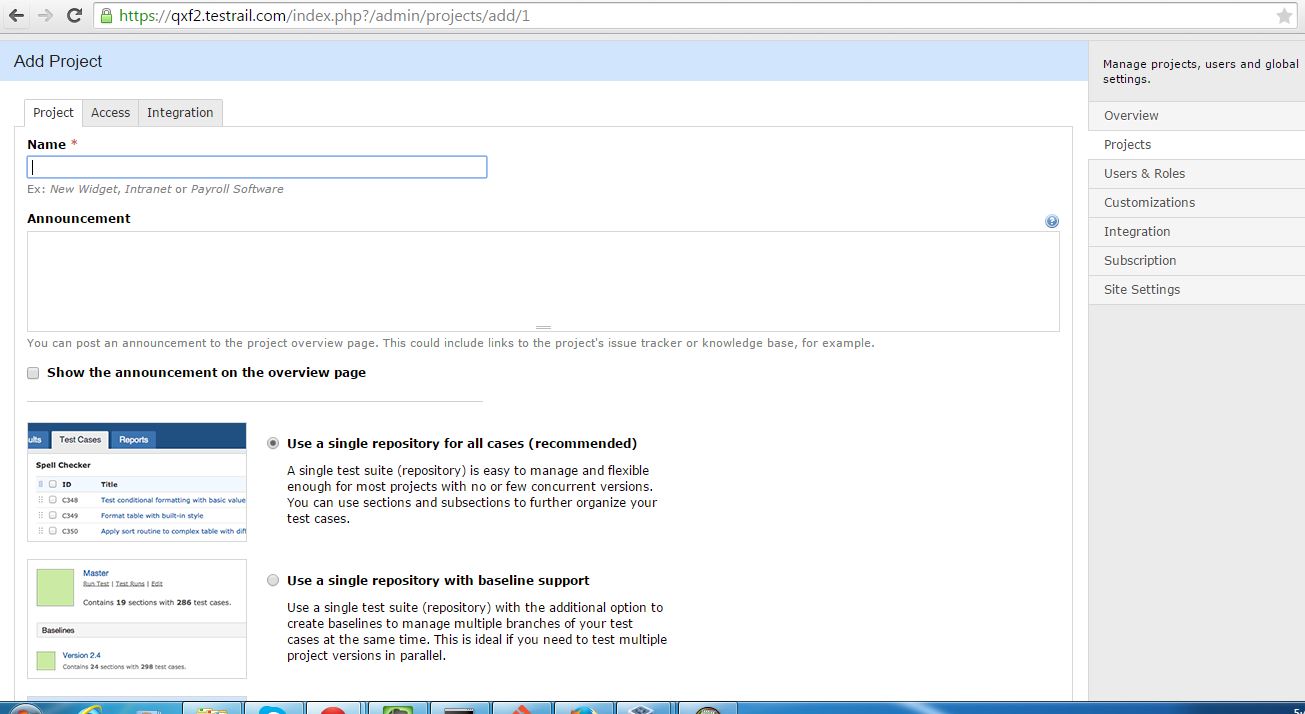
2. Adding Projects: Once you login to your TestRail account you are taken to the Dashboard page where you can see all your existing Projects and also add new Projects. As a general rule you create a new project for each of your project or actual product. You can create a new project by clicking on the Add Project link from the dashboard page and then entering the requested details on the resulting page.
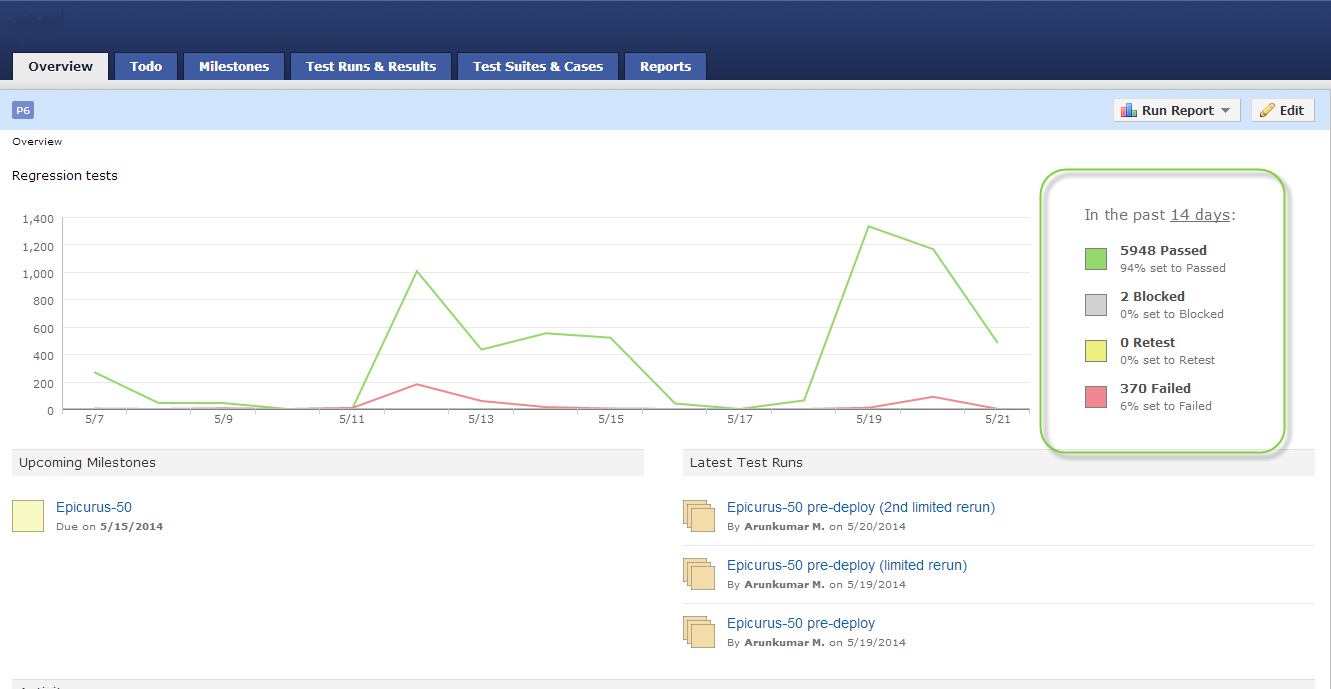
The Project Overview page provides us lot of information like Project progress chart, Upcoming Milestones, Latest test runs, detailed history as well as the activity details
3. Test Cases and Test Suite:
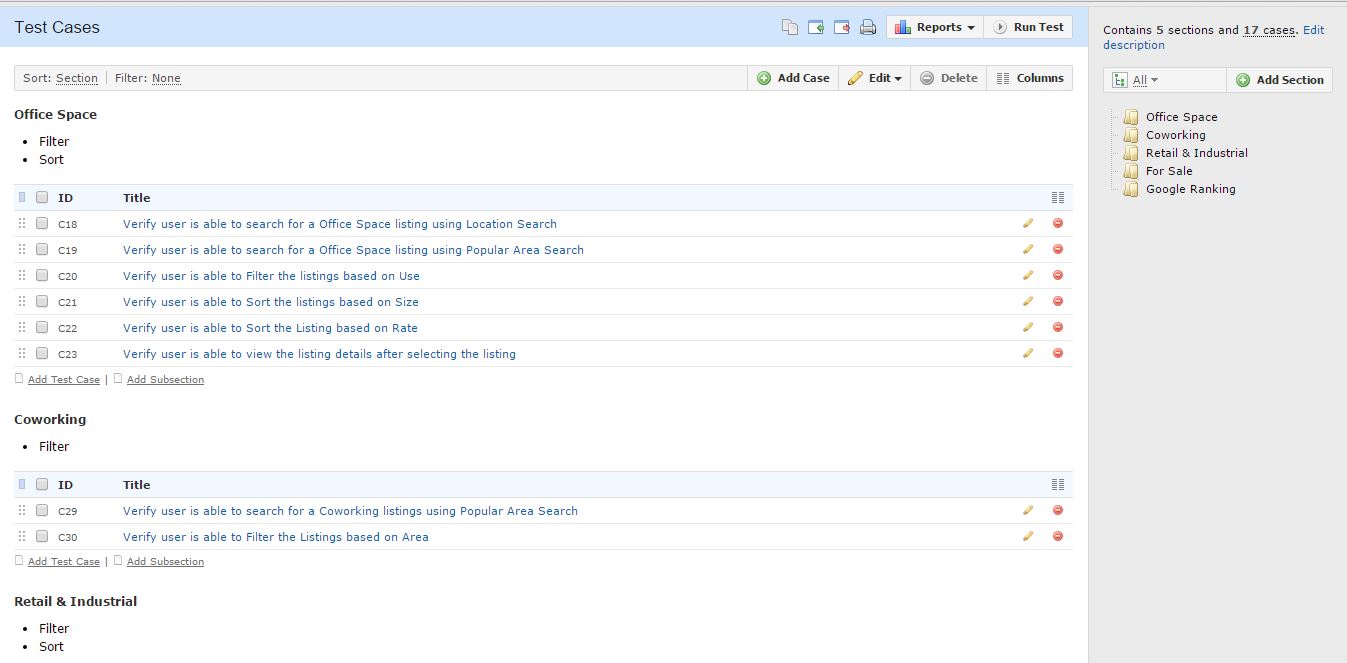
In the Test Case page you can document all your Test cases. In case you have lot of test cases which need to be organized under different sections you can group related test cases under different Test suite. You can also add sub section in case you need to further organize larger test suites
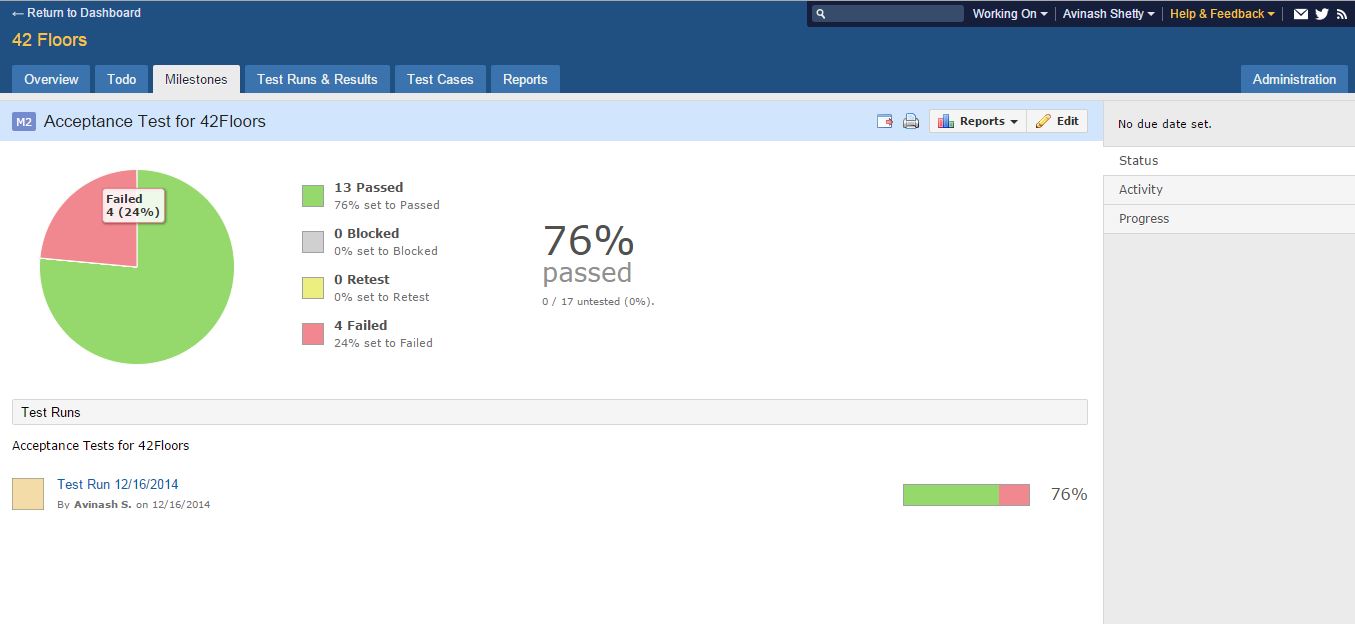
4. Milestone:
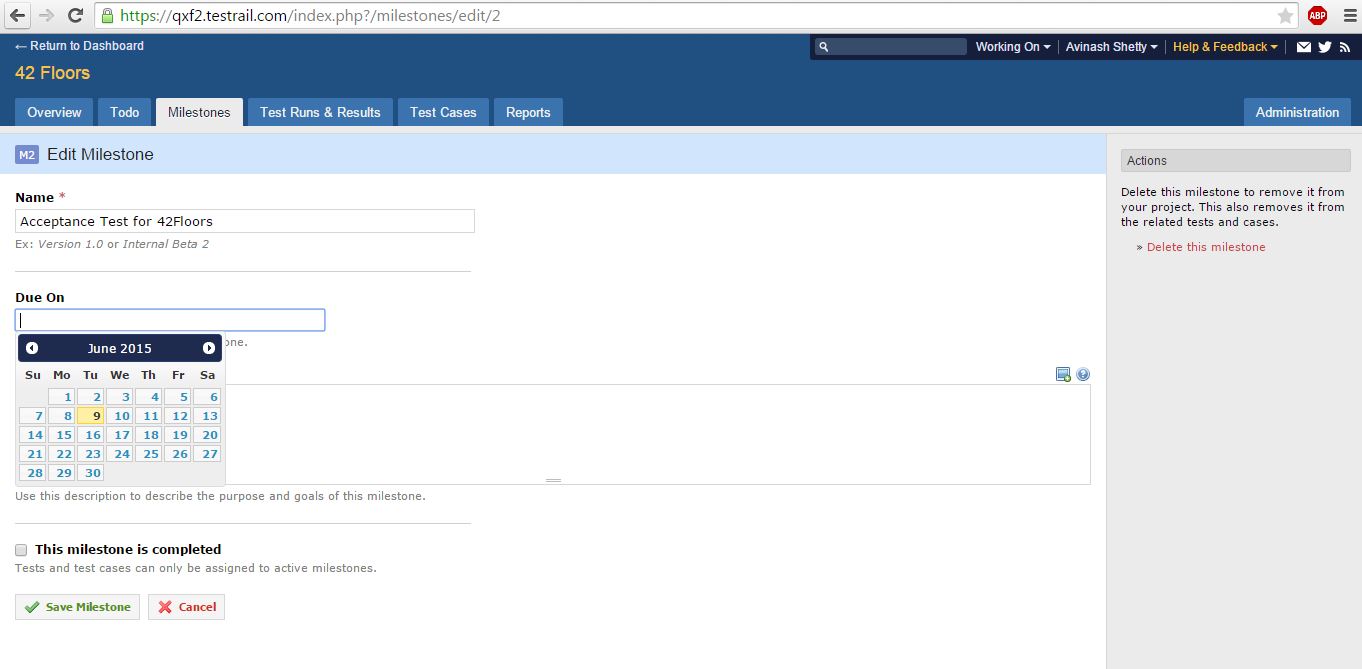
You can use Milestone to manage your Project Milestones such as different releases, iterations etc using TestRail. Below screenshot shows a Milestone as Acceptance Test for one of our Project. You can also have Test Runs or Test Plans for Specific Milestones so that you can track the Milestone Progress
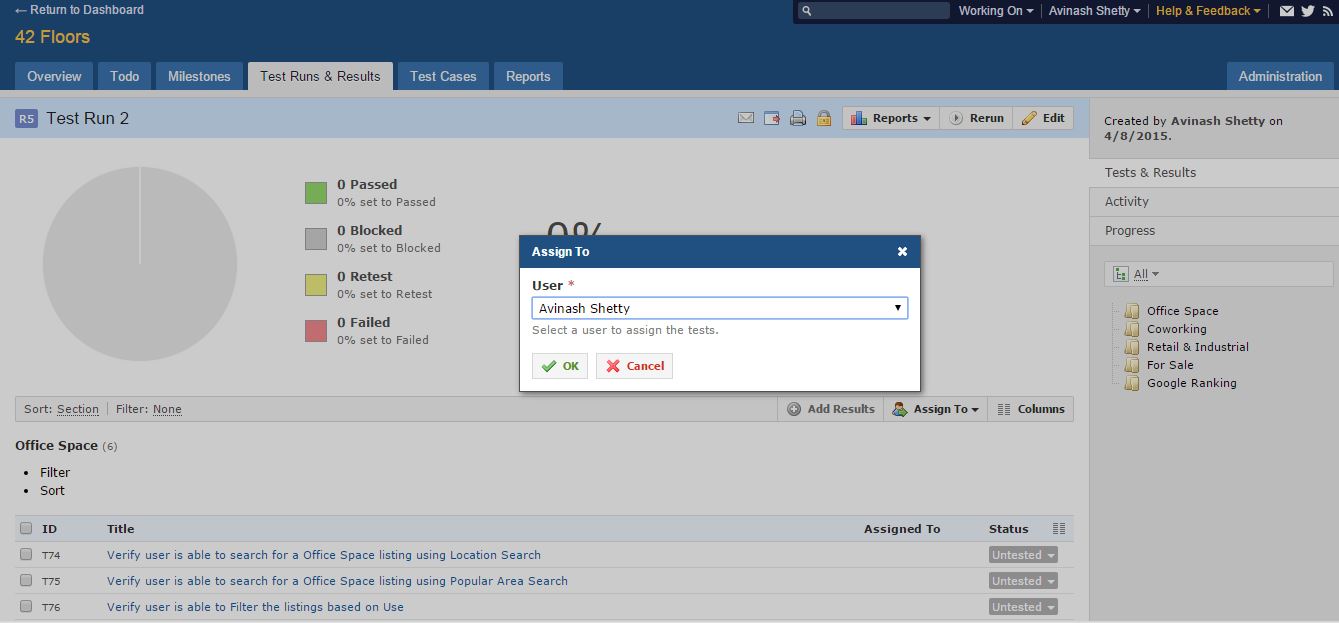
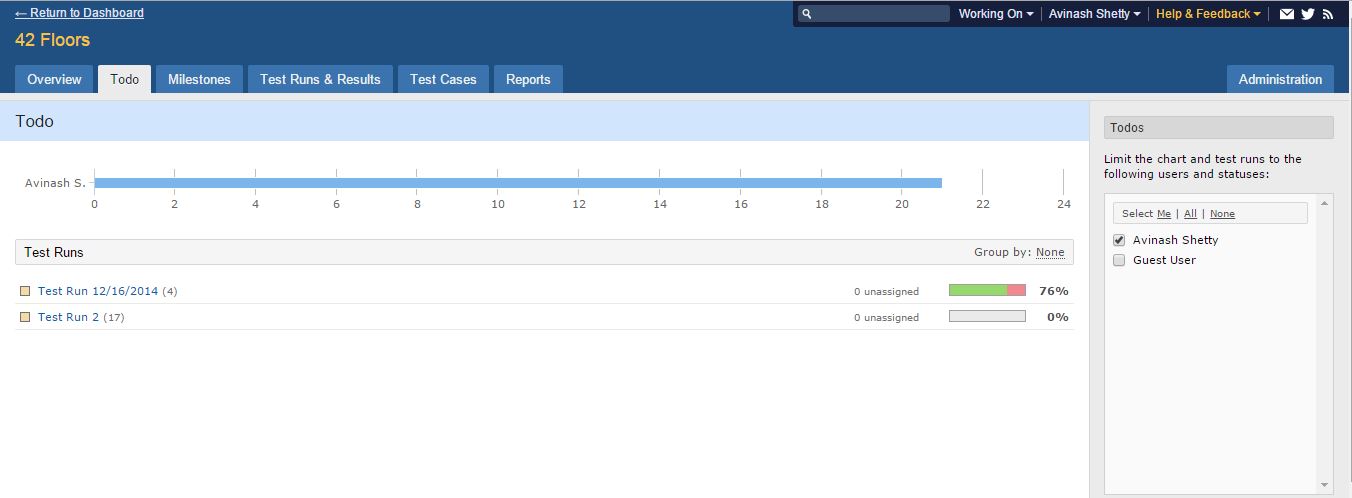
5. Todos and Assign Test Cases:
You can assign tests to team members. You can either assign tests when a run is created or do it later from the run or test pages. Once the tests are assigned to a user it appears on the user’s todo list. Every user has their own todo list for the projects they are working on.
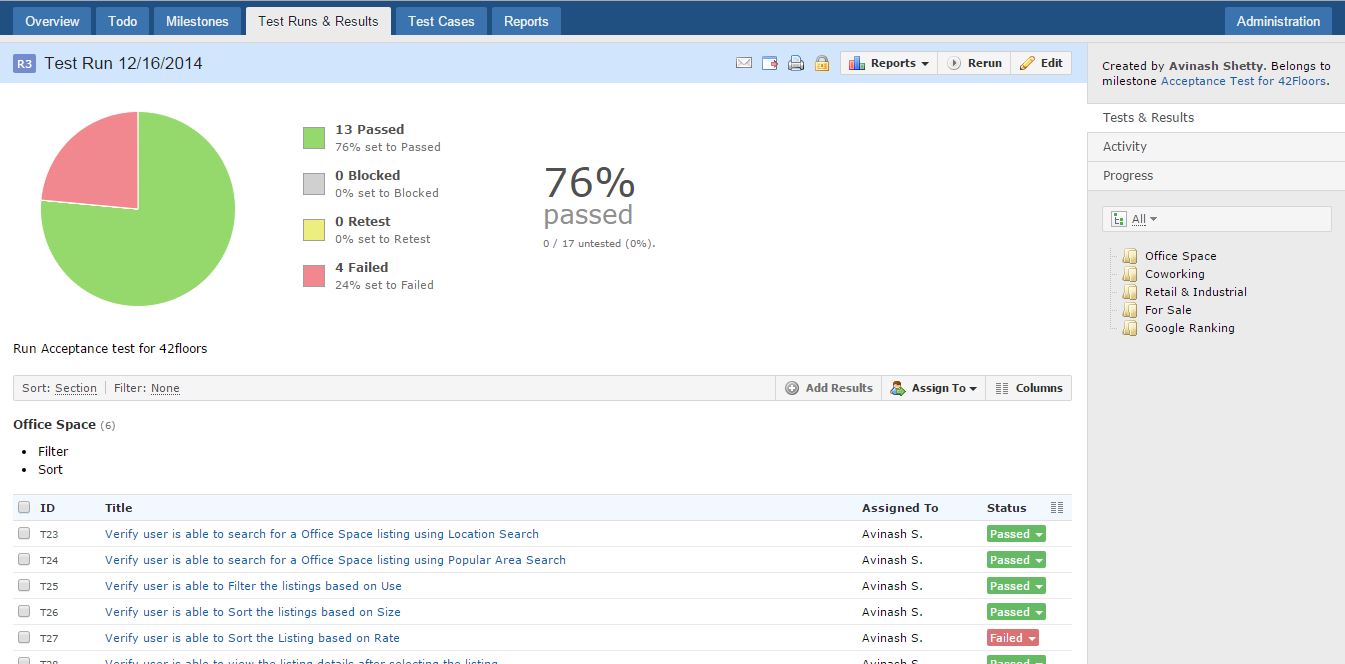
6. Test Runs:
Test Run tab shows all the Test Runs that are currently active for the project. You can add a test run and by selecting all test cases for that project or select some specific tests required for that run as you wish. We can also have multiple test runs for the same test suite.


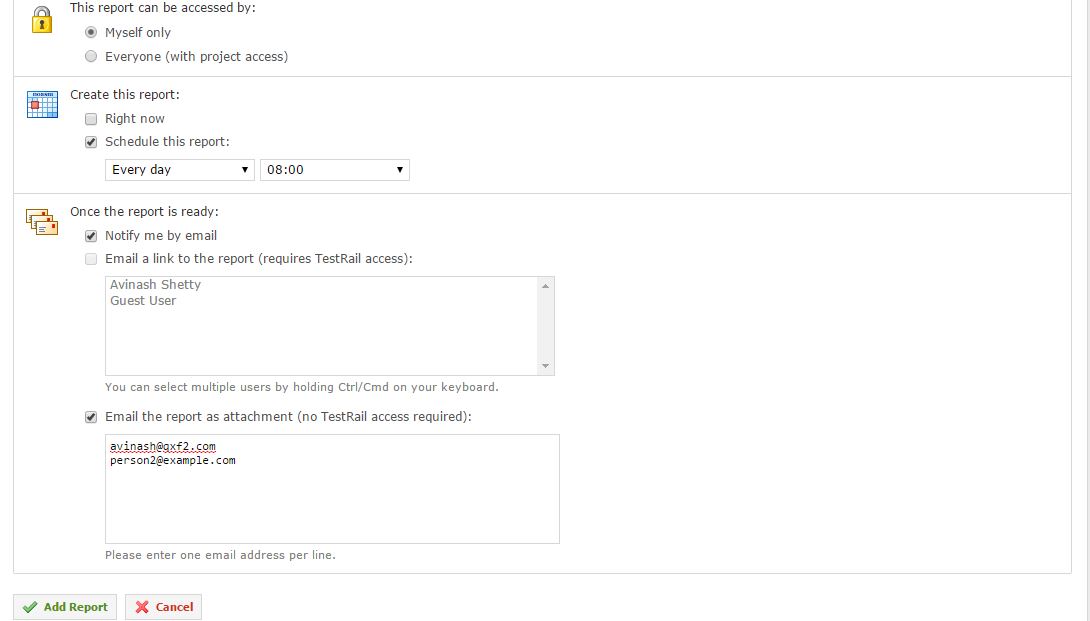
7. Report:
Test Rail provides great reporting capabilities to share statistics with your clients or managers. You can create or schedule reports from a wide range of available templates like summary report, defect report, result report etc.
Please find below screenshot of a sample Summary report generated for one of our projects.


You can also email reports as links or attachments to your teams.
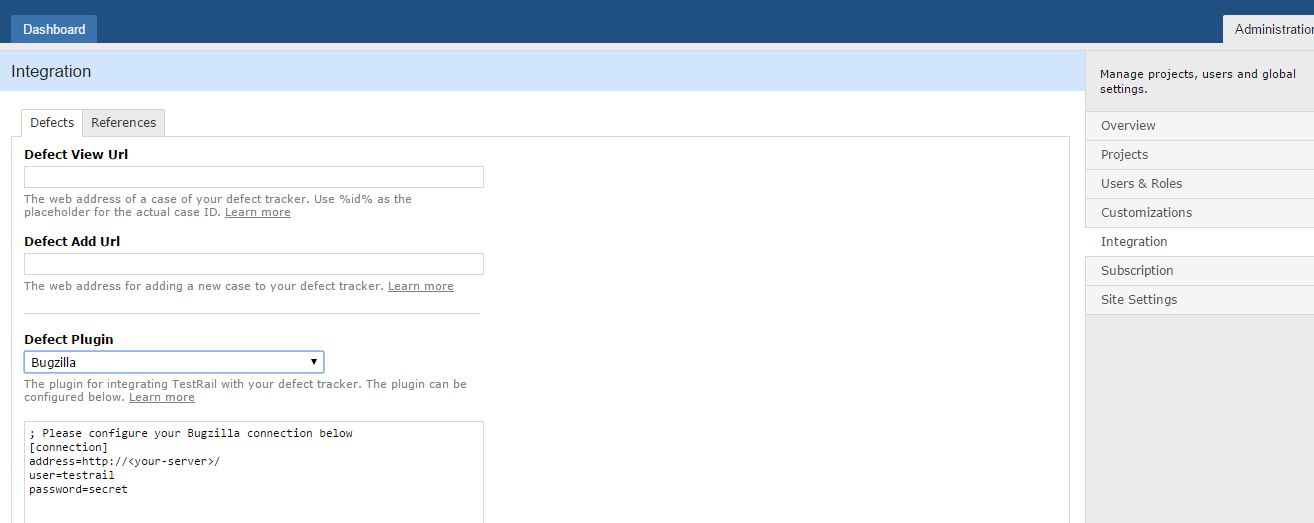
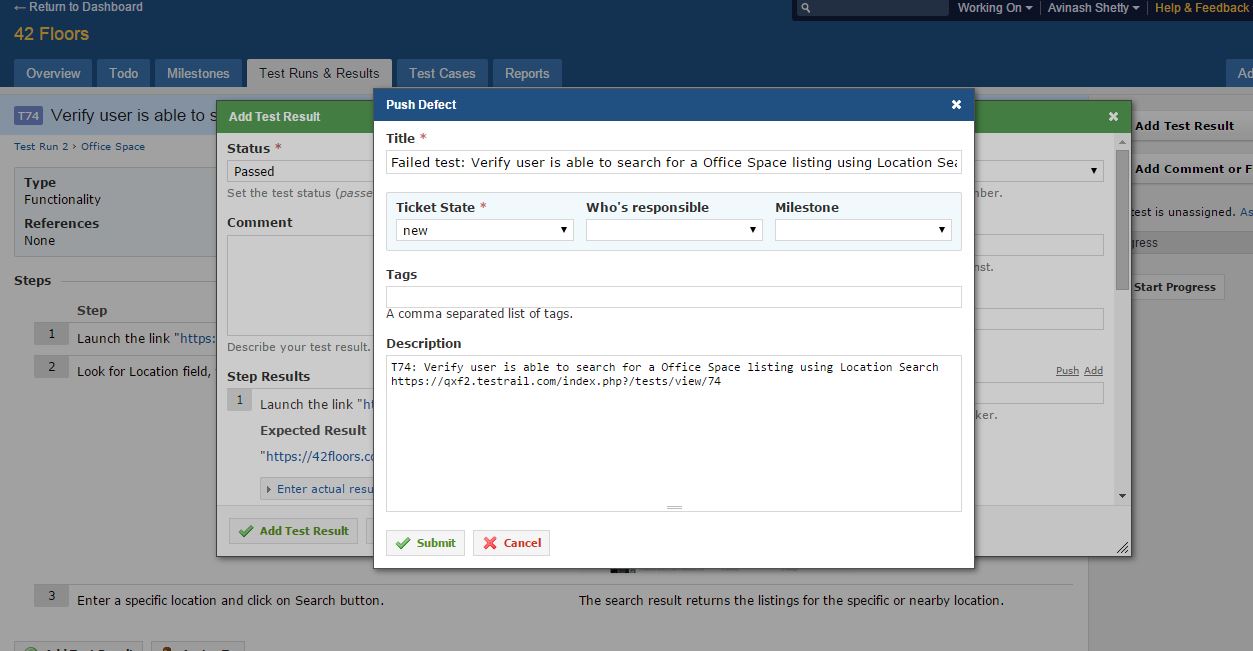
8. Integration with Defect Tracking tool: TestRail can be integrated with most of the bug tracking tools like Bugzilla, FogBugz, Gemini, Jira, Lighthouse etc. For this first you need to configure the web address of your bug tracker in TestRail. Then you can add, push or view defect details directly from TestRail.
9. TestRail API: TestRail’s API can be used to integrate TestRail with various tools, frameworks and third-party applications. For example, many customers use the API to integrate their automated tests and submit test results to TestRail. You can refer to this link for a list of available bindings (libraries) for various programming languages.
That brings us to the end of this tutorial on TestRail. As always, we are happy to answer any questions you may have. Enjoy Testing…
If you are a startup finding it hard to hire technical QA engineers, learn more about Qxf2 Services.

I am a dedicated quality assurance professional with a true passion for ensuring product quality and driving efficient testing processes. Throughout my career, I have gained extensive expertise in various testing domains, showcasing my versatility in testing diverse applications such as CRM, Web, Mobile, Database, and Machine Learning-based applications. What sets me apart is my ability to develop robust test scripts, ensure comprehensive test coverage, and efficiently report defects. With experience in managing teams and leading testing-related activities, I foster collaboration and drive efficiency within projects. Proficient in tools like Selenium, Appium, Mechanize, Requests, Postman, Runscope, Gatling, Locust, Jenkins, CircleCI, Docker, and Grafana, I stay up-to-date with the latest advancements in the field to deliver exceptional software products. Outside of work, I find joy and inspiration in sports, maintaining a balanced lifestyle.


Hi Avinash,
can u please help me how to create an automation testing integration with test rail.
i have multple test cases which i need to automate these test with selenium ? \\many thanks noor
Hi Noor,
You can refer this link https://qxf2.com/blog/reporting-to-testrail-using-python/
Thank you.
hi Avinash. im new to test rail and cab u pls share to how to automate test cases with selenium web driver
Hi Noor,
To automate test cases with selenium web driver, please refer these two links.
i)https://qxf2.com/blog/selenium-tutorial-for-beginners/ -This link is for beginners
ii)https://qxf2.com/blog/page-object-model-selenium-python/.
Thank you.
Hi Avinash,
Thank you for a detailed guide.
I see here that there TestRail is not free.
Do you recommend any opensource products? Even if it is not feature rich as TestRail, just for smaller projects?
Thanks in advance,
Shreekanth
Hi Shreekanth,
Sorry for the delay in replying to your comments. In case you are looking out for any test management tool, you can try out the ones which are mentioned in the link here. I have also heard about testlink, but haven’t tried any of these tools. Let me know if any of these work for you.
Thanks & Regards
Avinash Shetty