This post is for those who want to get started with Jupyter Notebooks. You don’t need to know anything beyond Python to start using Jupyter notebook. In this post I will be covering below topics.
What is a Jupyter Notebook?
Jupyter Notebook is a web application where you can create and share documents that contain source code, equations, visualizations as well as text. It is an ideal tool to help you to gain the data science skills you need. “Jupyter” is a loose acronym meaning Julia, Python and R. These programming languages were the first target languages of Jupyter application.
Jupyter Notebook App
It is a server-client application, which allows you to edit and run notebooks via a web browser. Its two main components are the kernel and a dashboard. A kernel is a program that runs and examines the code. The dashboard of the UI application which shows you the notebook documents that you have created and is used to manage the kernels.
How to install Jupyter Notebook
Running Jupyter Notebooks with the Anaconda Python Distribution:- One of the basic requirement for running Jupyter notebook is Python(either Python 3.3 or greater or Python 2.7). The general recommendation is that you use the Anaconda distribution to install both Python and the notebook application. The advantage of Anaconda is that you have access to over 720 packages that can easily be installed with Anaconda’s Conda, a package, dependency, and environment manager. You can download and follow the instructions for the installation of Anaconda here.
Running Jupyter Notebook using Pip :- If you don’t want to install Anaconda, you just have to make sure that you have the latest version of pip. Once you have pip, you can just run
# Python2 pip install jupyter # Python 3 pip3 install jupyter |
Running Jupyter Notebooks in Docker Containers:- Docker is an excellent platform to run software in containers. To run the Jupyter Notebook image in your Docker container, give in the below command in your Docker Quickstart Terminal
docker run --rm -it -p 8888:8888 -v "$(pwd):/notebooks" jupyter/notebook |
The newest Jupyter HTML Notebook image will be downloaded and it will be started.
How to use Jupyter Notebook
To launch a Jupyter Notebook application run the following command in the command prompt from the working directory.
jupyter notebook |
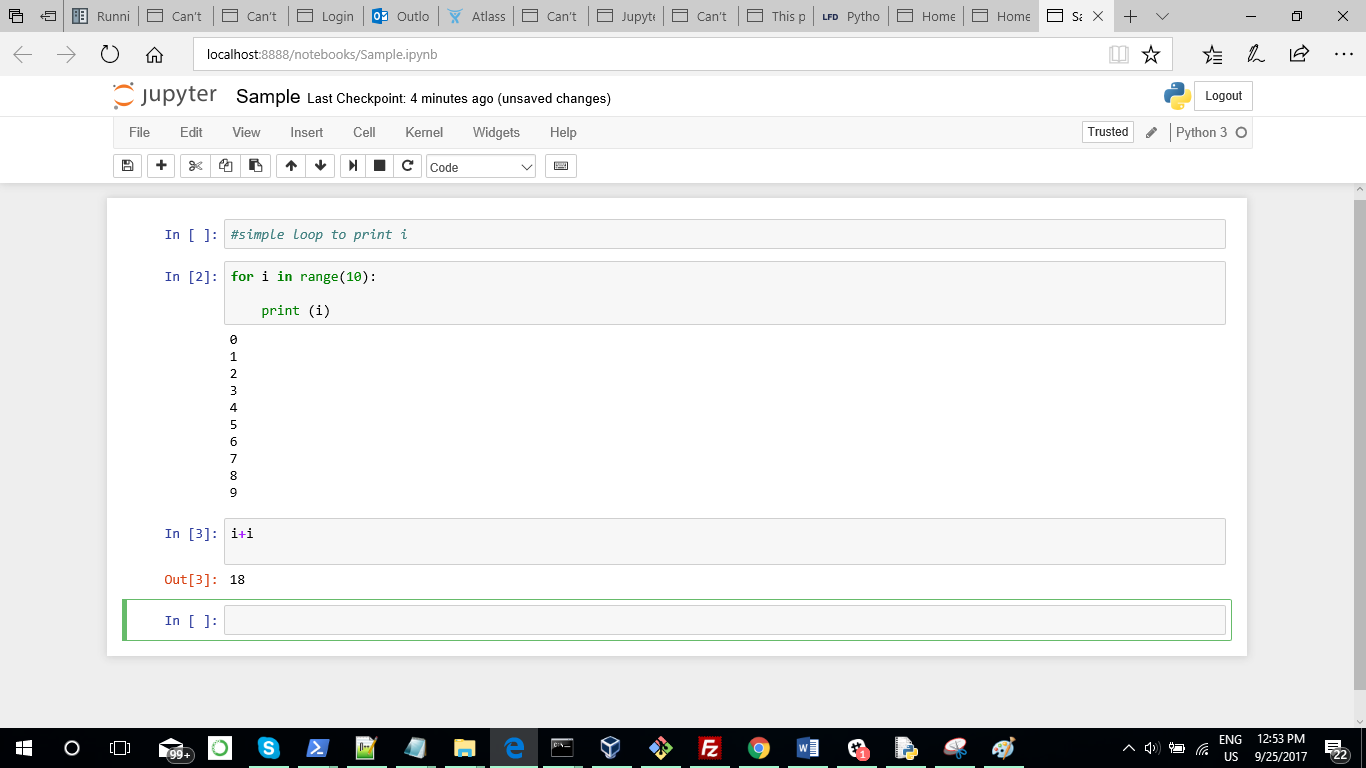
This will start the Jupyter server and open a new window in your browser (if that’s not the case, go to URL: http://localhost:8888). Below is the screenshot of Jupyter application.

For closing the notebook server, go to the command prompt where you launched the server from, and press Ctrl+C.
The notebook dashboard consists of several tabs.
A notebook is a file and Kernel is a process. The kernel receives snippets of code from the Notebook interface, executes them, and sends the outputs and possible errors back to the Notebook interface.
Jupyter notebook user interface
To start a new notebook, Click on the New drop down in the Files tab. You see the options make a regular text file, a folder and a terminal. Lastly, you will see an option to make a Python 3 notebook. This option will depend on the version of python that you have installed. If you want to start on a new notebook, click on the “Python3” option in the ‘Notebook’ category.
You can import libraries that you need, you can add, remove and edit the cells according to your needs. You can also add explanatory text, titles and subtitles to explain the code.
A notebook may be downloaded in either a .ipynb or .py file from the menu option File | Download as. Choosing the .py option downloads a Python .py script, in which all rich output has been removed and the content of markdown cells have been inserted as comments.
Share your Jupyter Notebooks
Sometimes you may want to share your notebook with colleagues or friends. Notebook documents are JSON documents that contain text, source code, rich media output and metadata. Each segment of the document is stored in a cell.
There are different ways to share notebook document with others:
jupyter nbconvert --to html sample.ipynb |
Sharing notebooks via GitHub Gist and nbviewer
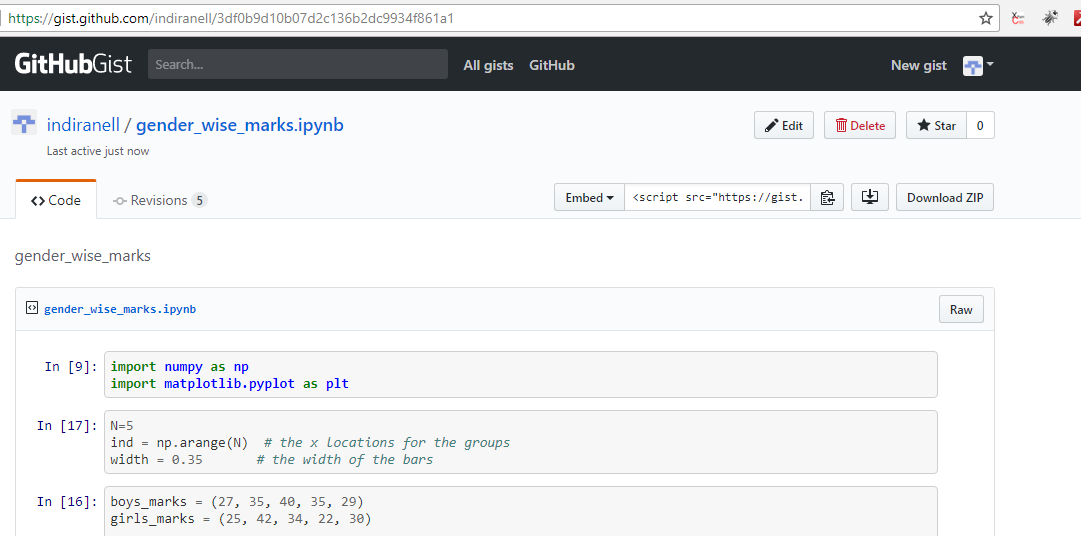
The below example notebook gender_wise_marks.ipynb has been created with a sample code for matplotlib usage. Below are the steps to share this notebook to Github Gist.
- Clear all the output from the notebook
- Save the notebook as .ipynb file
- Open the .ipynb in notepad++ and copy the JSON content
- Login into github Gist – https://gist.github.com/
- Paste the JSON content in the Gist code snippet area
- Give a filename with extension as .ipynb and save the file
- Click on Create Public Gist. This will generate a number with Gist URL as shown below

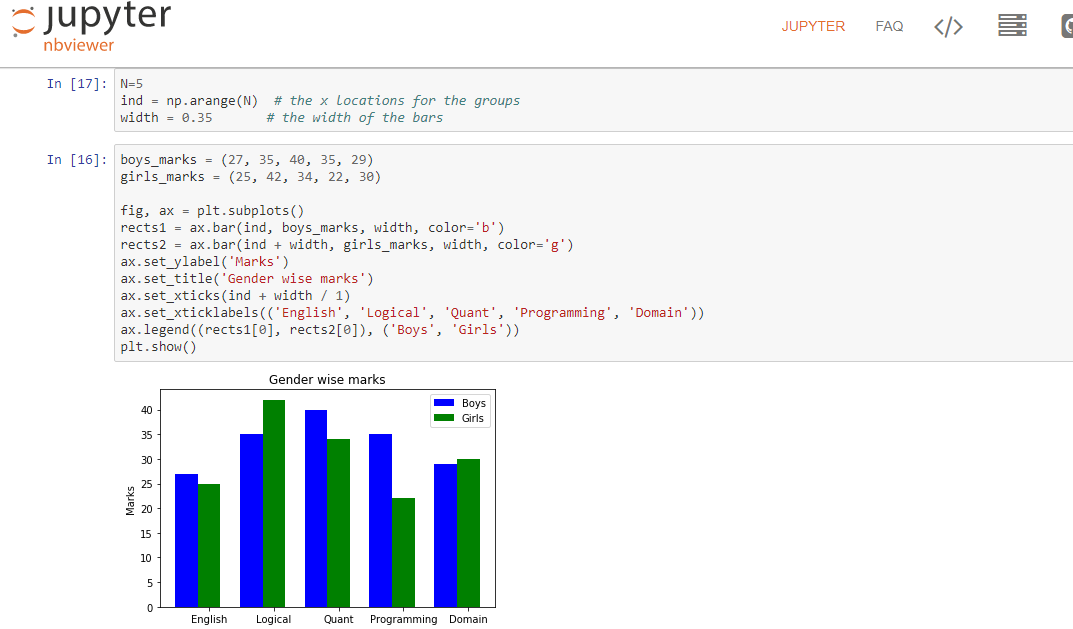
You can view the notebook now in nbviewer here
How to use a shared Jupyter Notebook
Loading Notebook Files – You can also load Jupyter Notebooks that other people have created, saved as Jupyter Notebook files (File extension .ipynb). After downloading the Notebook file from Github or Jupyterhub move it into your Jupyter Notebook working directory and then choose File -> Open in Notebook to open it. Now you can make some changes and edit the existing files.
Import .ipynb files into another notebook – You can import .ipynb into another notebook by using the %run command. You can simply say %run ‘gender_wise_marks.ipynb’ to share code between notebooks(without cutting and pasting them between different notebooks). Jupyter’s %run magic allows you execute python files and ipython scripts in a notebook. You can also import Jupyter notebooks as modules. For more information refer here
Loading Python Files – You can also load a pre-existing Python file into a Jupyter Notebook cell by simply typing
%load "sample.py" |
This loads up a new cell containing the contents of sample.py. There is one other useful built-in tool for working with Python files:
%run "sample.py" |
This will run sample.py and load the output into a Notebook cell.
Built-in magic commands in Jupyter Notebook
Jupyter kernels support a set of predefined ‘magic functions’. The builtin magics are two kinds line-oriented and cell-oriented.
Line magics are prefixed with the % character and work much like OS command-line calls: they get as an argument the rest of the line, where arguments are passed without parentheses or quotes.
Cell magics are prefixed with a double %%, and they are functions that get as an argument not only the rest of the line, but also the lines below it in a separate argument.
The built-in magics include:
Hope this post helps you get started with Jupyter Notebooks!
If you are a startup finding it hard to hire technical QA engineers, learn more about Qxf2 Services.
References:
1) Boost Your Jupyter Notebook Productivity
2) Jupyter Notebook Tutorial: The Definitive Guide
3) IPython Extensions
4) Jupyter Builtin magics

I am an experienced engineer who has worked with top IT firms in India, gaining valuable expertise in software development and testing. My journey in QA began at Dell, where I focused on the manufacturing domain. This experience provided me with a strong foundation in quality assurance practices and processes.
I joined Qxf2 in 2016, where I continued to refine my skills, enhancing my proficiency in Python. I also expanded my skill set to include JavaScript, gaining hands-on experience and even build frameworks from scratch using TestCafe. Throughout my journey at Qxf2, I have had the opportunity to work on diverse technologies and platforms which includes working on powerful data validation framework like Great Expectations, AI tools like Whisper AI, and developed expertise in various web scraping techniques. I recently started exploring Rust. I enjoy working with variety of tools and sharing my experiences through blogging.
My interests are vegetable gardening using organic methods, listening to music and reading books.

