Problem: Many testers do not get a chance to explore Jenkins.
Why this post?
Jenkins is an open source continuous integration tool written in Java. Jenkins seems to be the popular choice for continuous integration. Due to a variety of reasons, many testers do not get the opportunity to explore and play around with Jenkins. May be your development teams manage Jenkins, may be you joined a testing team after Jenkins was setup and stable, may be Jenkins is hosted on a machine you are not given access too. At Qxf2 Services, we strongly believe in exploring the tools that we use everyday. In this post, we will show you how easy it is to set up Jenkins on your personal machine and learn more about it. Happy learning!
For this tutorial, we take a chess application written in Java, write a unit test and execute the build and tests via a Jenkins job. We are choosing a chess app because Qxf2 loves chess. We have chosen Ant as our automated build utility. There is nothing special about the choice of Ant here. Jenkins does allow you to integrate various automated build tools with it.
Pro tip: To get the most out of this post, spend some time exploring the different screens Jenkins offers you.
Getting started with Jenkins to build an app
1. Download and install Jenkins
2. Install Java and Ant
3. Select an application to build
4. Update the Junit test case
5. Set up the project in Jenkins
6. Start the build
7. Verify the result
STEP 1: Download and install Jenkins
Jenkins provides installers for different operating systems. In companies, it is more common to see Jenkins hosted on a *nix system. Our best guess is that most testers use Windows. Our goal is to help you, the tester, learn about Jenkins. So we are choosing to use Windows in this example. You can download the Windows native package as a zip file. Extract the file and install Jenkins. Since we are installing Jenkins using the Windows installer, we don’t need to do anything else as the Windows installer automatically runs Jenkins as a Windows service.
You can verify Jenkins is running as a service by launching the Services app from the Windows Start Menu and looking for a running service called “Jenkins” among the list of all windows services running on the machine.
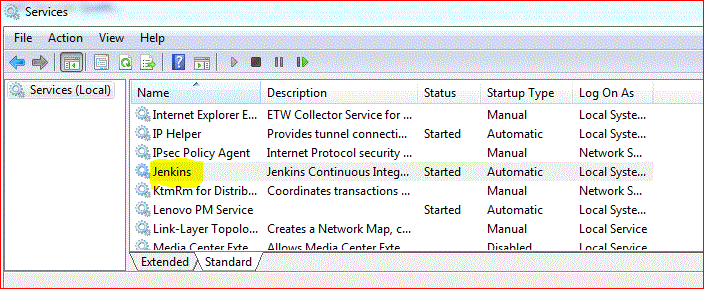
NOTE: By default, Jenkins runs at http://localhost:8080/. You can change it by editing jenkins.xml, which is located in your installation directory.
STEP 2: Install Java and Ant
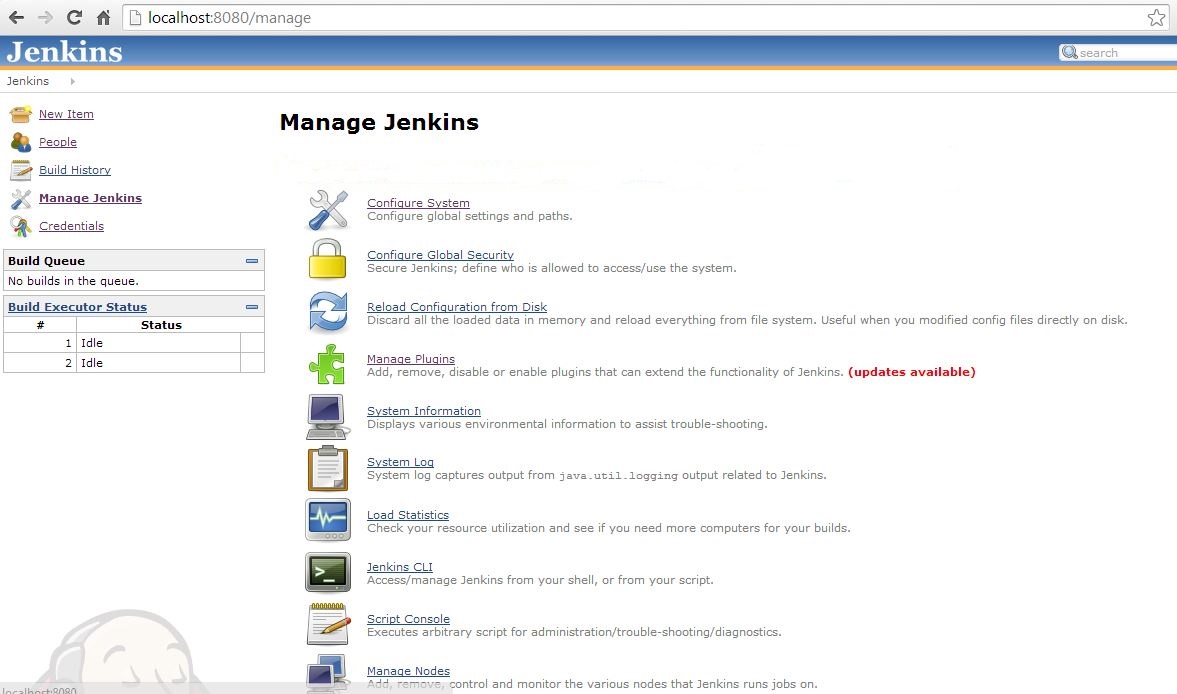
Jenkins requires Java in order to run, so make sure you have Java installed. Since we are building an Java app using Apache Ant you need to download and install Apache Ant. Configure the correct path to your JDK and Apache Ant by clicking on Manage Jenkins and then Configure System on Jenkins.

STEP 3: Select an application to build
We will take an example of a chess app posted in github for building through Jenkins. Download the project from github to your local machine. The java chess app has some dependencies, we need to download Apache Ivy to manage these dependencies. Apache Ivy is a tool for managing (recording, tracking, resolving and reporting) project dependencies.
STEP 4: Update the test case
We will update the test case to validate that the Title of the Chess app displays as “October Chess Sample chess Project”.
import com.nullprogram.chess.Chess; import org.junit.Test; import static org.junit.Assert.assertEquals; public class BoardTest { @Test public void testGetTitle(){ # Assert that the Application title displays as "October Chess Sample chess Project" assertEquals( "October Chess Sample chess Project", Chess.getTitle()); } } |
Make sure you have Junit.jar files included inside your ANT_HOME/lib directory. Both junit.jar and ant-junit.jar should be present in ANT_HOME/lib. For more details refer to link
http://ant.apache.org/manual/Tasks/junit.html
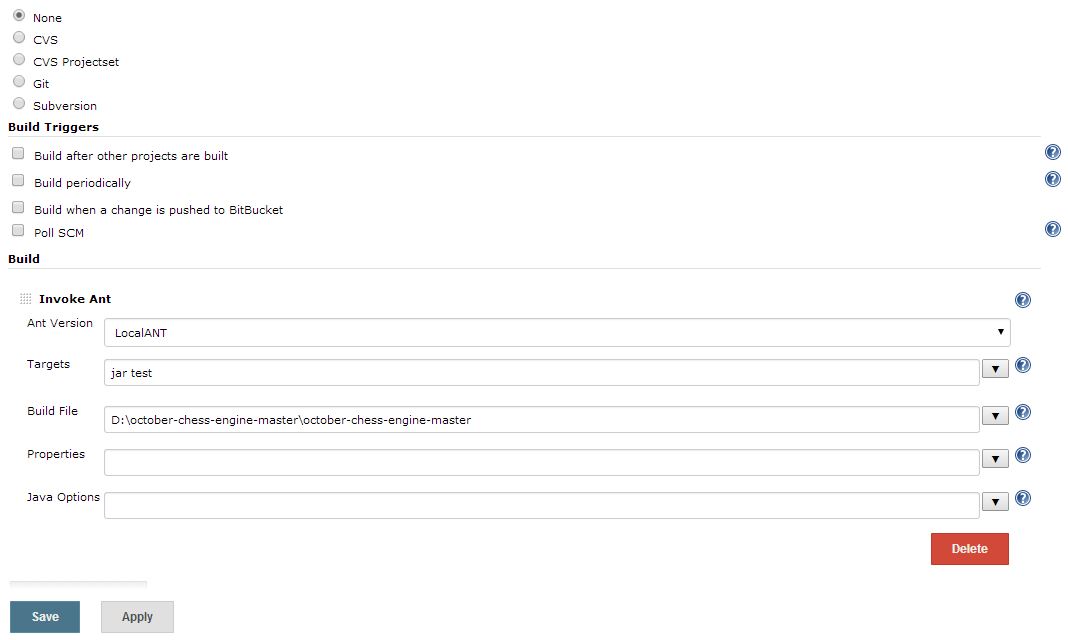
STEP 5: Set up the project in Jenkins
- Go to Jenkins, select “New Item”, enter a name for your build and then choose “Build a free-style software project and click “OK”.
- You can run your project directly from web-based hosting services like Git or Bitbucket. However we will run the project directly from our local machine. Configure the project as “None” under “Source Code Management”.
- Click on “Add Build step” and select the ant version.
- Click on “Advanced” and enter the Build File Path accordingly and click on Save.
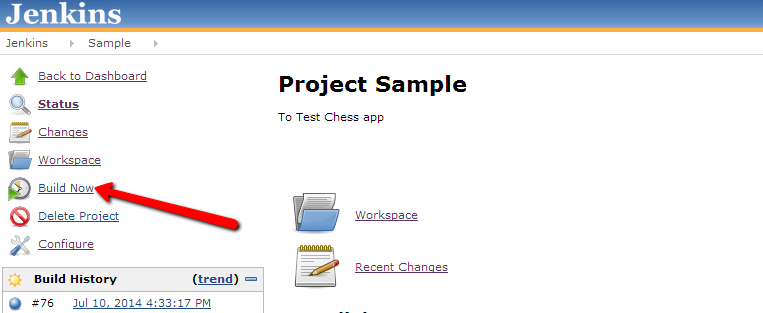
STEP 6: Start the build
Go back to your build page in Jenkins and click on “Build Now”. The Build will start and you can view the status. Click on the small icon in the Build History to see the complete Console Output
Note: The initial build will take a longer time since it has to load ivy settings.
STEP 7: Verify the result
The Build will succeed however the test case failed as currently the title was displayed as “October Chess fatal: Not a git repository (or any of the parent directories): .git”
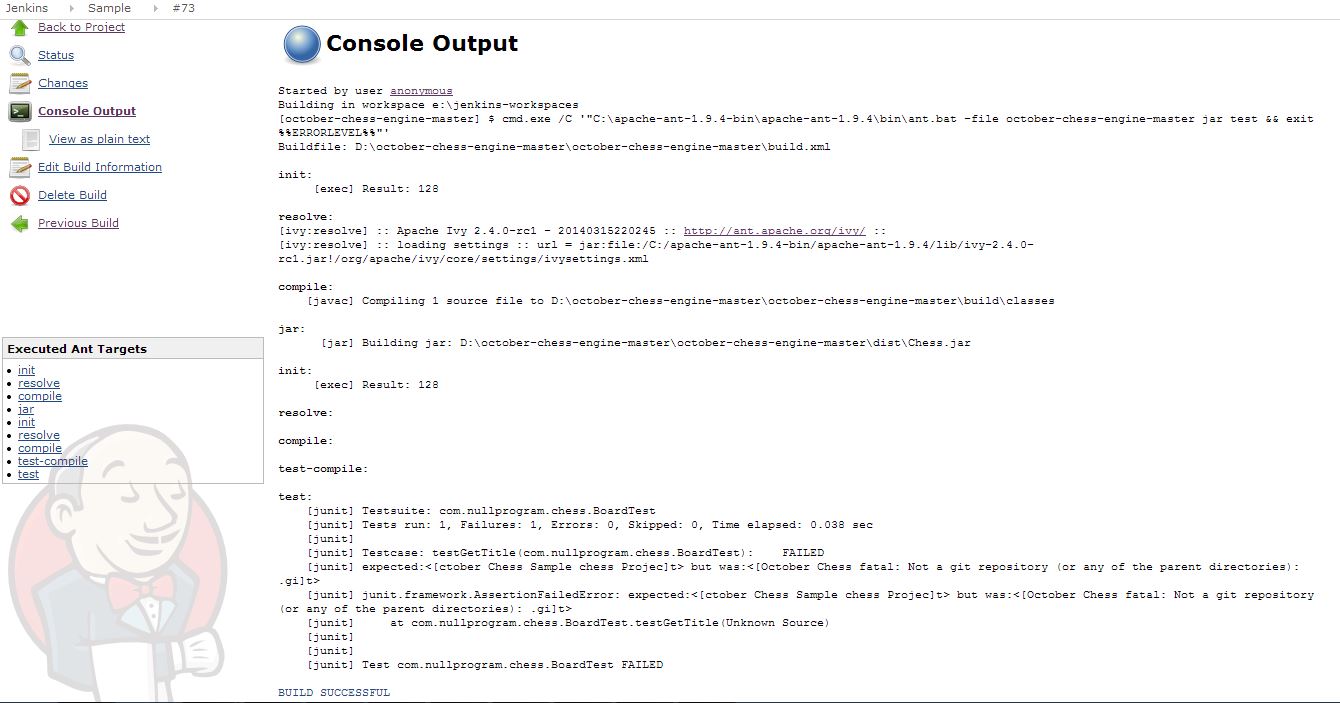
Update the project so that the title displays “October Chess Sample chess Project” and re run the Build.
Now both the Test case and Build is successful
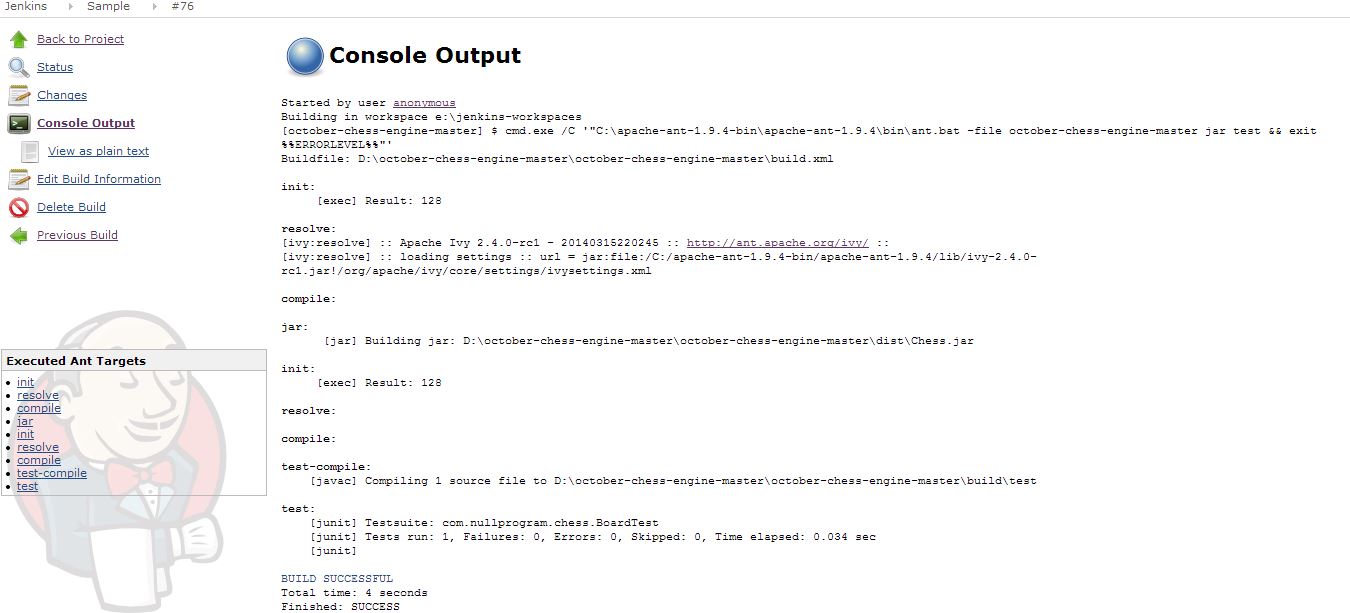
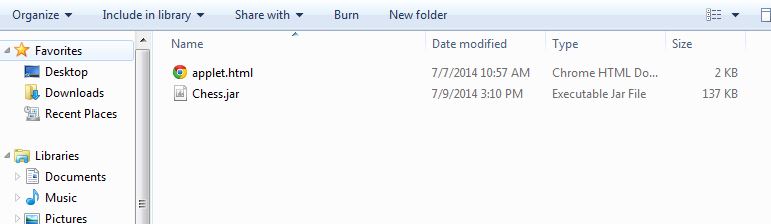
You can also check the chess jar File generated and enjoy playing a game of chess!
Recommended reading
1. Martin Fowler explains Continuous Integration: This Martin Fowler article is still the best starting point to understanding Continuous Integration

I am a dedicated quality assurance professional with a true passion for ensuring product quality and driving efficient testing processes. Throughout my career, I have gained extensive expertise in various testing domains, showcasing my versatility in testing diverse applications such as CRM, Web, Mobile, Database, and Machine Learning-based applications. What sets me apart is my ability to develop robust test scripts, ensure comprehensive test coverage, and efficiently report defects. With experience in managing teams and leading testing-related activities, I foster collaboration and drive efficiency within projects. Proficient in tools like Selenium, Appium, Mechanize, Requests, Postman, Runscope, Gatling, Locust, Jenkins, CircleCI, Docker, and Grafana, I stay up-to-date with the latest advancements in the field to deliver exceptional software products. Outside of work, I find joy and inspiration in sports, maintaining a balanced lifestyle.

