In this post, we will help you host your Great Expectations test results on Netlify, a web hosting platform. This post is third in our series to help testers implement useful tests with Great Expectations for data validation. Implementing tests and running them is job half done. As testers it is quite essential to make sure our test results reach the right people at the right time! In this blog, we will look at the reporting part of the test workflow and later try ways to make our test result messages more engaging.
Background
This post needs you to be setup with Great Expectations as a pre-requisite. It also assumes you are familiar with Great Expectations and the related terminology. If you are not already setup, please follow Great Expectations tutorial with a real-world scenario: Part 1. There is a follow-up blog Run Great Expectations workflow using GitHub Actions which puts up the test on to a CI/CD pipeline.
However, you can still play along this blog if you have some Great Expectations tests running and are looking out for a way to get your results accessible to everyone without having to go through tedious setup. In this blog, I have used Netlify, a web hosting platform to host my Great Expectations test results. We will talk about it shortly.
Keeping our test results relevant
Before we dive in to the details, I want to talk a bit about the importance of making our tests results stand out especially in these changing development times. Agile releases, CI/CD pipelines have challenged testers to deal with large amount of testing data, abundance of tests, daily reports etc. We also need to judge how to categorize our tests, whether they are daily or when new data arrives. Considering all these, we need to pay attention and ensure that our test results are actionable and not just passed off as another test report. Well, there is no one straightforward way how to do that. But increasing engagement for test results is an important aspect that I will be working on later.
Recap
Let us look at a short recap of the steps covered so far in the previous two blogs. We have:
* Been working on a real-world scenario of Qxf2. Our goal is to ensure the quality of data that gets stored in github_stats table which tracks how all of Qxf2’s open-sourced GitHub repositories perform.
* First, identified the data quality checks that can be performed on all the columns of the table. I have put up a mindmap showcasing all the tests. Checkout my introductory blog Data validation using Great Expectations with a real-world scenario: Part 1 for more details.
* Next, picked one of the tests and implemented it using Great Expectations. This test checks whether the date (column) is stored in correct format.
* By doing the above step, got setup with Great Expectations and fleshed out a simple skeleton framework for our data tests.
* Thereafter, added the test to a CI/CD pipeline using GitHub Actions. My second blog Run Great Expectations workflow using GitHub Actions covers this step in detail. You will find that I have also shared my thought process on how to introduce test automation (not just using Great Expectations) within your team.
* Finally, posted notification on Slack channel about our test run.
Here is how the complete workflow looks like:
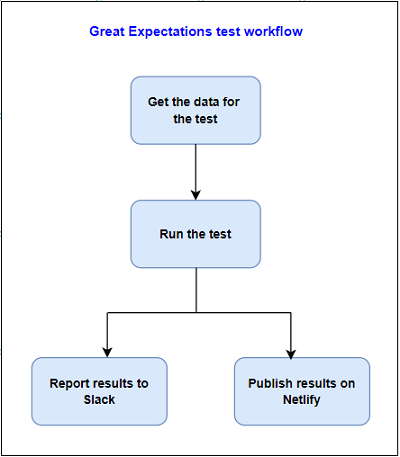
Let us now look at the last step in the workflow – publishing results.
Publish Great Expectations test results to Netlify
One of the advantages of Great Expectations is the up-to-date documentation generated after a test run. Now that our test is scheduled to run daily (using GitHub Action workflow), we need to figure out a way to show the test results generated from the runs. There are several third party tools/sites and cloud services like S3 we can use to store the results. I came across Netlify while checking out the Great Expectations GitHub Action. Netlify is a web hosting platform with lot of features for automating web projects. I used their Starter plan to create a site and then used it to publish test results. It is a simple two steps process involving creating a site in Netlify and deploying results to it using GitHub Actions. Let us look at them in detail.
1. Create a site in Netlify
A site in Netlify is useful for hosting static documents, in our case, test results. To create a site, follow the below steps:
1.1) Login to Netlify
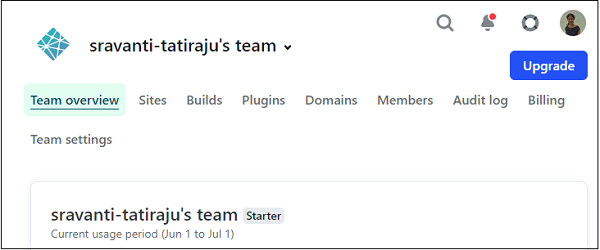
Login to Netlify if you already have an account registered with them. In case you don’t, its easy to sign up. I choose the Email option and filled in the details asked. After providing a team name, I was redirected to the Team overview page.
1.2) Add new site
Next step is to create a new site. There are different ways to do this. We will use the manual deploy option. I find this option straightforward without having to connect to a Git repository.
On Sites tab, click on Add new site and choose ‘Deploy manually’.
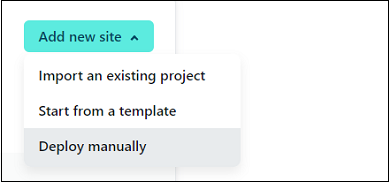
It navigates to the app.netlify.com/drop page.
We need to choose the folder that we want to deploy to the site. Here, providing any folder works since it is just for creating a site. I chose to give the test results folder present in my local Great Expectations deployment. The results get stored in local_site folder present in the uncommitted directory of great_expectations deployment. Navigate to great_expectations/uncommitted/data_docs folder. Select the local_site folder and drop it to the Netlify drop page.
As soon as we do this, a new site is created and the index.html present in the local_site folder is deployed to it. While this happens, a random name is picked for the site. Now that our site is created, let us give it a meaningful name.
To do that, navigate to the Site settings tab. On the Site details page, in the Site information section, click on ‘Change site name’ button. Here, provide a name for the site. And then click save. We see that the page gets refreshed with the updated site name.
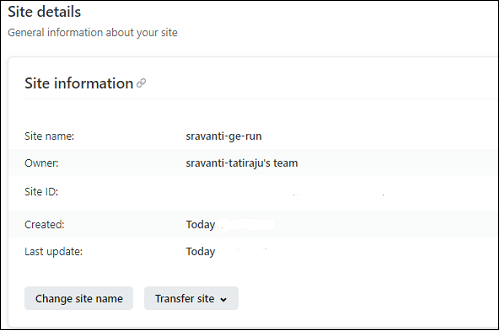
This page provides important information about our site. While we are still here, let us note down the Site ID. We will need this later while using GitHub Action. In the Site information section, copy the Site ID and save it somewhere safe.
1.3) Generate NETLIFY_AUTH_TOKEN
We will be using GitHub Actions to deploy results to our Netlify site. For that, we need a Token to authorize the GitHub Actions to access our Netlify account. Let us generate one.
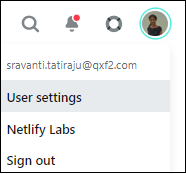
From Profile, select the User Settings option.
Click on Applications tab and select OAuth.
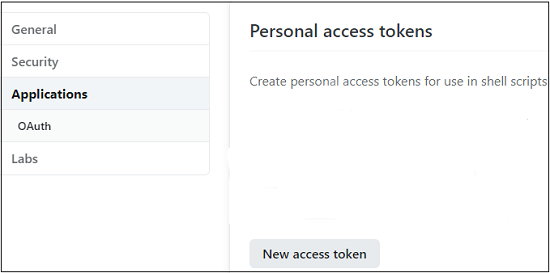
In the Personal access tokens section, click on the New access token button. Give a Description to identify the token and click on Generate token. Copy the token generated and save it.
2. Create a GitHub Action step to deploy results to Netlify
We will now add a step in our GitHub workflow to deploy the test results to Netlify. For this, we will use actions-netlify – a GitHub Action for deploying to Netlify.
Let us look at the required inputs for this action –
i) publish-dir: The directory which we want to be published on to the site. In our case it will be great_expectations/uncommitted/data_docs/local_site. This contains the index.html (home page for the test results).
Every time a Checkpoint is run, the above folder is generated containing the Data Docs or the test results.
Don’t get confused about using this folder in an earlier step (for Netlify drop). That was just for creating a Site!
ii) NETLIFY_AUTH_TOKEN: We have created this in the previous step above. Let’s add this as a GitHub secret.
To do that, in your GitHub repository, navigate to Settings -> Secrets -> Actions secrets and add a New repository secret. Place your token there. Check with your DevOps if you do not have access to GitHub secrets of your project repo.
iii) NETLIFY_SITE_ID: We noted the Site ID for our site during the creation step. It is present in team page > your site > Settings > Site details > Site information > SITE ID.
iv) production-deploy: By default, this option is set to False and a temporary site is created (for each run). We will need to set this parameter to True so that it will deploy the test results folder to our created site for every run. The site is identified by the Site ID..
The code for the Netlify GitHub Action step looks like this:
- name: Deploy DataDocs to Netlify uses: nwtgck/actions-netlify@v1.2 with: publish-dir: "great_expectations/uncommitted/data_docs/local_site" production-deploy: true env: NETLIFY_AUTH_TOKEN: ${{ secrets.NETLIFY_AUTH_TOKEN }} NETLIFY_SITE_ID: ${{ secrets.NETLIFY_SITE_ID }} |
Refer to the complete github_stats_run.yml script here.
And that is it! Let us now run the updated workflow.
3. Test the workflow
In your github repo, navigate to the Actions tab. Under Workflows, select the run-github-stats-checkpoint workflow and click on ‘Run workflow’. The workflow is triggered which completes all the steps including the latest publishing results to Netlify.
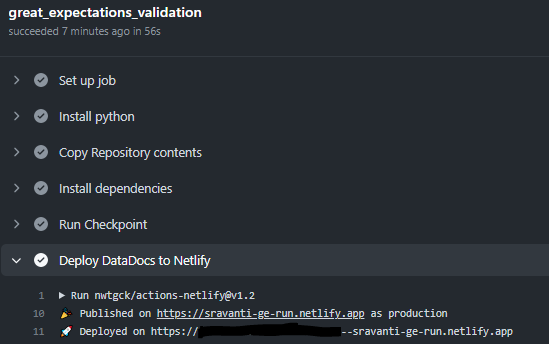
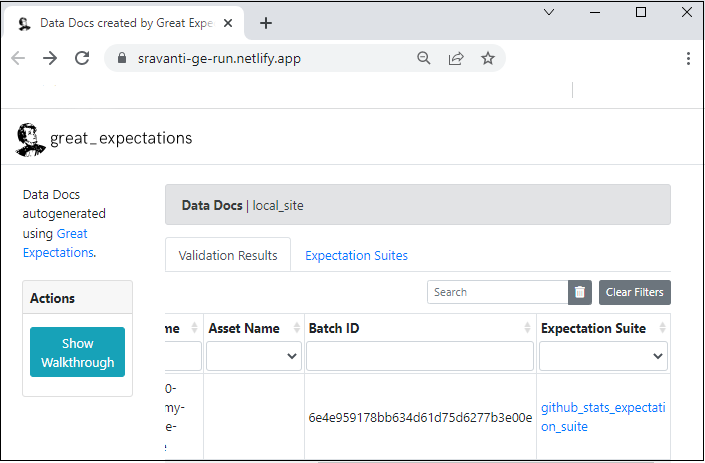
Once you see a successful run, navigate to your site link. You will find the test run results.
This was just using the basic Netlify hosting option. You can do more advanced configurations such as adding custom domain to your site.
Next Steps
We have so far completed the basic steps of creating a test, running it in CI/CD and publishing the test results. We will try next to look at complex test cases and explore ways to make our test run messages more engaging in further blog posts. Thanks for reading and stay tuned!
References
1. Get Started with Netlify
2. Netlify Actions
I have been in the IT industry from 9 years. I worked as a curriculum validation engineer at Oracle for the past 5 years validating various courses on products developed by them. Before Oracle, I worked at TCS as a Manual tester. I like testing – its diverse, challenging, and satisfying in the sense that we can help improve the quality of software and provide better user experience. I also wanted to try my hand at writing and got an opportunity at Qxf2 as a Content Writer before transitioning to a full time QA Engineer role. I love doing DIY crafts, reading books and spending time with my daughter.

