Beginners find it confusing to set up the Raspberry Pi from scratch. There are many tutorials that show each individual steps in detail but not many of them have a list of all the individual steps together. I also come across the same problem and come up here with the solution. I hope this post is helpful to you.
Components
To setup Raspberry Pi, you only require:
- Raspberry Pi kit (Raspberry Pi Board, SD Card and SD Card Reader)
- LAN Cable
Steps to setup Raspberry Pi in headless mode
To setup Raspberry Pi headlessly without any external keyboard, mouse, and display, you need to go through the following steps:
Step 1: Download Rasberry Pi supported OS Image
I downloaded Raspbian Buster with desktop and recommended software (zip download) from the official Site and this image is of 2530 MB. In case, if you only want to ssh into Raspberry Pi, I suggest you go with Raspbian Buster Lite, it is only 434MB in size. Please download any available image as per your project requirements.
Step 2: Format SD Card with SD Card Formatter
Download and install any SD Card Formatter to format the SD Card. After installation, select the card which you want to format and click on the format button with existed other default settings to format the card.
Step 3: Download a tool to write image on SD card
I downloaded balenaEtcher. balenaEtcher is compatible with Mac OS, Linux and Windows, and it is easy to use. balenaEtcher also supports writing images directly from the zip file, without any unzipping required.
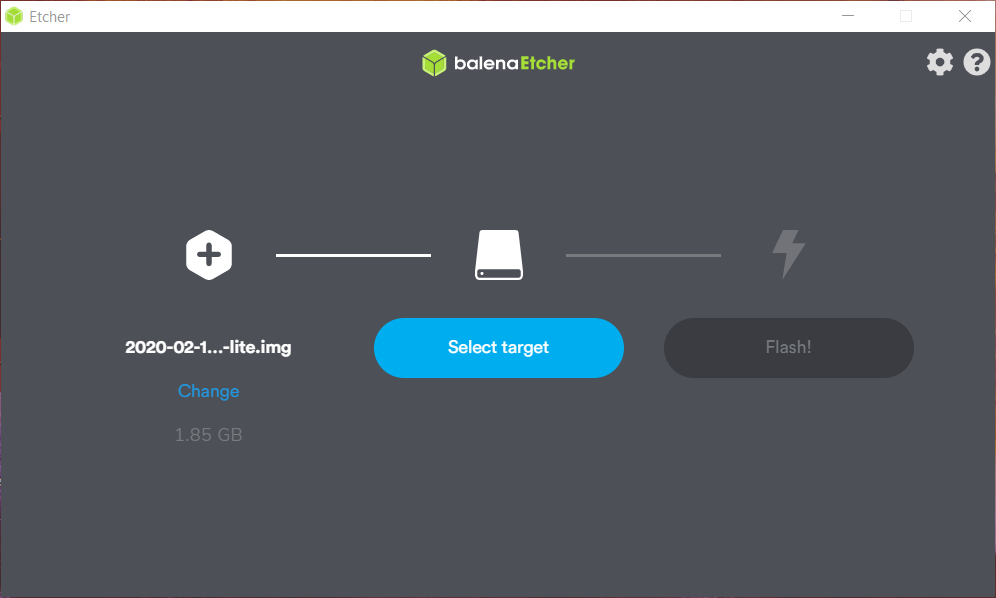
To write your image with balenaEtcher:
- Download the latest version of balenaEtcher and install it.
- Connect the SD card reader with the SD card inside.
- Open balenaEtcher and select from your hard drive the Raspberry Pi .img or .zip file you wish to write to the SD card.
- Select the SD card you wish to write your image to.
- Review your selections and click ‘Flash!’ to begin writing data to the SD card.
Note: Writing image may take approximately 5 to 7 mins and it may vary based on the size of the image.
Step 4: Add ssh file on SD Card Root
On the boot partition of the SD card, create/add a file named “ssh” (without any extension), it will Enable SSH. I created mine from Windows Explorer. Right-click on the boot partition folder, create a new text file and rename it to “ssh” and remove .txt extension. You can also create it by running command "echo boot_partion_directory:\ssh" in command prompt.
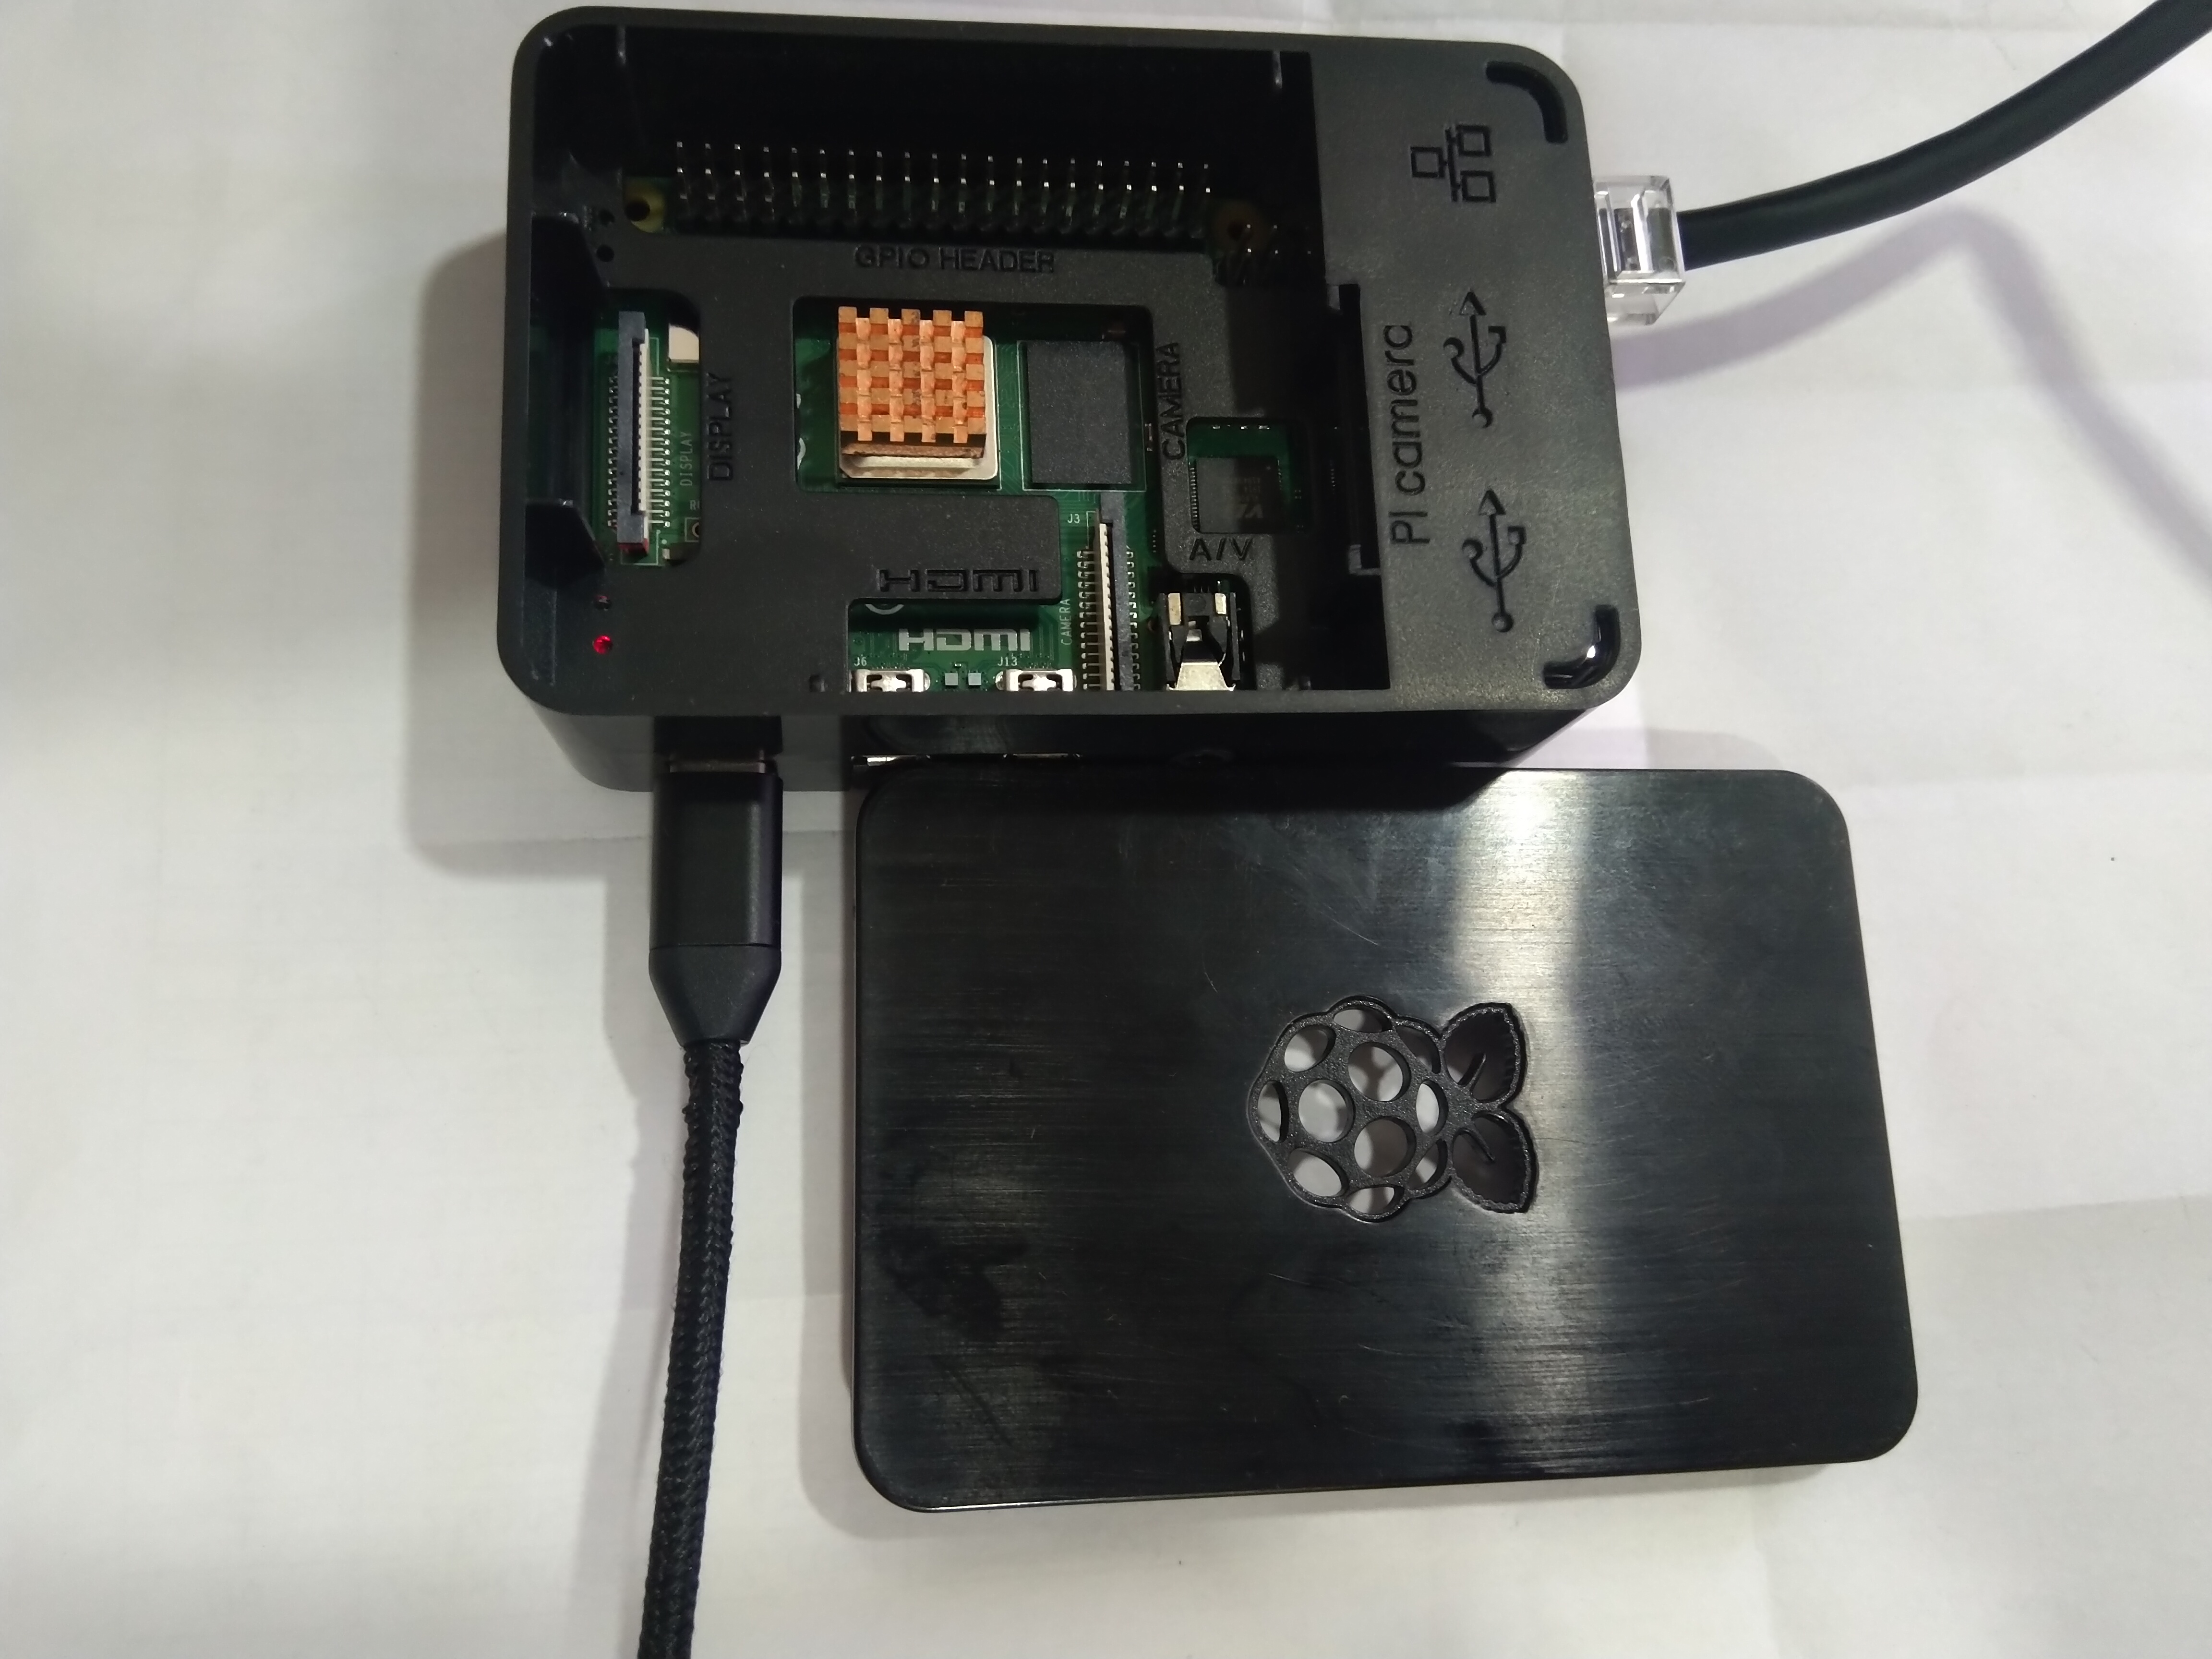
Step 5: Insert SD card into Raspberry Pi and connect LAN cable to Raspberry Pi and Laptop
Step 6: Figure out IP Address of Raspberry Pi
To connect with your Raspberry Pi, you need to find the IP address. You can check in your Router’s DHCP lease allocation table as shown in the following image.

If you don’t know/remember your router’s IP, please refer tutorial here.
You can also find the IP address of Raspberry Pi by using any Android IP Scanner APP or iOS IP Scanner APP.
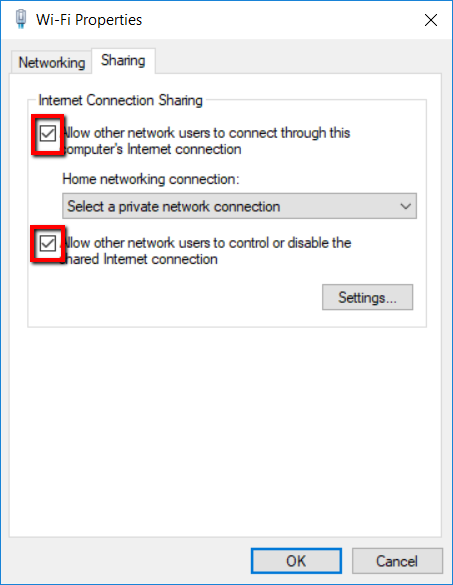
In case, if you are not getting an IP address by checking DHCP Client List or by IP Scanner app, you need check LAN connection between Raspberry Pi and Laptop and also need to check your WiFi/Network sharing property enabled for other connected devices or not.
To check WiFi sharing property, on Windows, go to “Network and Sharing Center”, click on the WiFi connection to check WiFi Property. On the “Sharing” tab, check the following options pointed in the image were enabled or not. If not enabled, please enable it to share your network with Raspberry Pi.
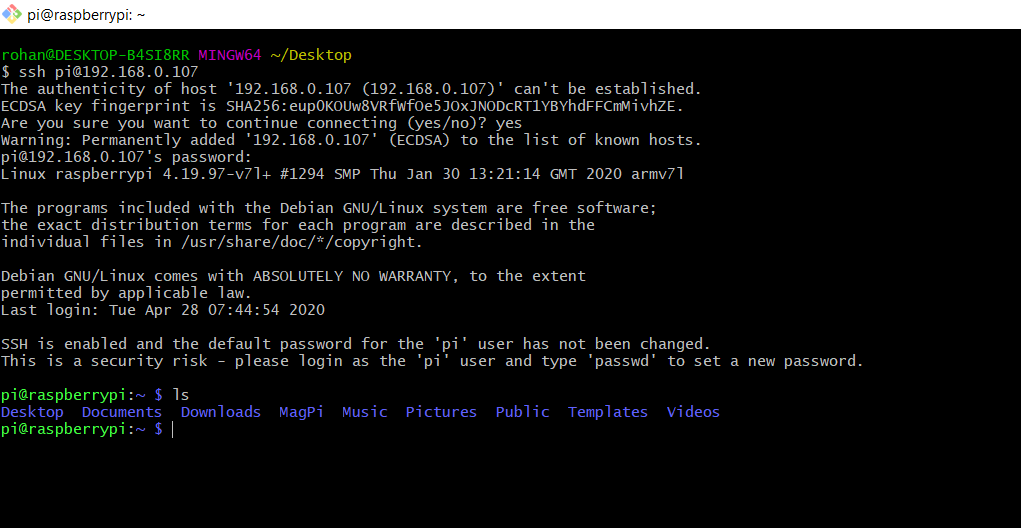
Step 7: SSH to Raspberry Pi
Use any SSh Client to connect with your Raspberry Pi. Here I used git bash.
The default credentials of Raspberry Pi are:
username: pi
password: raspberry
Now, you have access to configure and work on your Raspberry Pi. Hope this blog is helpful for you.

I love technology and learning new things. I explore both hardware and software. I am passionate about robotics and embedded systems which motivate me to develop my software and hardware skills. I have good knowledge of Python, Selenium, Arduino, C and hardware design. I have developed several robots and participated in robotics competitions. I am constantly exploring new test ideas and test tools for software and hardware. At Qxf2, I am working on developing hardware tools for automated tests ala Tapster. Incidentally, I created Qxf2’s first robot. Besides testing, I like playing cricket, badminton and developing embedded gadget for fun.

