Problem: Automating tests for APIs and backend services can be time consuming. Runscope is a powerful tool to help you quickly get started with API testing.
Runscope is a tool which helps us to automate web services testing. Runscope has a user friendly web interface. It also allows you to perform advanced variable manipulations and complex assertions in your tests via scripts. You can also schedule tests to run regularly and receive notifications. When it comes to API testing, Runscope makes the easy things easy and the hard things possible.
When to use Runscope
There are a range of options that testers can use when it comes to API testing. You can choose not to test at all, get developers to do the testing, write scripts to do the testing, test the API indirectly via the front end, etc. In the past we have written about API testing using the Python module Mechanize. Runscope is a relatively new option that we explored and liked at Qxf2 Services. Some specific times I would choose to use Runscope are when I need:
1. a lightweight option to do API testing
2. to get started quickly with API testing
3. to work with testers who are new to API testing
There are two ways to create your tests: capturing live calls using Runscope URLs and creating requests from scratch. In the example below we show you how to get started with Runscope by creating requests from scratch. For this example we are going to use the public api at OpenFDA. Our test is to search for records listing a specific drug and validating the count of the five most frequently reported patient reactions.
Getting started with Runscope
1. Sign up for a Runscope account
2. Login and organize your projects
3. Choose a test
4. Create a request by adding method, URL, header, parameters etc
5. Run the test
6. Check the result
7. [OPTIONAL] Schedule tests and notifications
Detailed steps
STEP 1: Sign up for a Runscope account.
You can sign up for a 30 day free Runscope account
STEP 2: Login and organize your projects
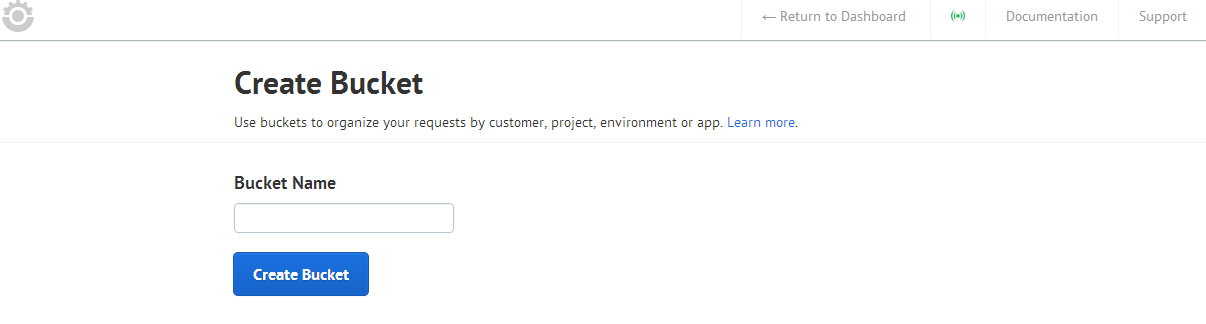
Login to your account. Create a bucket for your project and add tests in the bucket.
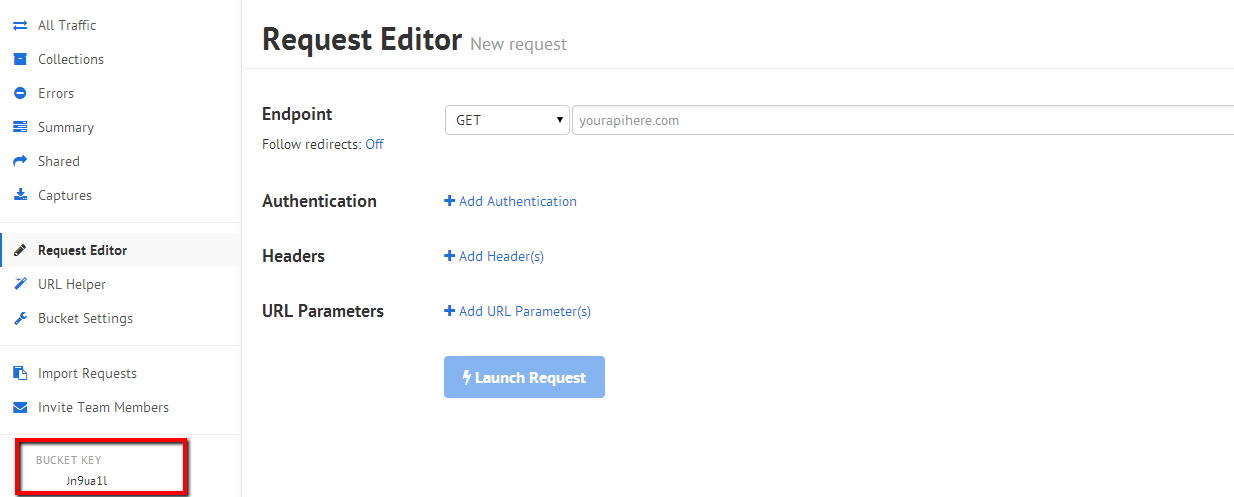
You can also view the bucket key which will be used when you post request using Runscope
STEP 3: Choose a test
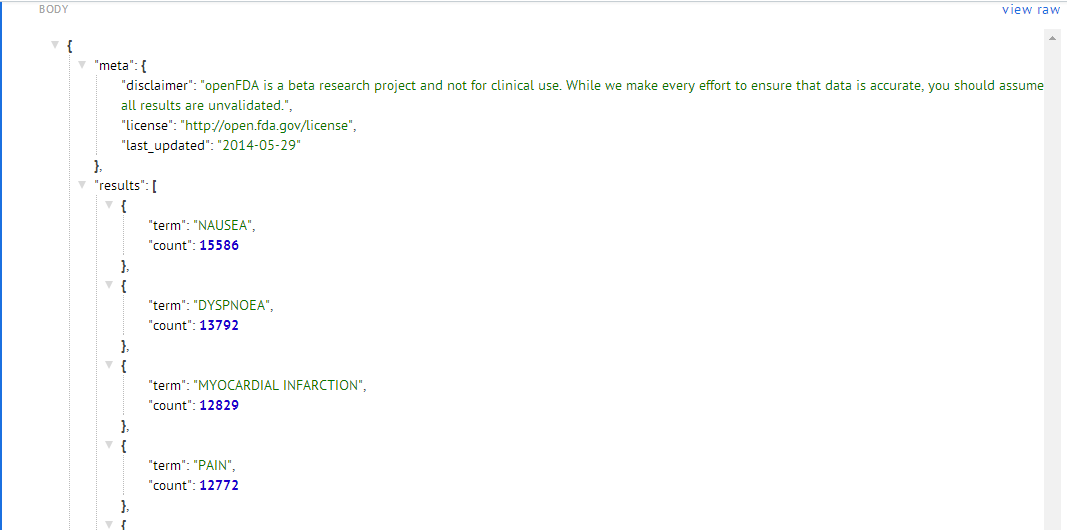
We will test the request for OpenFDA. OpenFDA is an Elasticsearch-based API that serves Food and Drug Administration publicly accessible data about drugs, devices and food. Our test is to search for records listing a specific drug and validating the count of the five most frequently reported patient reactions.
STEP 4: Create a request by adding method, URL, header, parameters etc
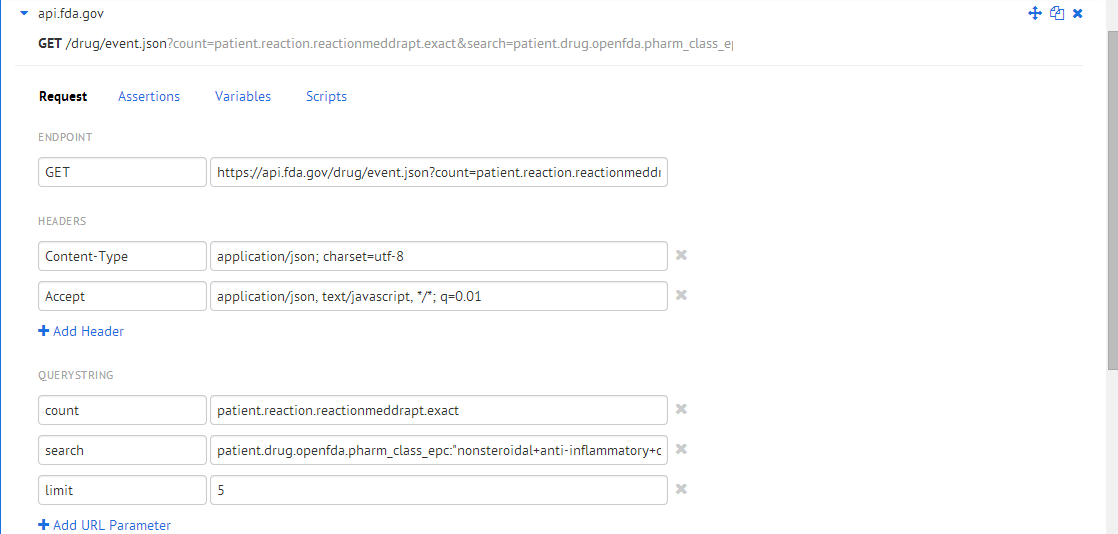
We are trying to create the following request in Runscope:
https://api.fda.gov/drug/event.json?count=patient.reaction.reactionmeddrapt.exact&search=patient.drug.openfda.pharm_class_epc:"nonsteroidal+anti-inflammatory+drug"&limit=5 |
Click on add request where you can create request, add parameters, assertions, variables and scripts
- Select the type of method and (GET, POST etc) enter the URL of the application under test
- You can add header parameters like Content Type etc
- Add the URL parameter which has to be sent as part of the query string. For this example we have added parameters like count, search and limit
- You can add assertions to specify expected value in the response for a request. If any assertion fails, when the test runs the test fails. Assertions can be added against a response header, status code, response time/size, and content. For our test we will add an assertion to make sure we receive Status Code 200
- You can extract data from response and save it as variables which can be used in subsequent requests. Variables are useful for passing data and state between requests based on the outcome of previous requests in the test run. For our test we will extract data from JSON response by using ‘Nested property within array’


STEP 5: Run the test
Save and run your test. Guess which button you click?
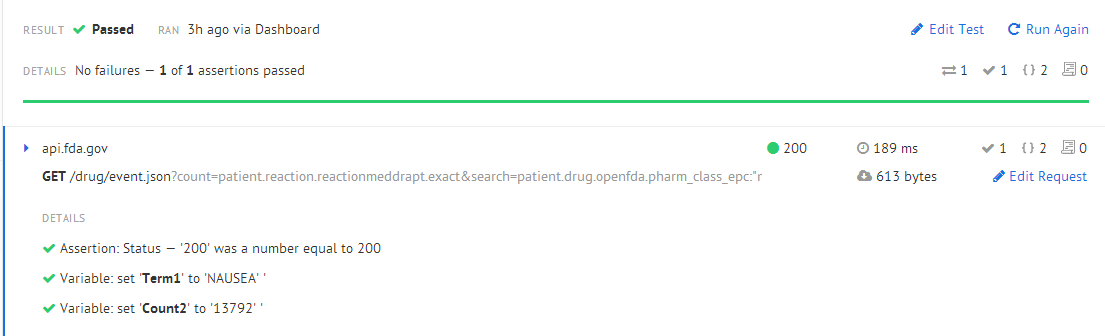
STEP 6: Check the result Once a test run is completed you can view the result in the left side of the page. You can also see the detailed result along with the complete request and response which you receive.

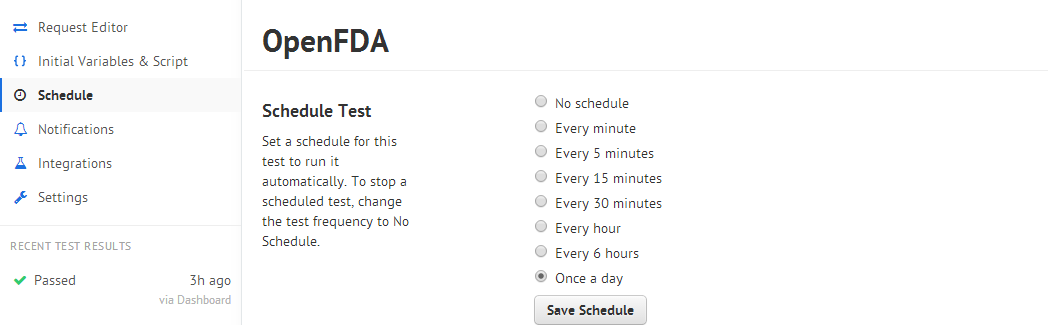
STEP 7: [OPTIONAL] Schedule tests and notifications
Click on schedule to schedule your test to run automatically.
You can set notifications to your email to notify you regarding the test completion or test result. You can also post the result using Webhook Notifications.

Hit us up with questions and comments below.

I am a dedicated quality assurance professional with a true passion for ensuring product quality and driving efficient testing processes. Throughout my career, I have gained extensive expertise in various testing domains, showcasing my versatility in testing diverse applications such as CRM, Web, Mobile, Database, and Machine Learning-based applications. What sets me apart is my ability to develop robust test scripts, ensure comprehensive test coverage, and efficiently report defects. With experience in managing teams and leading testing-related activities, I foster collaboration and drive efficiency within projects. Proficient in tools like Selenium, Appium, Mechanize, Requests, Postman, Runscope, Gatling, Locust, Jenkins, CircleCI, Docker, and Grafana, I stay up-to-date with the latest advancements in the field to deliver exceptional software products. Outside of work, I find joy and inspiration in sports, maintaining a balanced lifestyle.


How to use Post method in runscope.Can anyone explain me.
I want to upload a txt json file in runscope.
Bharath,
I have not tried to trigger Post Request for uploading a text file. But probably you can try this. Open dev tools and try uploading file in your application. You should get all the parameters which gets passed when trying to upload manually. Now try triggering similar request using Runscope. If you are not sure how to use dev tools you can refer to our blog on developers tools.