For one of our clients, TestCafe has been recently used for end-to-end(e2e) UI automation. TestCafe has a number of significant features, including simple setup, no web driver installation, support for all main operating systems, various browser support, reporting and HTTP Mocking.
In this article, I’d like to show how to create UI tests with TestCafe, as well as how to set up and write e2e tests with basic assertions using page object models. For this, we created a sample React Resume Builder Application, which we will use to write an e2e test in the sections that follow. If you are new to TestCafe, this article will help you understand the basic features of TestCafe as well as how to write selectors for a React application.
TestCafe Setup and Requirements
Pre-requisite: Install NodeJS and npm and check if the installation is correct by node -v and npm -v
TestCafe can be installed globally or locally in your project using npm.
For Global Installation on windows – npm install-g testing cafe
For Local Installation on windows – npm install --save-dev testcafe
Check the installation by running the command testcafe -v
The output looks like this:
$ testcafe -v

Using locally installed version of TestCafe.

1.15.1
Note: If TestCafe is installed both locally and globally, the TestCafe command will run the local version.
About our Web Application and Setup
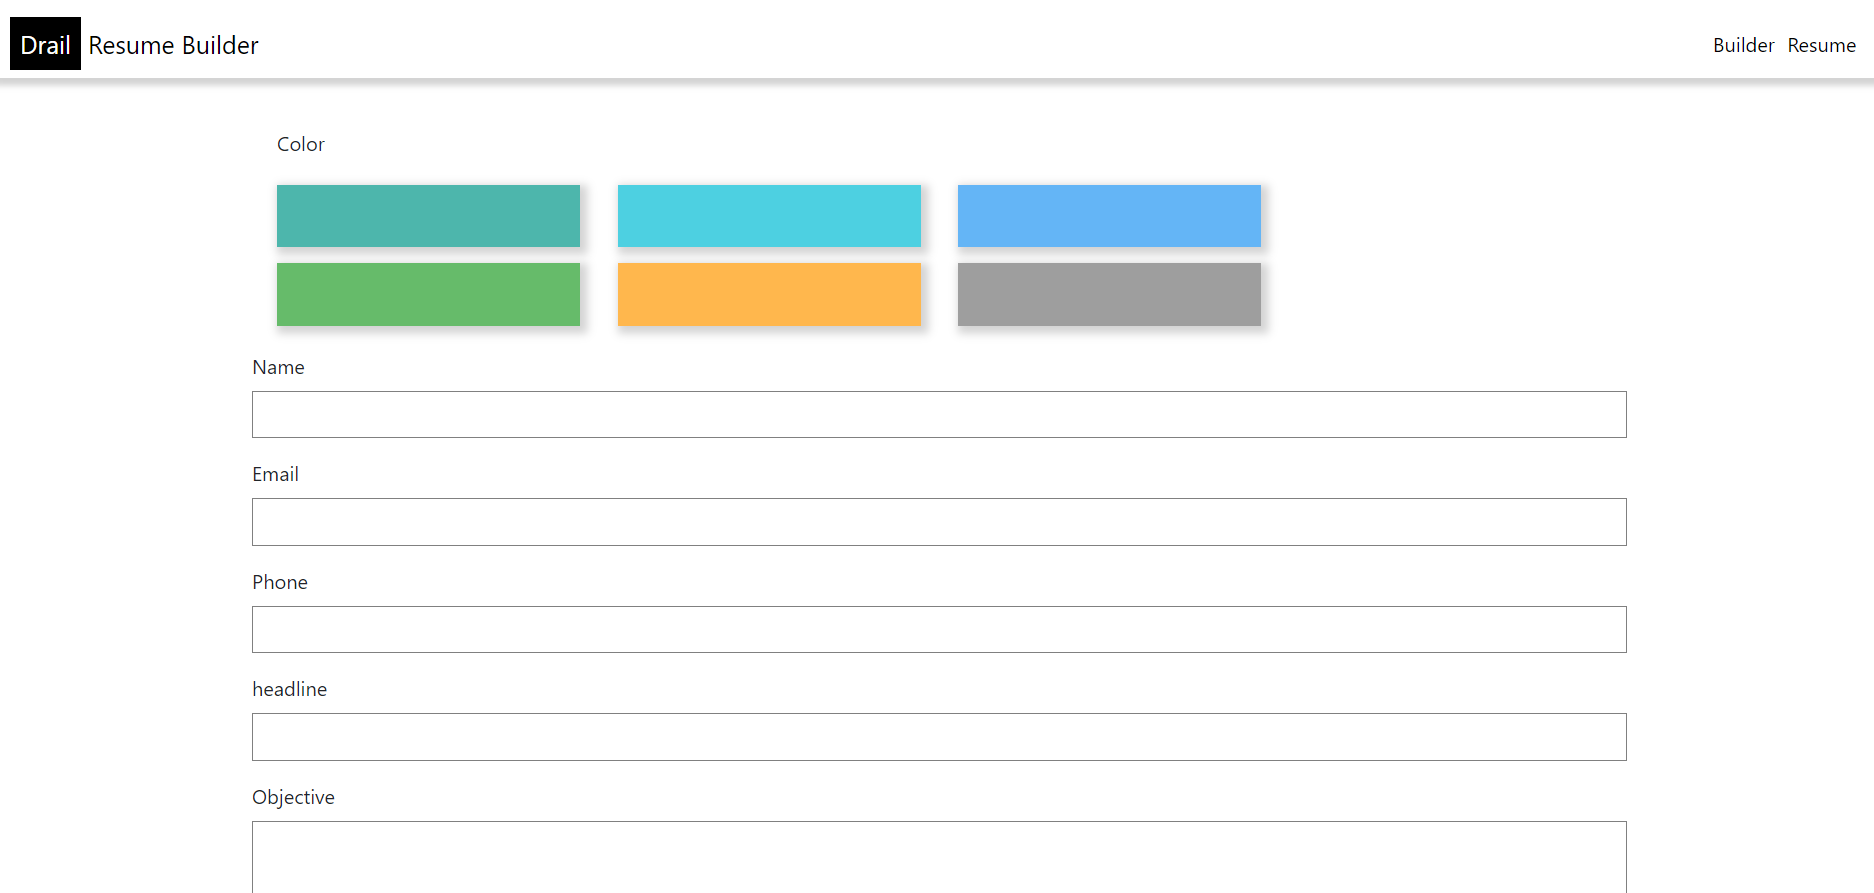
For this tutorial, I am using this sample Resume Builder Application created using create-react-app. This application is built for our internal training purpose. You can find the source code here. This react application is used to create a resume by entering personal, educational, and professional experience details. Begin by cloning the base project structure
$ git clone https://github.com/yashrajb/Drail-Resume-Builder.git
From the root directory run npm start to start the project. The application will be deployed at http://localhost:3000 and a list of UI fields should appear. Once you’re comfortable with the application, start writing tests.
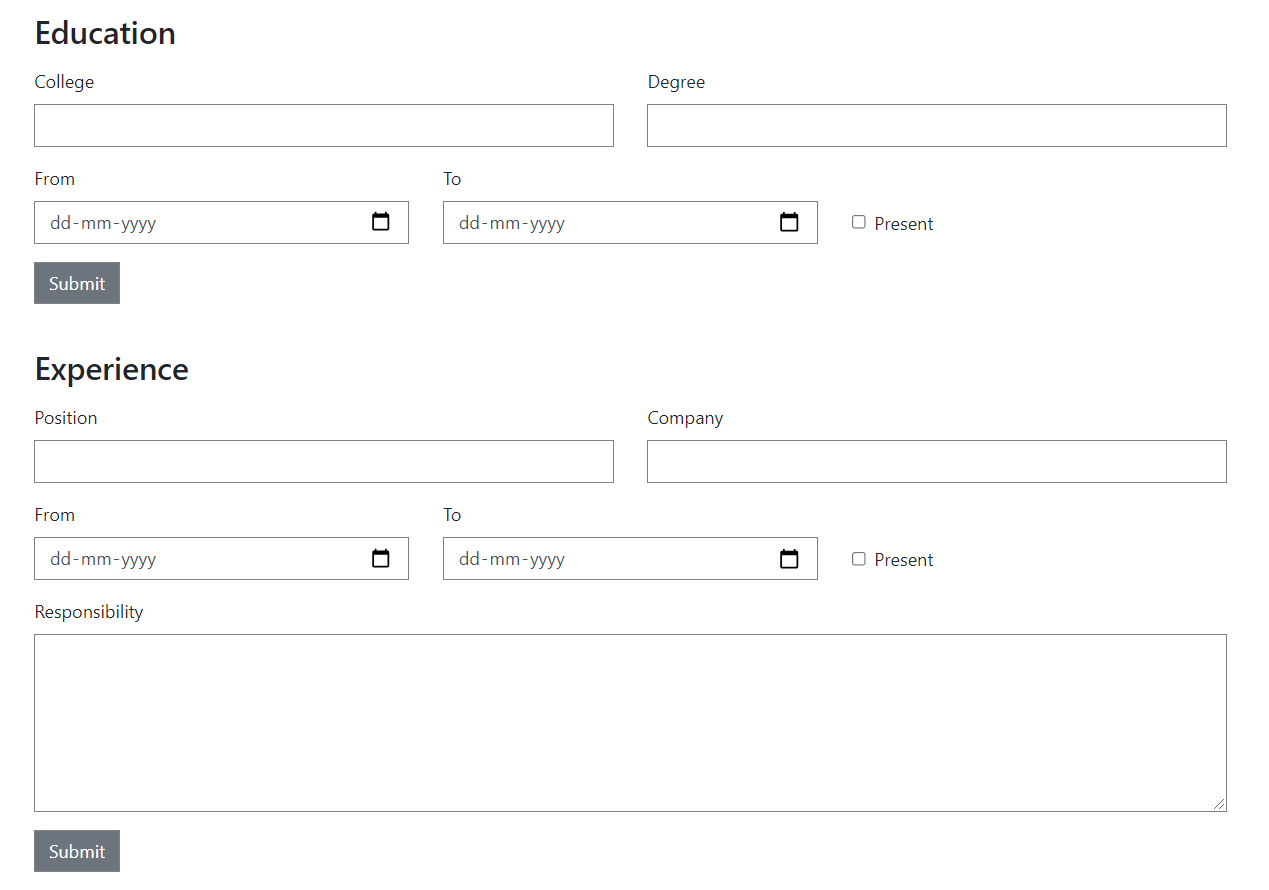
Before we get started, take a look at our sample Resume Builder application. It consists of two pages, main page with textboxes, drop down list, buttons etc., and a redirect page. In this tutorial, I am going to build a E2E tests for Resume builder application. For example, this test will go to the main web page, fill out the form, and verify if the filled in contents are displayed in the redirected page.
Page Object Architecture
Using the Page Objects Pattern is one of the best pattern for architecting a testing project. Ideally, you should save all selectors or locators or any specific data that is unique to a specific page in a page object file. The main advantage of this pattern is that it will be easier to maintain the test because if some changes are required, the test itself will remain unchanged, and only the selectors or locators in one page will need to be modified. This pattern helps to make the code more understandable, maintainable, and reusable by writing the page methods. You can read here about page objects.
Writing Page Objects
For this testing, I used the page object model and created classes for each web page in the application. The Test scenarios include
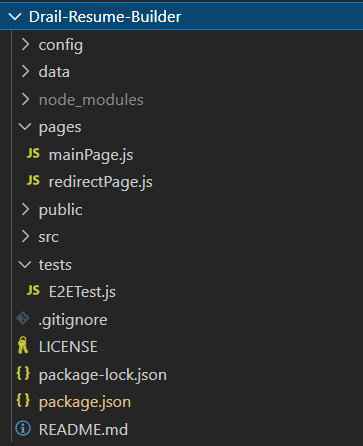
In the project root folder, I created a folder called `/pages` and a folder called `/tests`, and started writing page objects and tests here. Lets start with a basic assertion. The directory structure looks like this:
Create Main page model
Make a file called “mainPage.js” in the pages folder, then declare a Page Object Class as shown below. This page consists of all the element locators and methods that we will use in the main page. To begin, you must import the Selector API from testcafe module. The TestCafe Selector function allows to use CSS selectors to locate the elements to test.
import { Selector, t } from 'testcafe';
const { ReactSelector } = require('testcafe-react-selectors');

export default class mainPage {
    constructor() {
         this.title = Selector('a');
    }
In the mainPage.js, I have simply added one Selector which will be accessed from the test.
Creating our first Test
Test scripts should be organized by module name under the “tests” folder. Each test is grouped into a fixture in TestCafe. The fixture is essentially a test category, and each test might have multiple fixtures. TestCafe uses a proxy server to inject scripts to the page, which we can then inspect.
I created a ‘/E2ETest.js’ file in the `/tests` folder and this test starts by opening the application and checking the header of the page(we will extend this test further in our next sections). If you notice I have also defined a config file to store all the critical data required for the project. In automated testing, test data is usually a crucial component. Using hardcoded values in our tests, such as ‘url’, is not a good idea. So I have added these values to a config file and am reading from it.
Our first test looks something like this.
import mainPage from '../pages/mainPage';
import config from '../config/config'

fixture`E2E Fixture - Building a resume`
      .page`${config.testURL}`;

// page header test
test('Assert main page header', async t => {
      // The assertion
      await t.expect(await mainPage.title.innerText).eql("Drail Resume Builder");
});
After importing the required modules, declare a test fixture and name it as `fixture ‘E2E Fixture – Building a resume’.` and define the start URL for all the tests in the fixture. In our situation, the URL is http://localhost:3000. Use keyword test to create a new test(). In our case, the test starts with asserting the URL of the home page header.
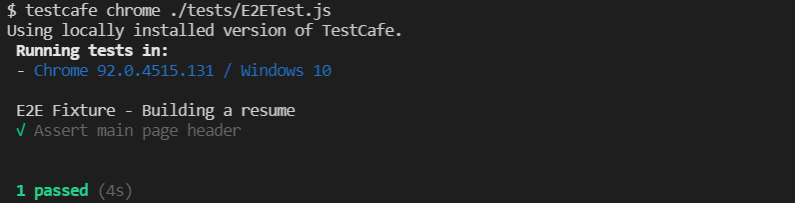
Run the tests
There are many ways to run a test in TestCafe. The simplest way is run using
testcafe chrome ./tests/E2ETest.js
Add actions to the page models
Let’s now add some actions to the page object mainPage.js. Inside the page object functions, things alter a bit. This time we’re instructing TestCafe to select specific form elements and type using the typeText(). So our mainPage.js now becomes
mainPage.js
import { Selector, t } from 'testcafe';
const { ReactSelector } = require('testcafe-react-selectors');

class mainPage {
    constructor() {
        this.title = Selector('a');
        this.resume = ReactSelector('LinkAnchor')
        this.name = Selector('input[id=name]')
        this.email = Selector('input[id=email]')
        this.phone = Selector('input[id=phone]')
        this.headline = Selector('input[id=headline]')
        this.objective = Selector('textarea[id=objective]')
        this.skills = Selector('input[id=skills]')
        this.languages = Selector('input[id=lang]')
        this.college = ReactSelector('EducationForm').findReact('Input').withProps('id', 'college')
        this.degree = ReactSelector('EducationForm').findReact('Input').withProps('id', 'degree')
        this.fromDateEdu = ReactSelector('EducationForm').findReact('Input').withProps('id', 'from')
        this.toDateEdu = ReactSelector('EducationForm').findReact('Input').withProps('id', 'to')
        this.educationSubmit = ReactSelector('EducationForm').findReact('Button').withProps('children', 'Submit')
        this.redirect = Selector('h3')
        this.position = ReactSelector('ExperienceForm').findReact('Input').withProps('id', 'position')
        this.company = ReactSelector('ExperienceForm').findReact('Input').withProps('id', 'company')
        this.fromDateExp = ReactSelector('ExperienceForm').findReact('Input').withProps('id', 'from')
        this.toDateExp = ReactSelector('ExperienceForm').findReact('Input').withProps('id', 'to')
        this.responsibility = ReactSelector('ExperienceForm').findReact('Input').withProps('id', 'responsible')
        this.experienceSubmit = ReactSelector('ExperienceForm').findReact('Button').withProps('children', 'Submit')
    }

    // click the resume button for the given link
    async clickResumeButton(link) {
        await t.click(this.resume.withProps('children', link))
    };

    // fills basic details
    async fillBasicDetails(name, email, phone, headline, obj, skills, lang) {
        await t
            .typeText(await this.name, name)
            .typeText(await this.email, email)
            .typeText(await this.phone, phone)
            .typeText(await this.headline, headline)
            .typeText(await this.objective, obj)
            .typeText(await this.skills, skills)
            .typeText(await this.languages, lang)
    }

    // fill the education details in the page
    async fillEducationDetails(educationDetails) {
        await t
            .typeText(await this.college, educationDetails.college)
            .typeText(await this.degree, educationDetails.degree)
            .typeText(await this.fromDateEdu, educationDetails.fromDateEdu)
            .typeText(await this.toDateEdu, educationDetails.toDateEdu)
            .click(await this.educationSubmit)
    }

    // fills the experience details
    async fillExperienceDetails(experienceDetails) {
        await t
            .typeText(await this.position, experienceDetails.position)
            .typeText(await this.company, experienceDetails.company)
            .typeText(await this.fromDateExp, experienceDetails.fromDateExp)
            .typeText(await this.toDateExp, experienceDetails.toDateExp)
            .typeText(await this.responsibility, experienceDetails.responsibility)
            .click(await this.experienceSubmit)
    }
}

export default new mainPage();
In the above page, I have added the following:
Similarly, the page methods for redirect page are to verify if the contents are displayed correctly.
redirectPage.js
const { ReactSelector } = require('testcafe-react-selectors');

export default class redirect {
    constructor() {
        this.resume = ReactSelector('Resume')
        this.educationView = ReactSelector('EducationView')
        this.experienceView = ReactSelector('ExperienceForm')
    }

    // resume with specific name
    async checkName(name) {
        return this.resume.withProps('name', name)
    };

    // check education details
    async checkEducationDetails(educationDetails) {
        return this.educationView.withProps(educationDetails)
    }

    // check experience details
    async checkExperienceDetails(Experiencedetails) {
        return this.experienceView.withProps(Experiencedetails)
    }

};
Complete E2E Test
Now our test needs to be extended to make use of the methods in the page objects. By importing and accessing its selectors, I can now use this page model in the e2e test.
I have added different tests for filling in personal, education and experience details and asserting the contents. I first imported all the page object classes needed, such as mainPage.js, redirectPage.js, as well as the config and data files. If you notice, I have also created a data folder to store data-specific information. With this in place, we can access our selectors through the page model’s properties and our test becomes like this
import mainPage from '../pages/mainPage';
import redirectPage from '../pages/redirectPage';
const data = require('../data/mainPageData');
import config from '../config/config'

fixture`E2E Fixture - Building a resume`
      .page`${config.testURL}`;

// page header test
test('Assert main page header', async t => {
      await t.expect(await mainPage.title.innerText).eql(`${data.basicInfo.title}`);
});

// fill the education and experience details page
test('Fill the education and experience details', async t => {
      await mainPage.fillBasicDetails(data.basicInfo.name, data.basicInfo.email, data.basicInfo.phone, data.basicInfo.headline, data.basicInfo.objective, data.basicInfo.skills, data.basicInfo.languages)
      await mainPage.fillEducationDetails(data.educationDetails)
      await mainPage.fillExperienceDetails(data.experienceDetails)
      await mainPage.clickResumeButton('Resume')
      const name = await redirectPage.checkRedirectName(data.basicInfo.name);
      await t.expect(name.exists).ok();
      // check that we have the correct education details
      const educationDetails = await redirectPage.checkEducationDetails({
            college: data.educationDetails.college,
            degree: data.educationDetails.degree,
            from: data.educationDetails.fromDateEdu,
            to: data.educationDetails.toDateEdu
      })
      await t.expect(educationDetails.exists).ok()
      // check that we have the correct experience details
      const experienceDetails = await redirectPage.checkExperienceDetails({
            position: data.experienceDetails.position,
            company: data.experienceDetails.company,
            from: data.experienceDetails.fromDateExp,
            to: data.experienceDetails.toDateExp,
            responsible: data.experienceDetails.responsibility
      })
      await t.expect(experienceDetails.exists).ok()
});
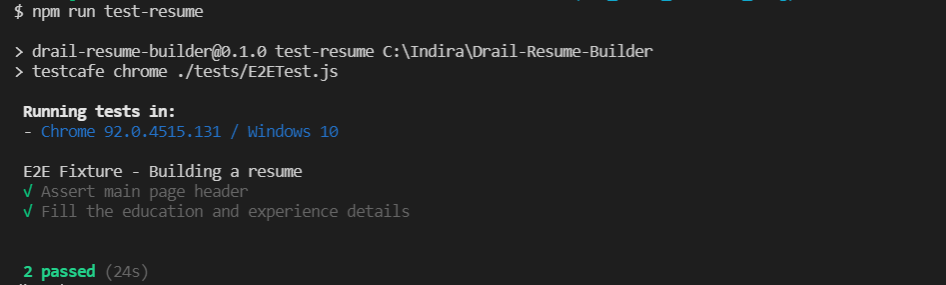
Now, run the test and view the Test Results. There are many ways to run a test in TestCafe. This time I have added the testcafe command to the scripts section in package.json as shown below
"scripts": {
    "test-resume": "testcafe chrome ./tests/E2ETest.js/"
}
$ npm run test-resume
Running Tests using CLI commands
TestCafe supports modern browsers and automatically detects the browsers installed on your machine. Listing out few CLI commands
1. Use below command to view the list of all available browsers
testcafe --list-browsers
2. Use below command to run this test on selected browsers
testcafe firefox, chrome, safari ./tests/E2ETest.js
In this case, testcafe will open three instances together in three different browsers.
3. Running on Google Chrome headless
testcafe "chrome:headless" .tests/E2ETest.js
4. Parallel Test Execution against multiple browsers
testcafe -c 1 safari,chrome ./tests/E2ETest.js
5. Set Test Execution speed
testcafe chrome ./tests/E2ETest.js --speed 0.5
Debugging the Tests
There are different ways to debug the TestCafe Tests. One way is Debug mode. Using this mode, test execution is paused before the action or assertion so that you can open the developer tools and debug the state of the element and page. The execution is halted and you can resume test execution or skip to the next action or assertion.

We can also enable Debug mode On Fail using CLI option, which will automatically enter into Debug mode when a test fails using below command
testcafe chrome ./tests/E2ETest.js --debug-on-fail
That’s all folks !! I have only touched the basics of what can be done with TestCafe, if you want more information on TestCafe you can visit official documentation
References:
1. TestCafe documentation
2. End to End testing with TestCafe

I am an experienced engineer who has worked with top IT firms in India, gaining valuable expertise in software development and testing. My journey in QA began at Dell, where I focused on the manufacturing domain. This experience provided me with a strong foundation in quality assurance practices and processes.
I joined Qxf2 in 2016, where I continued to refine my skills, enhancing my proficiency in Python. I also expanded my skill set to include JavaScript, gaining hands-on experience and even build frameworks from scratch using TestCafe. Throughout my journey at Qxf2, I have had the opportunity to work on diverse technologies and platforms which includes working on powerful data validation framework like Great Expectations, AI tools like Whisper AI, and developed expertise in various web scraping techniques. I recently started exploring Rust. I enjoy working with variety of tools and sharing my experiences through blogging.
My interests are vegetable gardening using organic methods, listening to music and reading books.

