This Appium tutorial will show you how to run automated tests on a real physical device. We estimate skimming through this post will take you 10 minutes. We estimate working through this post, step by step, will take you about 90 minutes. In this post we will cover getting setup with Appium, interfacing with real devices, writing and running Appium tests. We also briefly introduce you to multiple ways to locate UI elements.
NOTE: If you have an Android phone handy, you can follow along easily. If not, you may be interested in a previous post showing you how to get started with Appium on an emulator.
Why this post?
There are two compelling reasons for this post.
1. Mobile devices are taking over the world
In recent times there is a lot of interest in mobile testing. And rightly so. The mobile space is growing. The apps are the new cool thing. The mobile space is ideal for software testers looking to learn new things and keep current.
2. Lack of high quality tutorials on mobile automation
One big challenge in the mobile automation space is the the limited amount of information about the technologies. Quality sources of information on mobile automation is very limited.
So here is a high quality and informative tutorial for the hands-on tester who wants to get started with Appium and mobile automation on a physical mobile device.
Why Appium?
There are quite a few number of tools out there in the mobile automation market like MonkeyTalk, Calabash, Robotium, etc. Each has its own advantages and limitations. Some of these tools require an agent to be installed, the application has to be recompiled so that the tool can interact with the mobile app, etc. However Appium is built on the idea that testing native apps shouldn’t require including an SDK or recompiling the app. Appium is also an open source project – so if you are not happy with it, you can contribute and enhance it. Appium tests run against both on iOS and Android. For me, Appium (while still being extremely immature), looks to be the standout technology that will own the mobile UI automation space. Appium reminds me of the early Selenium versions I used. Based on history, I think Appium will be the front-runner in the mobile UI automation space.
Step by step Appium tutorial
We have already shown you how to run an Appium test using an emulator in one of our previous posts. In this post, I will show you how to test an app using a real device. Being a tennis fan, I decided to test a tennis app. On my Android phone, I downloaded the ATP/WTA app and decided to automate some of the functionality of this app. I will also show you how to navigate through different pages in the app using different locator strategies, get data from a table using Appium and Python and how to use the uiautomator to find UI components of the page.
Overview
1. Appium setup
2. Connect to an Android device
3. Select an app to test, get its package and activity name
4. Use uiautomatorviewer to find UI components of the application
5. Write the test
6. Start and launch Appium server console
7. Run the test
8. View the test result
STEP 1: Appium setup
Download and install Android SDK and Appium along with Appium’s client libraries for Python. Installations are fairly straight forward. However if you need help, please refer to the setup section in our previous blog for a more detailed process on how to set up Appium on your machine.
STEP 2: Connect to an Android device
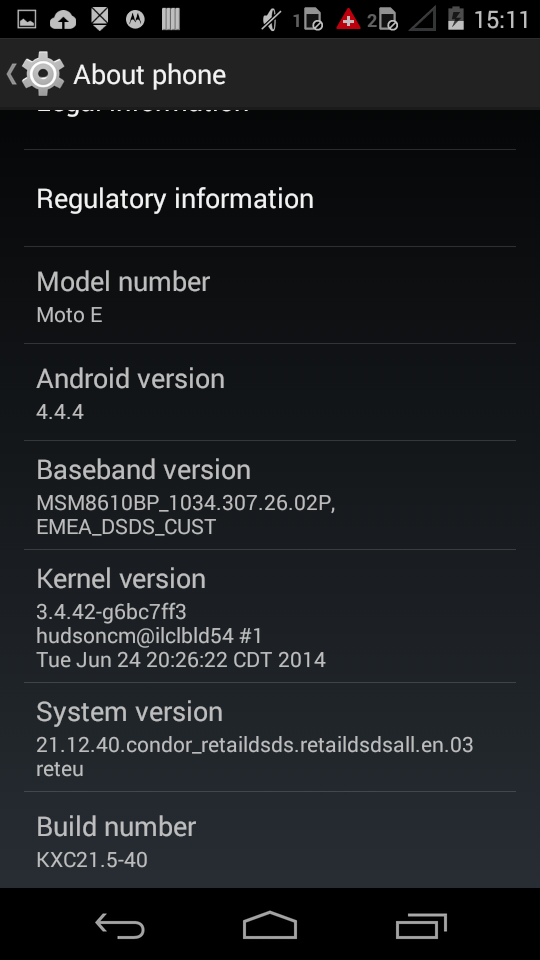
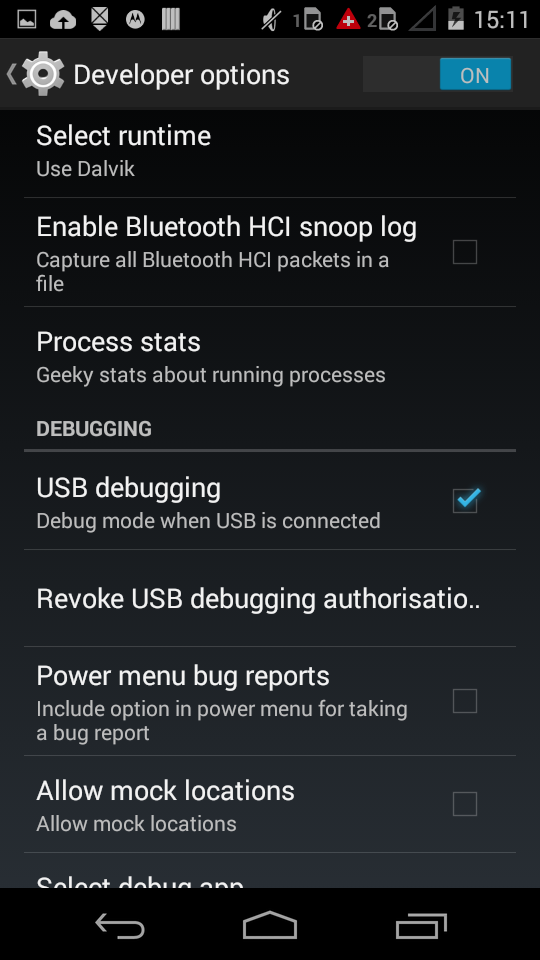
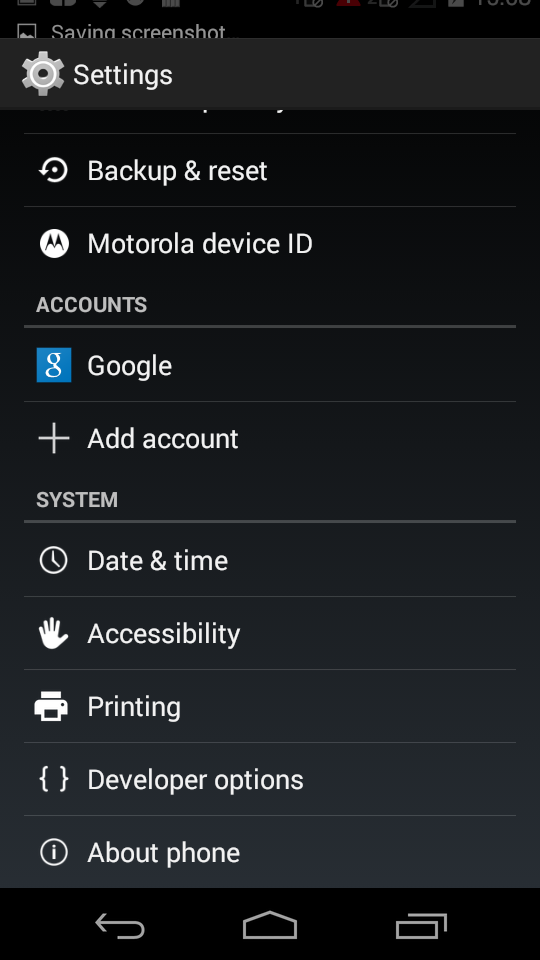
You have to enable USB debugging in your phone to be able to run your test scripts. For this, first, you need to enable “Developer options” by navigating to Settings/About Phone and tapping build number seven times. You will get a notification saying that you’re now a developer. Ignore it – you are still a tester ;). Once you are a developer you need to navigate to “Developer options” and enable the USB debugging option. You can refer to this link for more details
Note: On some devices, you may have to download some device drivers to connect your phone to the PC
STEP 3: Select an app to test, get its package and activity name
You can go to Google Play Store and download the ATP/WTA app. We will automate some of the functionality like navigating to the ATP Singles Rankings view to assert that Novak Djokovic is the first player listed and also get his personal details from the table in players view.
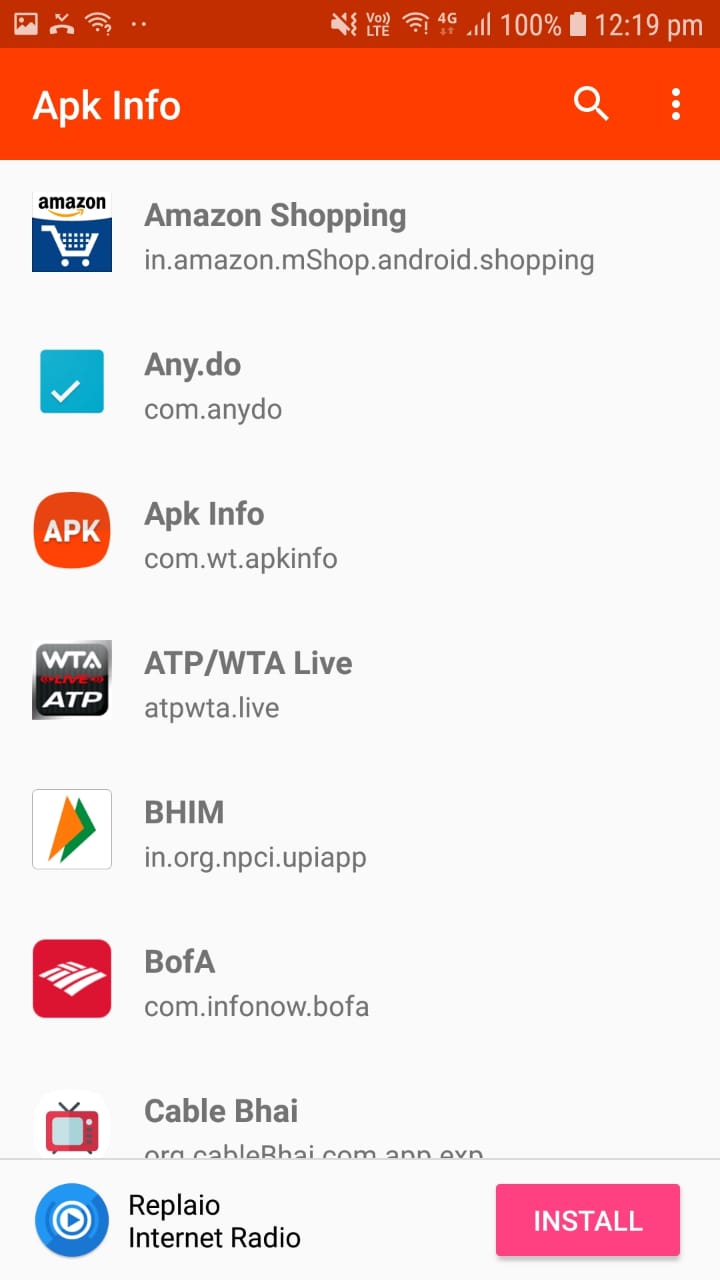
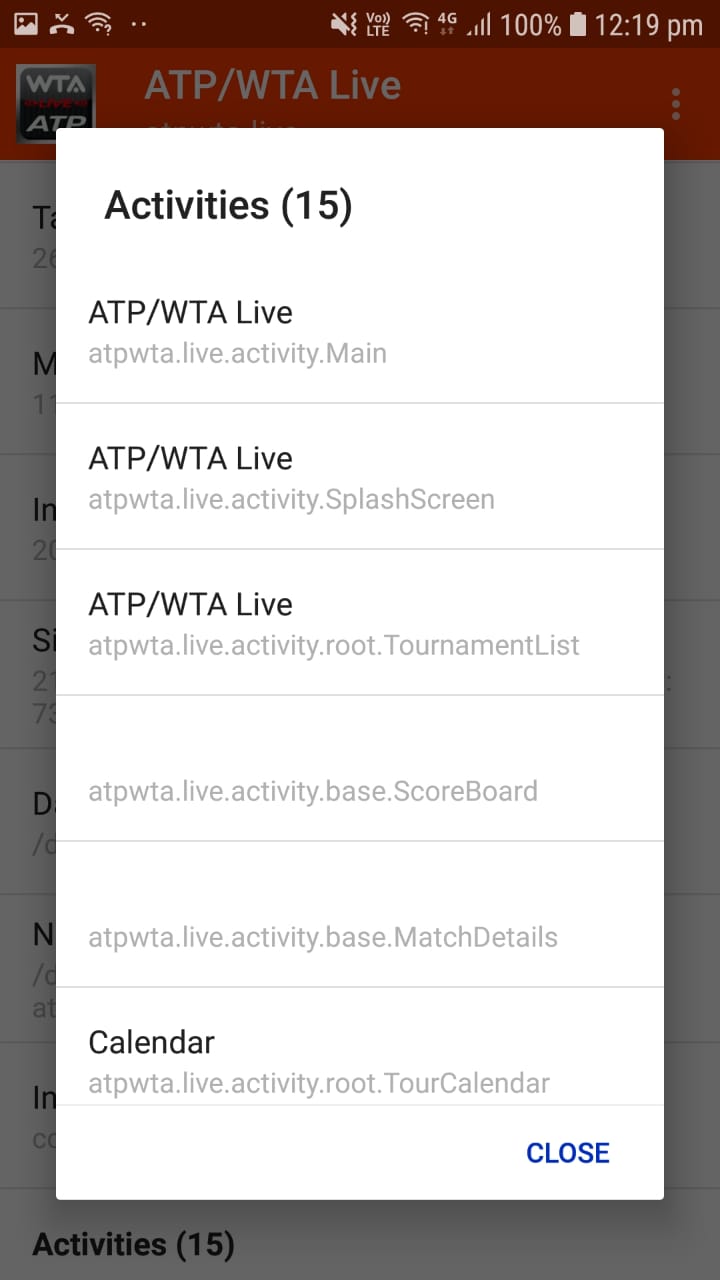
In order to start the app we would need the app Package and Activity name. We can get these details from the apk file of the app. Instead of downloading the apk file and looking into app manifest file for this detail, we can also download some really cool apps which can get you these details. Apk Info is one such app which you can download from Play Store and get the app Package and Activity details. Just download the app and click on Apk Info Icon which will list all the apps on your device. Click on your app to get the details required as shown below
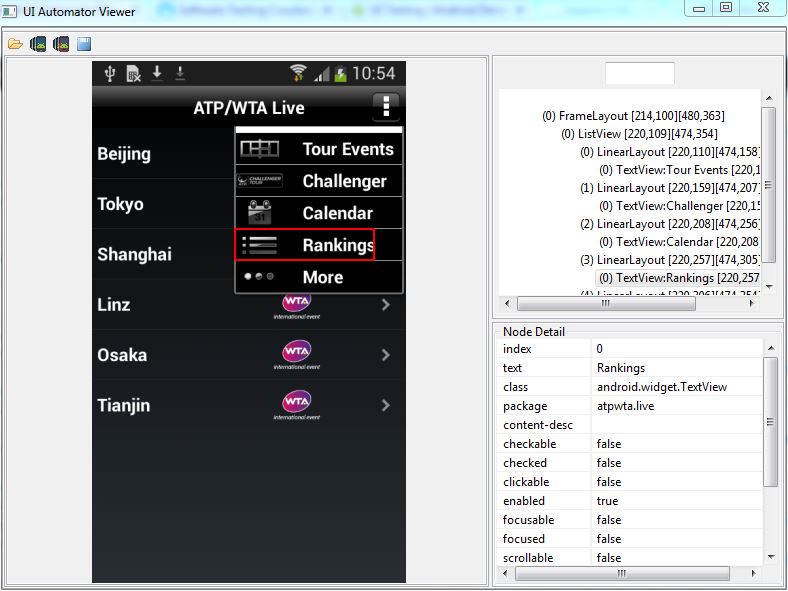
STEP 4: Use uiautomatorviewer to find UI components of the application uiautomatorviewer is a GUI tool to scan and analyze the UI components of an Android application. To click or to navigate to any components in your app you need to identify the UI components of your application. Using uiautomatorviewer you can take the snapshot of the UI screen on any Android device that is connected to your machine. You can then inspect the layout hierarchy and view the properties of the individual UI components that are displayed on the device.
Connect your Android device to your machine and open the app you are testing. In your machine open a terminal window and navigate to the path $android-sdk /tools and run the command to open Uiautomatorviewer
$ uiautomatorviewer |
To capture a screen, click the “Device Screenshot button” in the uiautomatorviewer tool. The screenshot of the page in your device is captured. You can move over the snapshot in the left-hand panel to see the UI components identified by the uiautomatorviewer. You can view the component’s properties listed in the lower right-hand panel, and the layout hierarchy in the upper right-hand panel.
STEP 5: Write the test
We will launch the ATP WTA app using the package and activity name we found out and then navigate through various pages using different locator strategies. While we do not recommend using multiple locator strategies, we are doing so in this tutorial only to make you aware of your options. Then we will confirm that Novak Djokovic is the top player listed in ATP Singles Rankings list view and get his personal details from a table in Players view.
""" Qxf2: Example script to run one test against ATP_WTA app using Appium The test will navigate to ATP Singles Rankings list and confirm that Novak Djokovic is the top player listed and get his personal details from a table. """ import unittest, time, os from appium import webdriver from time import sleep class Android_ATP_WTA(unittest.TestCase): "Class to run tests against the ATP WTA app" def setUp(self): "Setup for the test" desired_caps = {} desired_caps['platformName'] = 'Android' desired_caps['platformVersion'] = '4.4' desired_caps['deviceName'] = '$ Your device name' # Since the app is already installed launching it using package and activity name desired_caps['appPackage'] = 'atpwta.live' desired_caps['appActivity'] = '.activity.Main' # Adding appWait Activity since the activity name changes as the focus shifts to the ATP WTA app's first page desired_caps['appWaitActivity'] = '.activity.root.TournamentList' self.driver = webdriver.Remote('http://localhost:4723/wd/hub', desired_caps) def tearDown(self): "Tear down the test" self.driver.quit() def test_atp_wta(self): "Testing the ATP WTA app " self.driver.implicitly_wait(30) time.sleep(5) # click on Navigation Bar MainMenu by finding element by xpath menubar = self.driver.find_element_by_xpath("//android.widget.Spinner[@resource-id='atpwta.live:id/NavBarMainMenuSpinner']") menubar.click() # From list of options available click on Rankings by finding element using uiautomator rankings = self.driver.find_element_by_android_uiautomator('new UiSelector().text("Rankings")') rankings.click() # click on ATP Singles by finding element using id singles = self.driver.find_element_by_id('atpwta.live:id/RankingsListItem') singles.click() # Assert that Novak Djokovic is the top listed player elmnt = self.driver.find_element_by_id('atpwta.live:id/Player1TV') self.assertEqual('Novak Djokovic', elmnt.get_attribute('text')) print elmnt.get_attribute('text') elmnt = self.driver.find_element_by_xpath("//android.widget.LinearLayout[@index=0]") elmnt.click() # Print the contents of Table listed for the top ranked player table = self.driver.find_element_by_android_uiautomator("new UiSelector().className(android.widget.TableLayout)") rows = table.find_elements_by_class_name('android.widget.TableRow') for i in range(0, len(rows)): cols = rows[i].find_elements_by_class_name('android.widget.TextView') for j in range(0, len(cols)): print(cols[j].get_attribute('text')+" -- "), print("") #---START OF SCRIPT if __name__ == '__main__': suite = unittest.TestLoader().loadTestsFromTestCase(Android_ATP_WTA) unittest.TextTestRunner(verbosity=2).run(suite) |
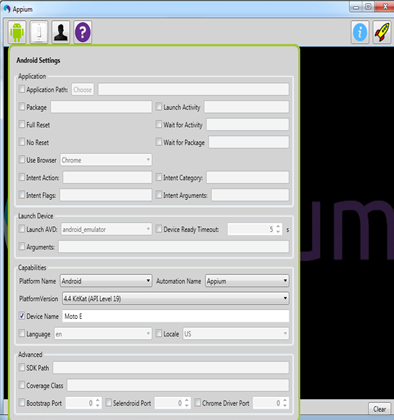
STEP 6: Start and launch Appium server
Start Appium server console by double-clicking on the Appium file. Click on the ‘rocket’ icon to launch the Appium node server.
Please refer to the 6th and 7th step of our previous blog if you need more details on starting appium server.
STEP 7: Run the test
You can run the test any way you like. We will run it using the command prompt. The app gets launched in your device and navigates to a different screen.


STEP 8: View the test result
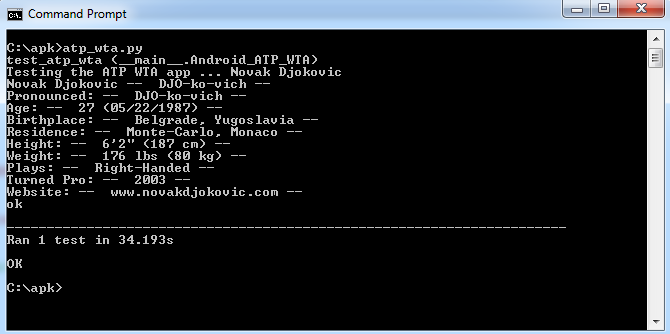
Game. Set. Match. You learnt how to do mobile automation using Appium on a real device! If you are still hungry for more, take a tour of our open-sourced web and mobile automation framework.

I am a dedicated quality assurance professional with a true passion for ensuring product quality and driving efficient testing processes. Throughout my career, I have gained extensive expertise in various testing domains, showcasing my versatility in testing diverse applications such as CRM, Web, Mobile, Database, and Machine Learning-based applications. What sets me apart is my ability to develop robust test scripts, ensure comprehensive test coverage, and efficiently report defects. With experience in managing teams and leading testing-related activities, I foster collaboration and drive efficiency within projects. Proficient in tools like Selenium, Appium, Mechanize, Requests, Postman, Runscope, Gatling, Locust, Jenkins, CircleCI, Docker, and Grafana, I stay up-to-date with the latest advancements in the field to deliver exceptional software products. Outside of work, I find joy and inspiration in sports, maintaining a balanced lifestyle.


I am writing automation script using automation tool appium using java.
1)I would like to know how to write script using only below data
type: android.widget.CheckedTextView
text: [email protected]
index: 4
enabled: true
location: {87, 1135}
size: {906, 144}
checkable: true
checked: false
focusable: false
clickable: true
long-clickable: false
package: com.google.android.gms
password: false
2) This method doesn’t auto populate when I type driver. please help me how can I get it…..driver.elementsByAndroidUIAutomator
driver.elementsByAndroidUIAutomator(“new UiSelector().className(android.widget.ListView).childSelector(new UiSelector().className(android.widget.LinearLayout).clickable(true))”);
Hi,
You can find the response below
1) I am assuming that you want to find an element using the mentioned properties.
In the above case none of the property seems to be unique enough and also there is no resource-id field which is usually unique. You may need to build an xpath using its parent element. Refer to the below blogs which may help you.
Identify UI elements for mobile apps
Xpath tutorial
2) I am not sure on this. What IDE are you using to run your script? In case its eclipse below link may be helpful
http://stackoverflow.com/questions/6912169/eclipse-enable-autocomplete-content-assist
Hello,
Thanks you for a nice presentation on using Appium on real device. I am new to this and it was very useful introduction. I have a little comment to the code though:
“elmnt = self.driver.find_element_by_xpath(“//android.widget.LinearLayout[@index=0]”)
elmnt.click()”
Actually returns Wawrinka for me. Probably because it gets confused with what to choose as Rank has the same class and also refers to index 0. It helped me to do a small change: “elmnt = self.driver.find_element_by_xpath(“//android.widget.LinearLayout[@resource-id=’atpwta.live:id/RankingItemViewRoot’and android.widget.LinearLayout[@index=0]]”)”
Once again thank you for a nice introduction!
Cheers
i m launching a site in chrome
i m not getting the path of urls of that site
could you please provide me with the documentation for the same or any further help
Hi Deepa,
Can you please let me know what exact issue are you facing? Error message and when are you getting the error would help
Hi Avinash,
I am working on Ubuntu 14.04. I have installed Appium 1.4.13. I have test cases written in Python. Everything works fine . Now, I need to create a report of the outputs.
How can I do that ??
Hi Karthik,
As of now I don’t have a good reporting capability. If I have something will update you on it
Hi,
I have used the same code as urs and have just changed the required things according to my app.
I am getting this error
selenium.common.exceptions.WebDriverException: Message:
———————————————————————-
Ran 1 test in 0.032s
FAILED (errors=1)
The message column is blank and nothing is happening in mobile device. I have checked with avd devices, my device is recognized so device recognition is not a problem.
Plus can you elaborate what is the funtion of xpath()
this is the complete error
Traceback (most recent call last):
File “D:\automation\appium_samples\getting_Started.py”, line 21, in setUp
self.driver = webdriver.Remote(‘http://localhost:4723/wd/hub’, desired_caps)
File “C:\Python34\lib\site-packages\appium\webdriver\webdriver.py”, line 36, in __init__
super(WebDriver, self).__init__(command_executor, desired_capabilities, browser_profile, proxy, keep_alive)
File “C:\Python34\lib\site-packages\selenium\webdriver\remote\webdriver.py”, line 91, in __init__
self.start_session(desired_capabilities, browser_profile)
File “C:\Python34\lib\site-packages\selenium\webdriver\remote\webdriver.py”, line 173, in start_session
‘desiredCapabilities’: desired_capabilities,
File “C:\Python34\lib\site-packages\selenium\webdriver\remote\webdriver.py”, line 233, in execute
self.error_handler.check_response(response)
File “C:\Python34\lib\site-packages\selenium\webdriver\remote\errorhandler.py”, line 165, in check_response
raise exception_class(value)
selenium.common.exceptions.WebDriverException: Message:
Hi Apurva,
I couldn’t figure out much looking at that error message except there is something wrong with the desiredCapabilities which you have set in line 173.
Hi Avinash,
You blog is very good and helpfull .Have you written any blog on how to write framework on Appium python for mobile application . Could you please provide any on this ?
Thanks in advance.
Hi Rashmi,
Thanks for taking time to write to us. We don’t have any blog on Mobile framework yet. We may decide to write about it in the coming days, please leave a note if you wish to be notified when we do.
Regards
Hi,
It’s really good article to go with, I wold like to know more about parallel execution. Is it possible to achieve this? Yes, Can you please give an example?
Siddhesh, sorry about the late reply. We totally missed your comment.
To run Appium tests in parallel, you would start multiple Appium servers, designate one as the main Appium port and the rest as bootstrap ports. You’ll need to associate each server with a device id too.
Use this as a reference: http://appium.readthedocs.io/en/stable/en/appium-setup/parallel_tests/
And when you are able to do this, how about writing a blog post of your own that the rest of us can refer to ;)?
Hi There,
I would like to know if appium test results can be integrated with testrail test management tool. If so could you please let me know the steps to do that.
Thanks
Mohan
Hi There,
I really liked your wlog about the testrail integration with selenium. now im interested to know whether appium can be integrated with testrail i.e. appium test results can be updated and reflected via testrail
Mohan, yes – you can integrate TestRail reporting with Appium too. It’s really no different from how you handle Selenium. You can use this post as an example: https://qxf2.com/blog/reporting-to-testrail-using-python
Hi Avinash Sir,
Could you please help me to test Web Application by using chrome browser by using a real devices ?
Kindly give me few of the example to navigate to any web application and perform some actions by using xpath ad all on real android device
Regards
Raj
Hi Raj,
The example shown in this blog is testing an app on a real device. Unfortunately i don’t have an example to share with you for working on a web app on chrome browser.
As per the link suggested “http://appium.io/slate/en/v1.3.4/?python#mobile-chrome-on-emulator-or-real-device” the things which you need to take care of is
1) Make sure Chrome (an app with the package com.android.chrome) is installed on your device
2) Add desired capabilities like these to run your test
{
‘platformName’: ‘Android’,
‘platformVersion’: ‘4.4’,
‘deviceName’: ‘YOUR DEVICE NAME,
‘browserName’: ‘Chrome’
}