This blog gives an idea to simulate your own devices by creating device templates. It would be helpful to QA or any user who has dependency with the device data for testing the application.
Before getting into technical details about simulation, the following summary is about snmp and snmpwalk.
What is SNMP?
- SNMP is a Simple Network Management Protocol, which is a simple set of operations (and the information these operations gather) that gives administrators the ability to change the state of some SNMP based device.
- The device can be a router, switch, printers, storage devices, Unix systems, Windows systems, power supplies, etc.
What is snmpwalk?
- snmpwalk command facilitates the GETNEXT procedure for us.
- SNMP GETNEXT request to query for information on a network entity, the information could be of sysDescr or sysLocation, etc.
- Therefore snmpwalk is nothing but SNMP GETNEXT requests to query a network device for information until end of MIB is reached.
We will do the following in this post:
1. Enable SNMP configuration on the device
2. Create device templates
2.i. Using snmprec.py
2.ii. From .snmpwalk file
3. Run simulated SNMP device for the generated device template
1. Enable SNMP configuration on the device
We need to enable SNMP config on the device that you would like to simulate by creating a device template for it. Follow the instructions to achieve it.
a) To enable SNMP configuration on the device we need to install snmp and snmpd.
sudo apt-get update
sudo apt-get install snmp snmpd
b) Update snmpd.conf file
Please note snmpd.conf file will be in /etc/snmp/snmpd.conf
c) Open the daemon’s configuration file with sudo privileges
sudo vim snmpd.conf echo agentAddress udp:127.0.0.1:161 >>/etc/snmp/snmpd.conf |
save the file.
d) Restart the snmpd service
sudo service snmpd restart |
e) Check if it’s working
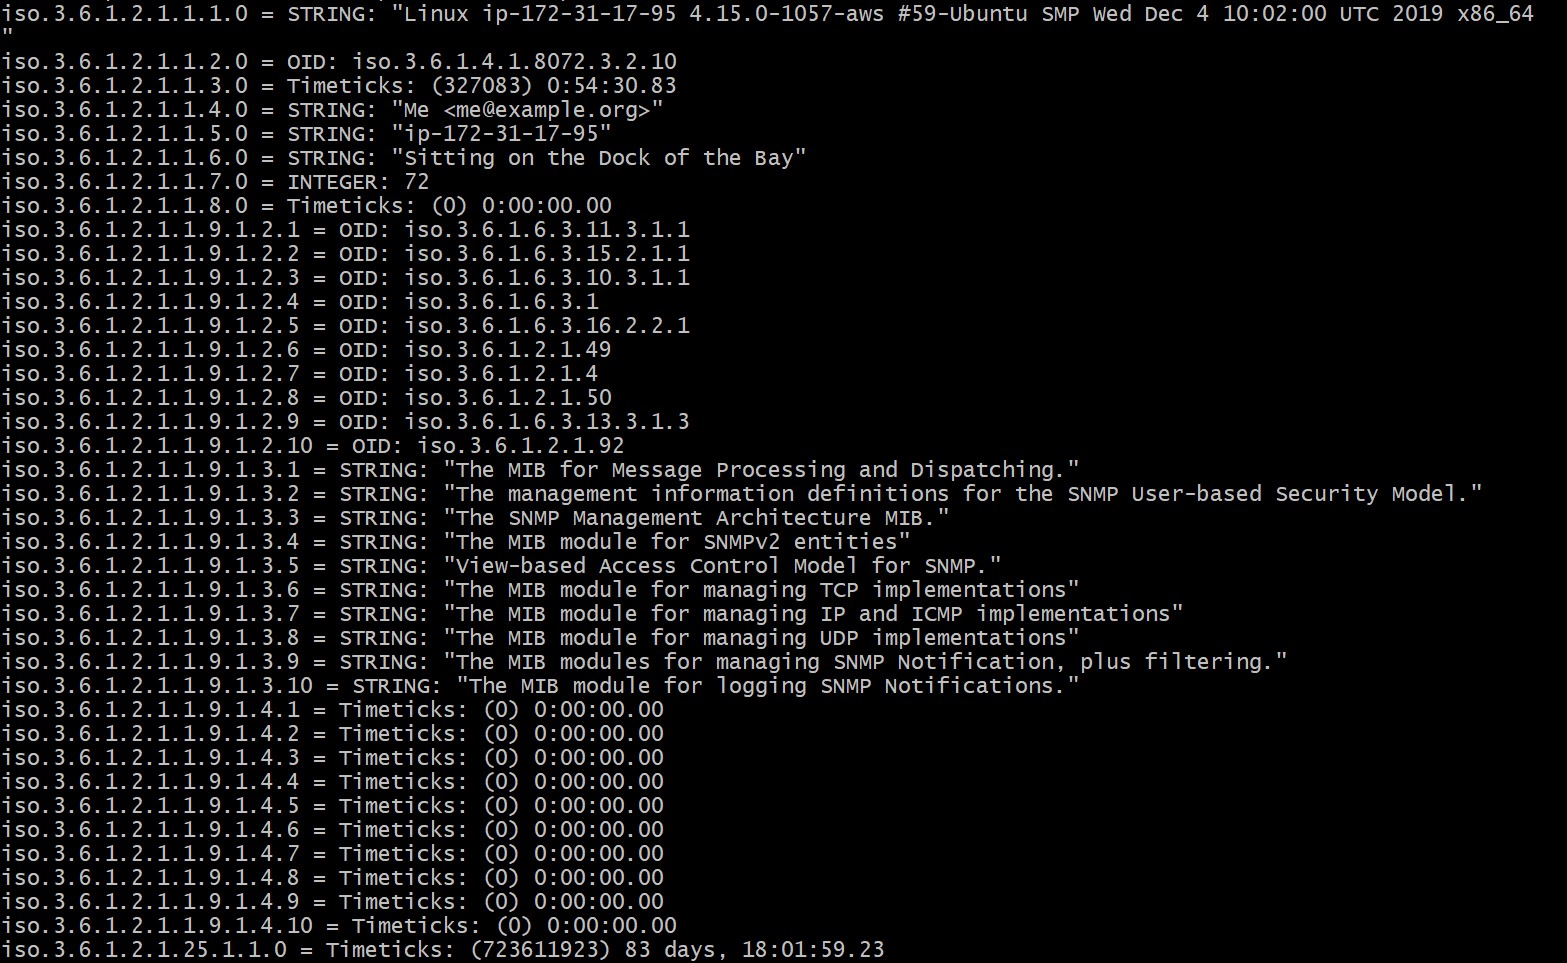
snmpwalk -v2c -c public localhost |
Note: here v2c refers to SNMP version 2, -c refers to the community string.
2. Create device templates
Next, we will create device templates which requires installing snmpsim module and then create snmprec files using either Using snmprec.py or a .snmpwalk file.
a) Install snmpsim python module using pip
pip install snmpsim |
b) There are two ways to create device templates.
i. Using snmprec.py
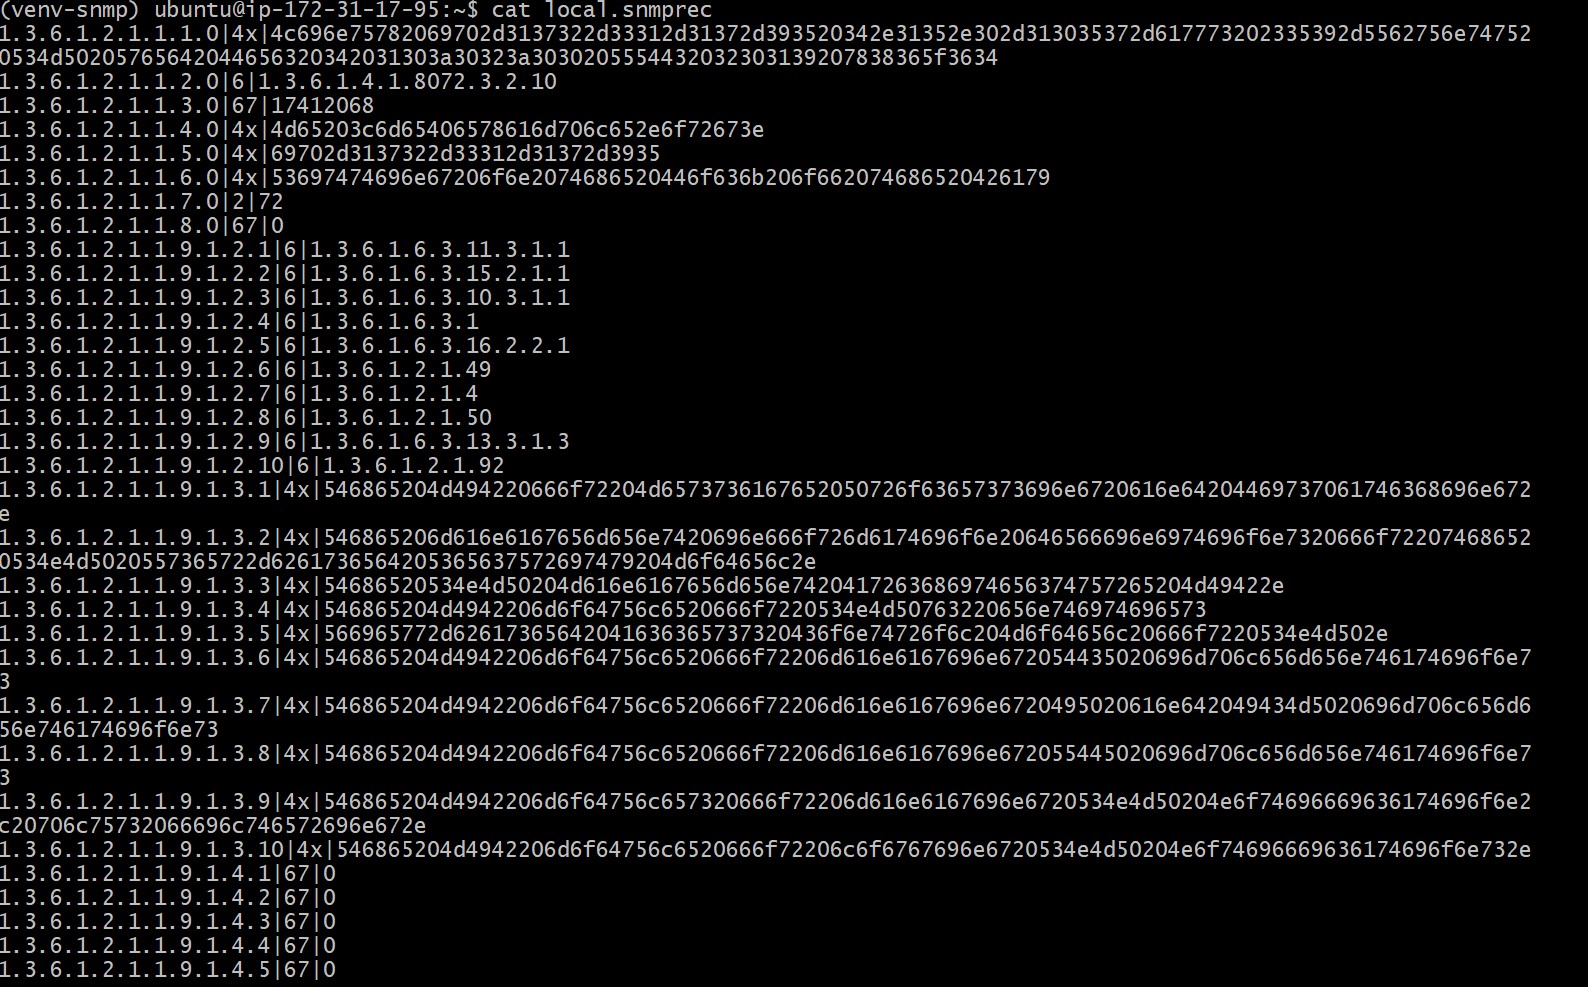
Here we will generate snmprec file by using snmprec.py tool of snmpsim python module and store the response data in a output snmprec file.
snmprec.py --agent-udpv4-endpoint=127.0.0.1 --output-file=./local.snmprec |
Note:-Execute the above command from your /home/ubuntu repository, otherwise it would give out permission denied error.

After using the tool, a new .snmprec file will be generated, depending upon the output file name given.
ii. From .snmpwalk file
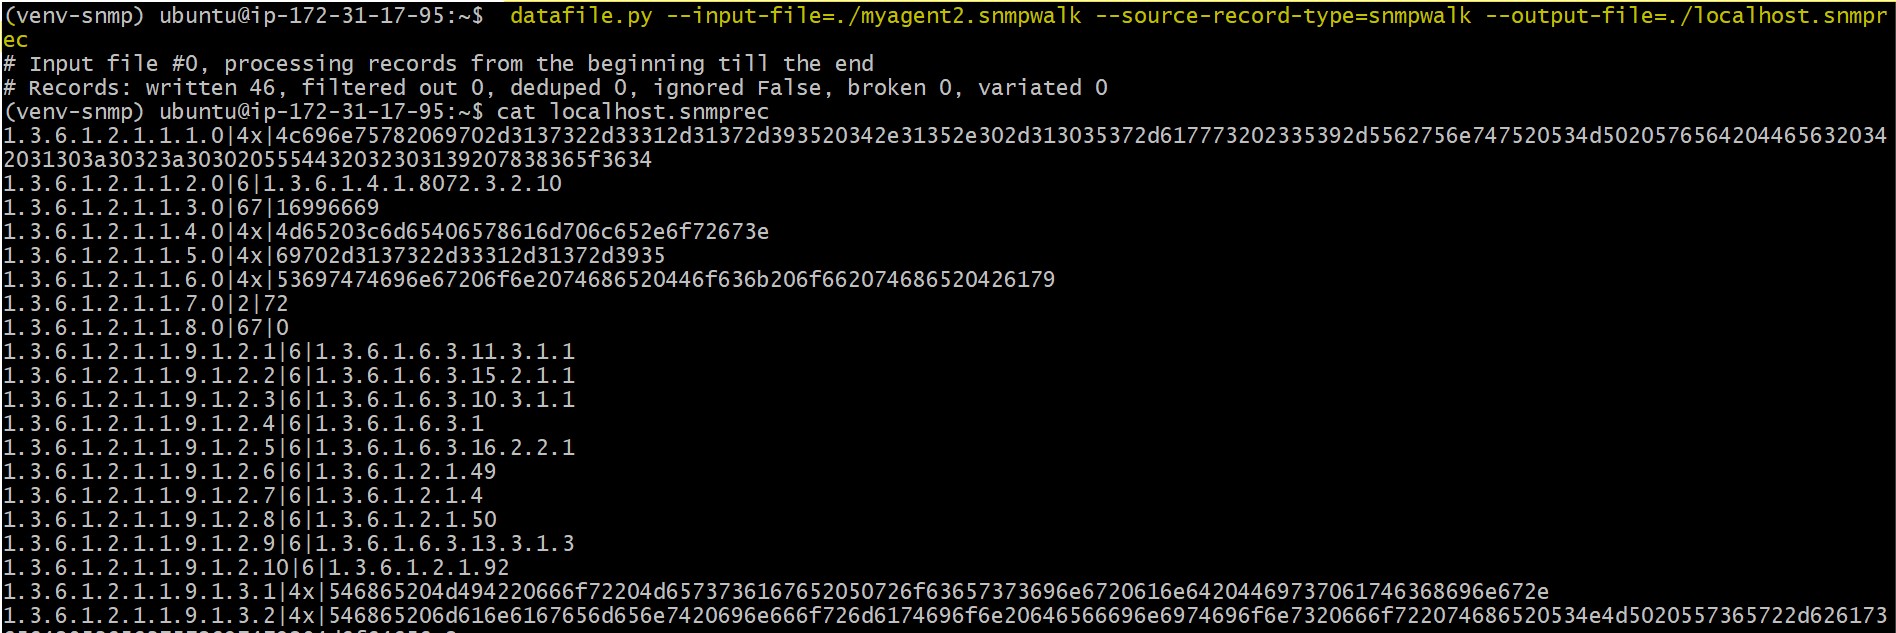
Here we will generate .snmpwalk file and then convert that into a .snmprec file by using datafile.py tool of snmpsim Python module.
To save the snmpwalk snapshot in a file use the below command
snmpwalk -v2c -c public -ObentU localhost 1.3.6 >>localhost.snmpwalk |
After this, a “localhost.snmpwalk” file will be generated which will contain the snmpwalk snapshot of the localhost. Next step is to convert the .snmpwalk file to .snmprec file by using datafile.py tool.
datafile.py --input-file=./localhost.snmpwalk --source-record-type=snmpwalk --output-file=./localhost.snmprec |
Note:-Execute the above command from your /home/ubuntu repository, otherwise it would give out a permission denied error.
3. Run simulated SNMP device for the generated device template
To check if our device template is working or not, let’s do a test run.
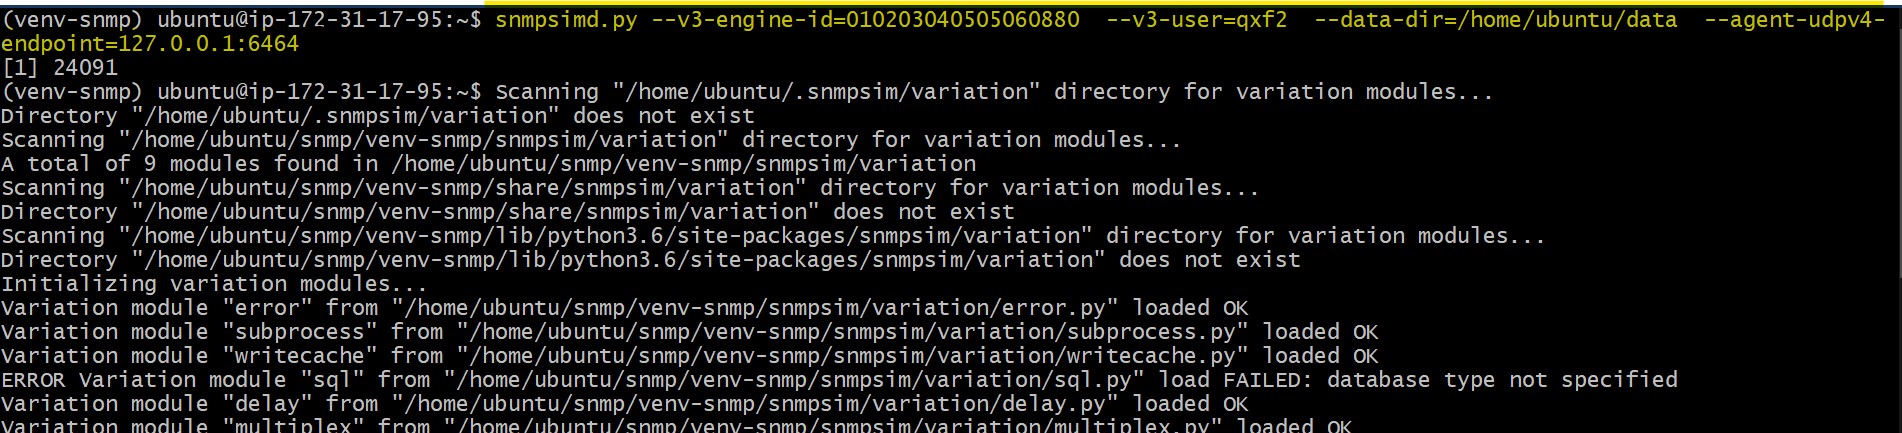
a) We will use SNMP Version 3
snmpsimd.py --v3-engine-id=010203040505060880 --v3-user=qxf2 --data-dir=/home/ubuntu/data --agent-udpv4-endpoint=127.0.0.1:6464 & |
b) Let us see if the simulated device is responding.
snmpwalk -v2c -c localhost 127.0.0.1:6464 |
Note: -c localhost is the community string & v2c is the SNMP version 2

I hope this blog helps you create hardware device templates for your testing purposes.
For reference and more details on creating device templates:-
Building simulation data
simulate-hardware-devices-and-switches-for-testing

I have done my Masters in Computer Application. I joined the Qxf2 Services as a QA Intern and started to work with them as a full-time employee. During the internship learned a lot about testing and its practices, and about Qxf2’s work culture as well. Passionate about learning new technologies. My hobbies are watching movies, playing strategy games, reading books.

