This post is aimed at Wallaroo users who are looking to develop an intuitive understanding of state partitioning. Wallaroo is a framework that makes it easy to handle streaming data and write event processing applications quickly. Wallaroo already has a really nice example of state partitioning called alphabet_partitioned but it is missing a final step illustrating how partitioning helps when there are multiple Wallaroo workers. In this post, we fill the gap. You will learn:
a) how to run Wallaroo in multi-worker mode across multiple Docker containers
b) a simple testing trick to prove that state partitions help in parallelizing tasks
Overview
Wallaroo applications are built for processing millions of messages quickly. However, to make things illustrative, we are going to:
a) control our input to have only 52 messages
b) introduce a sleep time in our computation to make the difference between the 1-worker and 2-worker experiments explicit
We begin with a 1-worker setup and baseline the performance of the application. Then, when we move to a 2-worker setup, we can check if our latency numbers are (almost) halve since 2-workers are accessing the state in parallel.
The rest of this guide is structured like this:
- Setup
- One worker experiment
- Two worker experiment
- An exercise
1. Setup
We will rely on Wallaroo’s existing alphabet_partitioned application as a starting point to help us understand state partitioning better. To follow along, make sure you are setup with Wallaroo + Python in Docker. The setup instructions are clear and easy to follow.
Once you are done with the Docker setup, start the Docker container for worker 1 by running the command:
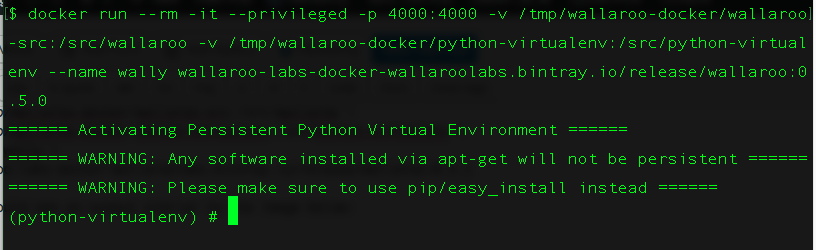
docker run --rm -it --privileged -p 4000:4000 \ -v /tmp/wallaroo-docker/wallaroo-src:/src/wallaroo \ -v /tmp/wallaroo-docker/python-virtualenv:/src/python-virtualenv \ --name wally \ wallaroo-labs-docker-wallaroolabs.bintray.io/release/wallaroo:0.5.0 |
Your output should be similar to the image below:
At the end of this step, you should have entered a Docker container called ‘wally’. Make sure to move to the alphabet_partitioned directory by cd /src/wallaroo/examples/python/alphabet_partitioned
Now, figure out the IP address of the container by running ifconfig. For newbies, the IP address will usually be the ‘inet addr’ listed for the interface eth0. Note down this IP address. For the rest of this post, we will refer to this IP address as $IP_Initializer.
2. One worker experiment
In this part of the experiment, you will have only one Docker container running Wallaroo. You will use this step to get a baseline for how long your application takes to process a given message set.
a. Create your own input file
Let us handcraft a small input file and then use it to send a controlled set of messages. This will help us figure out when the experiment ends by simply looking at the output.
The alphabet_partitioned application expects 9-byte messages:
a) a 4-byte header that has just the length of the payload
b) a 1-byte alphabet
c) a 4-byte number that represents the number of votes for the alphabet
To make things easy for us, we will design the file to have 52 messages. The first 26 messages will be an alphabet and the number 1. The second 26 messages will be an alphabet and the number 2.
Save the following code as (say) generate_binary_votes.py in your /src/wallaroo/examples/python/alphabet_partitioned directory.
""" A scratch script to produce a file similar to votes.msg for Wallaroo's alphabet_partitioned application DESIGN: 1. Open a file fake_votes.msg in binary format 2. Write 5 byte messages alphabet,vote 3. Prepend a header with the number 5 (unsigned int) in it because all messages are 5 bytes 4. Write this binary string to a file 5. To make it easy to test for correctness, we will design the file to have only 52 messages 6. The first 26 messages will be an alphabet and the number 1 7. The second 26 messages will be an alphabet and the number 2 """ import string import struct def generate_alphabet_input(filename): "Generate a binary file with alphabets and votes" alphabets = list(string.ascii_lowercase) with open(filename,'wb') as fp: for i in range(1,3): for alphabet in alphabets: msg = struct.pack('>IsI',5,alphabet,i) fp.write(msg) #----START OF SCRIPT if __name__=='__main__': generate_alphabet_input('fake_votes.msg') |
Now, run the python script to produce a new 468 byte (=52*9) binary input file called fake_votes.msg.
python generate_binary_votes.py |
At the end of this step, you should have a fake_votes.msg file in your current directory.
b. Edit the application to add sleep time
Open alphabet_partitioned.py using vi. Then, add two lines:
a) import time along with the other imports
b) time.sleep(0.5) at the end of the update() method for the class TotalVotes
By doing so, we are forcing the computation to consume ~0.5 seconds per message processed.
c. Start the receiver
Start the receiver by executing:
data_receiver --ponythreads=1 --ponynoblock --listen $IP_Initializer:7002 |
Note: $IP_Initializer is the IP address you captured in the Setup section.
d. Start the application
In a new terminal prompt, enter the container
docker exec -it wally env-setup |
Then, in the prompt of the Docker container, go to the alphabet_partitioned application’s directory
cd wallaroo/examples/python/alphabet_partitioned/ |
Start the application by executing:
machida --application-module alphabet_partitioned \ --in $IP_Initializer:7010 --out $IP_Initializer:7002 \ --metrics $IP_Initializer:5001 --control $IP_Initializer:6000 \ --data $IP_Initializer:6001 \ --external $IP_Initializer:5050 --cluster-initializer\ --ponythreads=1 --ponynoblock |
e. Start the sender
In a new terminal prompt, enter the container
docker exec -it wally env-setup |
Then, in the prompt of the Docker container, go to the alphabet_partitioned application’s directory
cd wallaroo/examples/python/alphabet_partitioned/ |
IMPORTANT: Start a stopwatch as soon as you start the sender. We are sending 52 messages and each one will take ~0.5 seconds (our sleep time) to process. So we expect that the whole experiment will take about 26 seconds to complete. Start the sender by executing:
sender --host $IP_Initializer:7010 \ --file fake_votes.msg --batch-size 26 --interval 10_000_000 \ --messages 52 --binary --msg-size 9 --repeat --ponythreads=1 \ --ponynoblock --no-write |
f. Time the app
Stop your timer as soon as you see ‘z=>3’ in the output. If things went well, this experiment took (approximately) 26 seconds.
g. Close the cluster
In the sender’s terminal prompt, execute
cluster_shutdown $IP_Initializer:5050 |
At this point, the application should shut down. You can shut down the receiver by (Ctrl+c)-ing out of it. Leave the docker container running and all the terminals open since we are going to be using them in the two worker experiment too.
3. Two worker experiment
We are going to introduce a second worker. Then, we give alphabet_partitioned application the exact same input stream as before. If state partitioning is working right, we should observe that the time it takes to process the same 52 messages is now almost halved.
a. Start the docker container of worker 2
Name the second docker container ‘roo’ (yeah, I know, imaginative!) and start it like this:
docker run --rm -it --privileged -p 4001:4000 \ -v /tmp/wallaroo-docker/wallaroo-src:/src/wallaroo \ -v /tmp/wallaroo-docker/python-virtualenv:/src/python-virtualenv \ --name roo \ wallaroo-labs-docker-wallaroolabs.bintray.io/release/wallaroo:0.5.0 |
Make sure to move to the alphabet_partitioned directory by cd /src/wallaroo/examples/python/alphabet_partitioned
To be safe, examine the code in alphabet_partitioned.py and confirm that your sleep statements are still there.
b. Start the receiver on worker 1
In the receiver prompt of the first worker repeat the command
data_receiver --ponythreads=1 --ponynoblock --listen $IP_Initializer:7002 |
c. Start the application on worker 1
Worker 1 (‘wally’) will be the cluster initializer. To start the application, run the following command on worker 1:
machida --application-module alphabet_partitioned \ --in $IP_Initializer:7010 --out $IP_Initializer:7002 \ --metrics $IP_Initializer:5001 --control $IP_Initializer:6000 \ --data $IP_Initializer:6001 --external $IP_Initializer:5050 \ --cluster-initializer --worker-count 2\ --ponythreads=1 --ponynoblock |
Notice we have added a worker-count argument telling the application that it has two workers.
d. Start the application on worker 2
Use the terminal prompt in step 3.a and run the following command on worker 2 (‘roo’):
machida --application-module alphabet_partitioned \ --in $IP_Initializer:7010 --out $IP_Initializer:7002 \ --metrics $IP_Initializer:5001 --control $IP_Initializer:6000 \ --ponythreads=1 --ponynoblock --name roo |
At the end of this step, you should see the output of the terminal claiming that the application is ready to work.
e. Start the sender on worker 1
This is very similar to step 2.e. Run the following command on worker 1.
IMPORTANT: Start a stopwatch as soon as you start the sender. We are sending 52 messages and each one will take ~0.5 seconds (our sleep time) to process. But 2 messages are going to be processed in parallel. So we expect that the whole experiment will take about 13 seconds (=52*0.5/2) to complete.
In the sender’s terminal prompt, execute:
sender --host $IP_Initializer:7010 \ --file fake_votes.msg --batch-size 26 --interval 10_000_000 \ --messages 52 --binary --msg-size 9 --repeat --ponythreads=1 \ --ponynoblock --no-write |
f. Time the app
Stop your timer as soon as you see ‘z=>3’ in the output of the receiver. If things went well, this experiment took (approximately) 13 seconds.
g. Close the cluster
In the sender’s terminal prompt, execute
cluster_shutdown $IP_Initializer:5050 |
At this point, the application should shut down. You can shut down the receiver by (Ctrl+c)-ing out of it.
4. An exercise
To further solidify your understanding through experimentation, try the same experiment by creating an input file with just a1 in binary format repeating 52 times. What do you expect? Is state-partitioning going to help reduce the total time taken to process the messages?
References
1. Wallaroo Partitioning
2. Stateful multi-steam processing in Python with Wallaroo
I want to find out what conditions produce remarkable software. A few years ago, I chose to work as the first professional tester at a startup. I successfully won credibility for testers and established a world-class team. I have lead the testing for early versions of multiple products. Today, I run Qxf2 Services. Qxf2 provides software testing services for startups. If you are interested in what Qxf2 offers or simply want to talk about testing, you can contact me at: [email protected]. I like testing, math, chess and dogs.

