This post introduces you to Liquibase – a database changeset management tool. I will cover its installation, usage and execution with MySQL.
WHAT IS LIQUIBASE?
Liquibase is an open source library to track database changes. Liquibase supports XML, JSON, and YAML files. This post uses XML files to make certain concepts clear. When Liquibase runs, there are several commands it can execute. The most important one is the UPDATE command, which applies database changes from a file. Generally, every application development is built around a concept of a linear database version which starts at version 1. After a change is added, the version is incremented to 2, then 3, etc. This works well for projects where only a single person adds the changesets and there is only one branch. The approach fails when different developers add different versions to the database concurrently. Liquibase provides a solution to this issue by using a unique identification scheme for each changeset that is designed to guarantee uniqueness across developers.
WHAT ARE CHANGESETS
Changesets are units of work for Liquibase to apply. It is basically the SQL you want to apply to the database. Each changeset should be a single, independent unit of work. You should never have one changeset applying multiple changes unless it is absolutely necessary. Changelogs are how you tell Liquibase what changesets to apply and in what order. The order in which the changesets appear in the changelog is the order in which they will be executed.

LIQUIBASE SPECIFIC TABLES
The first time you run Liquibase it creates two tables in the database: DATABASECHANGELOG and DATABASECHANGELOGLOCK. The lock table is used to prevent concurrent Liquibase runs from stepping on each other. DATABASECHANGELOG is used to keep track of what changesets have been applied to a database. The initial run will obviously be against an empty table, so all changesets will be applied. Liquibase uses a combination of id/author/filepath to create a changeset id.
Installation requirements:
Liquibase 3.x requires Java. So let’s get installed first and other pre-requisites for executing Liquibase using command line options and a Maven Plugin.
- Install JDK from this location – Install JDK
- Add the location of the bin folder of the JDK installation for the Path variable in System Variables. The following is a typical value for the path variable: “C:\Program Files\Java\jdk1.7.0\bin”
- Install the Mysql Connector for Java from JDBC Driver for MySQL (Connector/J)
- To install Liquibase, download the compressed Liquibase Core file from http://www.liquibase.org/download to a local directory.The extracted files contain a liquibase.bat and Liquibase shell script for Windows and Mac/UNIX systems.
- Add the directory containing the liquibase.bat file to your system’s PATH.
- Test the installation by opening a command prompt and entering the following command:
Liquibase –version
The result should be something like: Liquibase Version: 3.5.3
Liquibase can be executed in various ways depending on your requirement, depends on what works best for you.There are three main ways to run Liquibase:
Automatically on startup – This method works best in environments where you have less control over the deployment process or if you want a simpler deployment process. You can set Liquibase to run automatically on startup using built in Spring or Servlet Listener support or interacting with a simple Java API.
Manual deployment – You can execute Liquibase manually in command line application, or can be run on Ant or Maven. In this post, I will show how to execute using the command line and Maven Plugin. These interfaces allow you to execute Liquibase commands whenever you need, without being tied to application startup.
Executing SQL – For those who need to know exactly what is being done to their database, Liquibase supports an “updateSQL” mode from the command line, Ant or Maven interfaces.
Now that you understood how Liquibase works and about its installation, let’s get started with its execution. For better understanding I have broadly divided into four steps:
- Create a database change log
- Create a change set inside the change log file.
- Run the change set against a database via the command line
- Verify the change in the database.
Running liquibase using command line interface – For demonstration purposes I’ve created a database named ‘liquibasetraining’ on my local MySQL server, as well as a changelog file (db.changelog-1.0.xml). You can keep it in your project folder or in a separate location, but changelog files should be under version control as shown below.
Here’s the first version of our changelog file with no changesets.
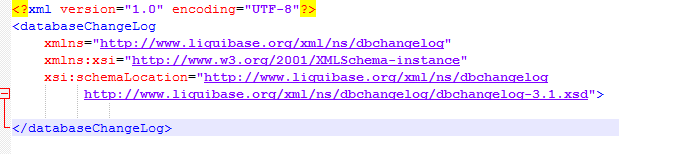
On the command-line navigate to the location where you are keeping the changelog file and run the following command:
liquibase --driver=com.mysql.jdbc.Driver --classpath=c:/mysql-connector-java-5.1.21-bin.jar --changeLogFile=db.changelog-1.0.xml --url="jdbc:mysql://localhost:3306/liquibasetraining?autoReconnect=true&useSSL=false" --username=root --password=password123 update |
In the above command, all of the parameters except classpath are required. Driver specifies the class name of the database driver that we want to use. changeLogFile is the name of our database changelog. URL specifies the JDBC database connection string which includes the server type, hostname and database name. classpath is where you keep the classes, like the database connector, used by Liquibase.
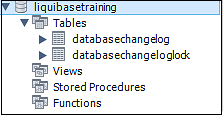
When Liquibase connects to the database using the given username and password, it should create two tables in the application database, DATABASECHANGELOG and DATABASECHANGELOGLOCK (as shown below). Each row represents a change made to the database. It contains useful details like id, author, filename, timestamp and tag information.
Instead of specifying command line parameters each time you run Liquibase, you can keep them in a Java properties file named liquibase.properties in the same directory. Then you can just run liquibase <command>.The properties file would look like this. Here we are using master.xml which has the changelog file db.changelog-1.0.xml.
changeLogFile=C:\liquibase\master.xml driver=com.mysql.jdbc.Driver url=jdbc:mysql://localhost:3306/liquibasetraining?autoReconnect=true&useSSL=false username=root password=password123 |
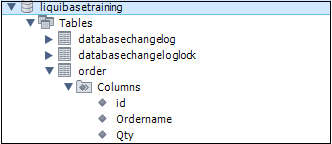
Next let’s create a user table order with id, Ordername and Qty fields by adding a changeset to db.changelog-1.0.xml. In this below example tag element means it applies a tag to the database for future rollback. Here’s the updated XML:
<?xml version="1.0" encoding="UTF-8"?> <databaseChangeLog xmlns="http://www.liquibase.org/xml/ns/dbchangelog" xmlns:xsi="http://www.w3.org/2001/XMLSchema-instance" xsi:schemaLocation="http://www.liquibase.org/xml/ns/dbchangelog http://www.liquibase.org/xml/ns/dbchangelog/dbchangelog-3.1.xsd"> <changeSet id="1" author="indira"> <createTable tableName="order"> <column name="id" type="int"> <constraints primaryKey="true" nullable="false"/> </column> <column name="Ordername" type="varchar(50)"/> <column name="Qty" type="int"> <!--<constraints nullable="false"/>--> </column> </createTable> </changeSet> <changeSet id="tag-1.0" author="indira"> <tagDatabase tag="1.0" /> </changeSet> </databaseChangeLog> |
Now run Liquibase using below command (using liquibase.properties file) and look at the result
liquibase --defaultsFile=c:\liquibase\liquibase.properties --classpath=c:\mysql-connector-java-5.1.40-bin.jar update |
If you look at the database , you’ll see the following structure:
Running Liquibase using Maven: Till now I showed you how to use command line commands with and without the liquibase.properties file. If the command line interface does not fit your needs, Liquibase can be run on Maven or Ant. Liquibase can be controlled via a Maven plug-in which can be obtained from the central Maven repository. It gives advantages like the control over dependencies, running tests, plugins, versioning your software, etc.
Prerequisites for using Maven Plugin:
- Install Maven Plugin from: Maven repository.
- Add the bin directory of the created directory apache-maven-3.3.9 to the PATH environment variable. For more details on installation use this link
- Confirm with mvn –version
For Running Liquibase using Maven:
1. Create a Project – You need a directory for your project to reside, for this we need to execute the following Maven command on your command line :
mvn archetype:generate -DgroupId=com.mycompany.app -DartifactId=my-app -archetypeArtifactId=maven-archetype-quickstart -DinteractiveMode=false |
Running the archetype plugin will create a skeleton Maven project in the directory my-app along with a POM.xml.
2. Add the Liquibase Plugin to your POM – The pom.xml file is the core of a project’s configuration in Maven. It is a single configuration file that contains the majority of information required to build a project in just the way you want. The POM structure is a bit complex, but it is not necessary to understand all of the tags but understanding important tags is enough to use it effectively. Once the POM.xml is generated, we will need to add the dependencies the database project relies on. For us, it’s the MySQL JDBC driver and off course Liquibase itself.
Configuration of the plugin is done via the Plugin section of the pom.xml, So i have added the Liquibase Maven Plugin in the section. Below is my POM.xml
<?xml version="1.0" encoding="UTF-8"?> <project xmlns="http://maven.apache.org/POM/4.0.0" xmlns:xsi="http://www.w3.org/2001/XMLSchema-instance" xsi:schemaLocation="http://maven.apache.org/POM/4.0.0 http://maven.apache.org/xsd/maven-4.0.0.xsd"> <modelVersion>4.0.0</modelVersion> <groupId>se.nrm.mediaserver</groupId> <artifactId>db</artifactId> <version>1.0-SNAPSHOT</version> <packaging>jar</packaging> <name>Liquibase-maven-test</name> <dependencies> <dependency> <groupId>org.liquibase</groupId> <artifactId>liquibase-core</artifactId> <version>3.5.3</version> </dependency> <dependency> <groupId>mysql</groupId> <artifactId>mysql-connector-java</artifactId> <version>5.1.37</version> </dependency> </dependencies> <build> <plugins> <plugin> <groupId>org.liquibase</groupId> <artifactId>liquibase-maven-plugin</artifactId> <version>3.5.3</version> <configuration> <propertyFile>C:\my-app\src\main\resources\liquibase\liquibase.properties</propertyFile> </configuration> <executions> <execution> <goals> <goal>update</goal> </goals> </execution> </executions> </plugin> </plugins> </build> </project> |
This is going to add the Liquibase Maven plugin to your project and point your build at a properties file for configuration.
Create a Liquibase Properties File : The property file should contain the following details
changeLogFile=C:/my-app/src/main/resources/liquibase/master_1.0.xml driver=com.mysql.jdbc.Driver url=jdbc:mysql://localhost:3306/mavenblogproject?autoReconnect=true&useSSL=false username=root password=password123 |
The best practice is always using a master_1.0.xml file as an entry file. In this master_1.0.xml file, there’s no logic defined, only a set of includes. In our example i have created two change log files db-changelog-1.1.xml(create tables) and db-changelog-1.2.xml(insert tables) as shown below
master_1.0.xml
<?xml version="1.0" encoding="UTF-8"?> <databaseChangeLog xmlns="http://www.liquibase.org/xml/ns/dbchangelog/1.9" xmlns:xsi="http://www.w3.org/2001/XMLSchema-instance" xsi:schemaLocation="http://www.liquibase.org/xml/ns/dbchangelog/1.9 http://www.liquibase.org/xml/ns/dbchangelog/dbchangelog-1.9.xsd"> <include file="C:\my-app\src\main\resources\liquibase\db-changelog-1.1.xml"/> <include file="C:\my-app\src\main\resources\liquibase\db-changelog-1.2.xml"/> </databaseChangeLog> |
db-changelog-1.1.xml
<?xml version="1.0" encoding="UTF-8"?> <databaseChangeLog xmlns="http://www.liquibase.org/xml/ns/dbchangelog" xmlns:xsi="http://www.w3.org/2001/XMLSchema-instance" xsi:schemaLocation="http://www.liquibase.org/xml/ns/dbchangelog http://www.liquibase.org/xml/ns/dbchangelog/dbchangelog-3.1.xsd"> <changeSet id="1" author="indira"> <createTable tableName="clinicallab"> <column name="id" type="int" autoIncrement="true"> <constraints primaryKey="true" nullable="false"/> </column> <column name="labname" type="varchar(50)"/> <column name="lablocation" type="varchar(50)"> <constraints nullable="false"/> </column> </createTable> </changeSet> <changeSet id="2" author="indira"> <createTable tableName="Department"> <column name="deptid" type="int" autoIncrement="true"> <constraints primaryKey="true" nullable="false"/> </column> <column name="deptname" type="varchar(50)"/> <column name="deptlocation" type="varchar(50)"> <constraints nullable="false"/> </column> </createTable> </changeSet> <changeSet id="tag-1.1" author="indira"> <tagDatabase tag="1.1" /> </changeSet> </databaseChangeLog> |
db-changelog-1.2.xml
<?xml version="1.0" encoding="UTF-8"?> <databaseChangeLog xmlns="http://www.liquibase.org/xml/ns/dbchangelog" xmlns:xsi="http://www.w3.org/2001/XMLSchema-instance" xsi:schemaLocation="http://www.liquibase.org/xml/ns/dbchangelog http://www.liquibase.org/xml/ns/dbchangelog/dbchangelog-3.1.xsd"> <changeSet id="2-insert" author="indira"> <insert tableName="department"> <column name="deptid" value="01"/> <column name="deptname" value="sales"/> <column name="deptlocation" value="India"/> </insert> </changeSet> <changeSet id="tag-1.2" author="indira"> <tagDatabase tag="1.2insert" /> </changeSet> </databaseChangeLog> |
Now, you can execute liquibase using Maven command. From the my-app directory execute below command
mvn liquibase:update
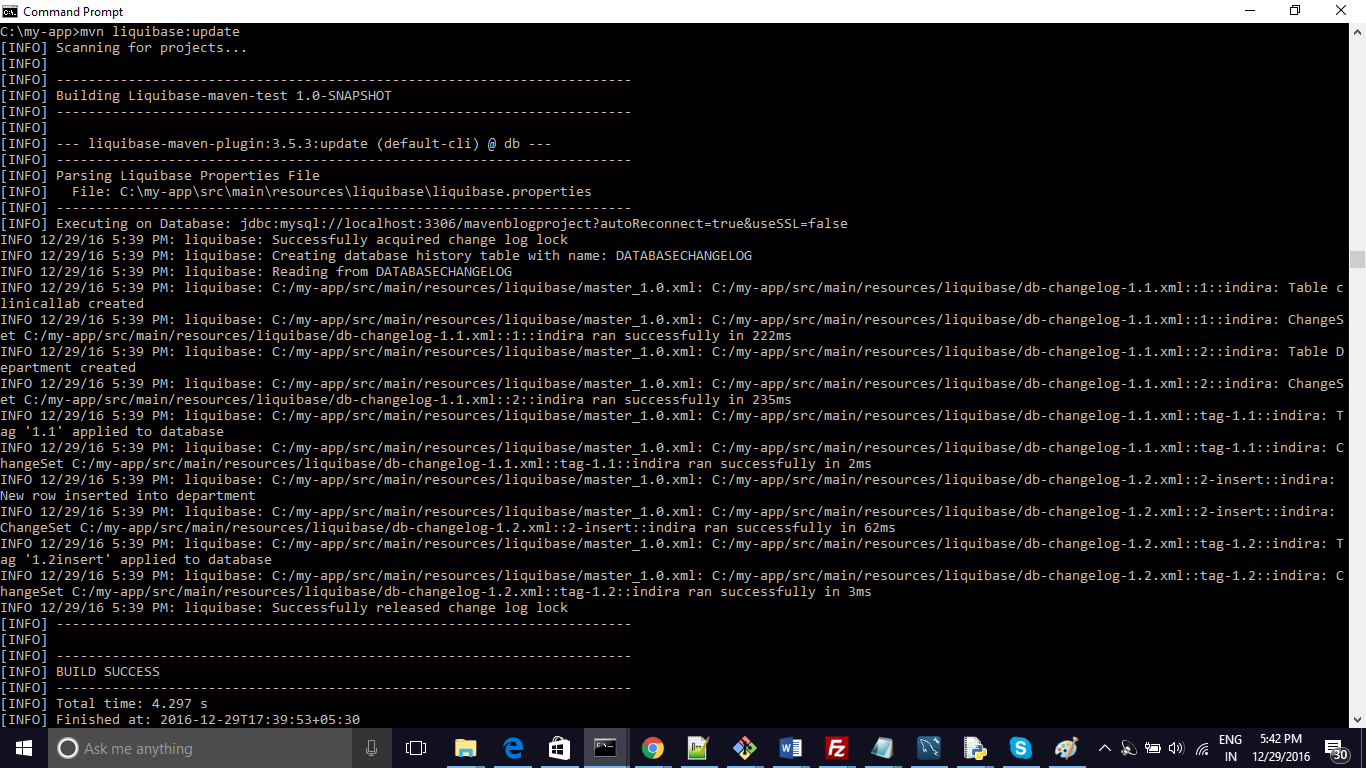
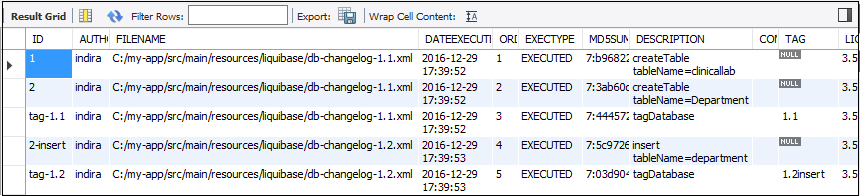
Now check the database, in the databasechangelog table, all changesets are executed. New tables are created and data is populated in the schema mavenblogproject (as shown below)
This post covered parts of Liquibase functionality. After reading this, you should be able to:
- Understand how Liquibase works
- How to apply change log to a database
- How to execute Liquibase using command line
- How to execute Liquibase using Maven Plugin
Beyond tracking and applying changes to a database, Liquibase supports many other powerful commands for rolling back changes, generating SQL instead of applying changes and generating documentation. If you want to undo an update, liquibase.bat rollback allows you to roll back changesets based on the number of changesets, to a given date, or to a given tag stored in the database.
If you are a startup finding it hard to hire technical QA engineers, learn more about Qxf2 Services.

I am an experienced engineer who has worked with top IT firms in India, gaining valuable expertise in software development and testing. My journey in QA began at Dell, where I focused on the manufacturing domain. This experience provided me with a strong foundation in quality assurance practices and processes.
I joined Qxf2 in 2016, where I continued to refine my skills, enhancing my proficiency in Python. I also expanded my skill set to include JavaScript, gaining hands-on experience and even build frameworks from scratch using TestCafe. Throughout my journey at Qxf2, I have had the opportunity to work on diverse technologies and platforms which includes working on powerful data validation framework like Great Expectations, AI tools like Whisper AI, and developed expertise in various web scraping techniques. I recently started exploring Rust. I enjoy working with variety of tools and sharing my experiences through blogging.
My interests are vegetable gardening using organic methods, listening to music and reading books.


HI,
here , should be in db-changelog-1.2.xml .
Best Regards,
Bruno
Hi Bruno,
I did not understand what you were saying. Could you please give me more details.
Thanks
Indira Nellutla
such a nicely explained blog..Really helpful for my intake for using liquibase with Oracle and Teradata!
hi
how can i automate running and update part ??
echo “INFO: Update the database”
#NEW_VERSION=4.0.0-SNAPSHOT
CHANGE_SET=`echo $NEW_VERSION|cut -f1 -d-`.changelog
export CHANGE_SET
echo “INFO: Executing liquibase for CHANGE_SET=$CHANGE_SET”
liquibase –driver=Jdbc driver –classpath=”c:\Program Files\jdbc driver location” –changeLogFile=databaseChangeLog.sql –url=”jdbc:sqlserver://” –username=sa –password=saPass update
is this correct??
Hi,
We haven’t tried automation part. Need to check. The information provided seems to be correct.
Thanks
Hi Indira! This is a really great article! Would you have any interest in writing more about Liquibase? Feel free to email me at [email protected] if you would like to help our community.